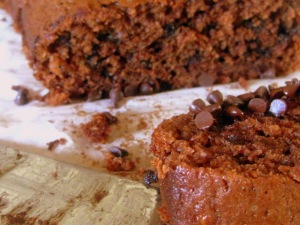
Brownie Muffins

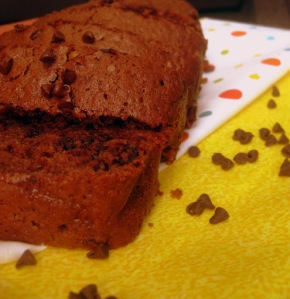
Brownie Muffins - sweetheatchefs.com

Here is your swapportunity to take advantage of my new recipe with only 3 ingredients!

I can’t believe it has been a month since my last post, I guess summer gets the best of us and before we know it…the dreaded BACK TO SCHOOL! Yay for me, boo for them 😀

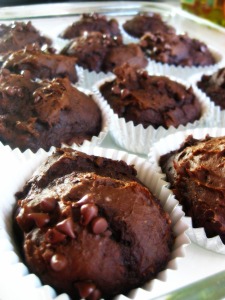
Ok, back to my recipe, you are not going to want to ignore this one! I found this from Hungry Girl and I am always looking for new ways to swap high fats for good fats and so on. I recently tried those black bean brownies you see everywhere…ya that is SO not for me (or anyone else in the house!) THESE my friends….you are going to LOVE. You know that saying you won’t miss a thing when you are subbing an ingredient for another? Well it is so true here! I promise, you will never make these the “regular” way again! The best part is the calorie count for one of these is 143 calories and 3 grams of fat! You can’t beat that for a moist, fluffy, chocolaty brownie treat! 

Count down with me…3, 2, 1…here we go!

Brownie Muffins 3 - sweetheatchefs.com

INGREDIENTS

  • 1 Box Duncan Hines Devils Food Cake Mix
  • 1 Can Libby’s Pumpkin Puree (15 oz can)
  • 1 tbsp. Nestles Chocolate Chips, divided

DIRECTIONS -Preheat oven to 400 degrees F.

  1. Mix together cake mix and pumpkin puree until well combined.
  2. Add about 2 tbsp. mix into muffin liners and top with a few mini chocolate chips.
  3. Bake for 20 minutes.
  4. Remove from oven and let cool before devouring + enjoy!
  5. Press the STAPLES easy button 😀

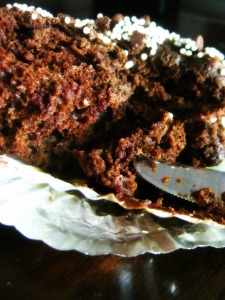
Brownie Muffins 2 - sweetheatchefs.com


If you liked this recipe, you will love these:


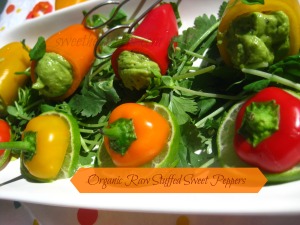
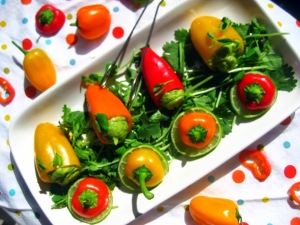
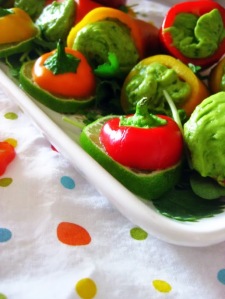
Organic Raw Stuffed Sweet Peppers

Organic Raw Stuffed Sweet Peppers - sweetheatchefs.com

WHEW DOGGIE! It is hot here in California, between June and July we get into the 100+ degree temperatures and I can’t fathom myself to make hot food for any one of my 3 daily meals. That is how this gem of a dish was born. I always have left over avocado, sweet peppers and cilantro lying around. (Remember I love Mexican food!) So I was dreaming of a cool summer dinner with little fuss and easy to make, to keep the summer fun going from the day. I am always down to stuff a pepper (that sounds so wrong, but so good at the same time!), and there are endless possibilities with these. My next version will include grated onion and crispy bacon! 

I decided to head to the Farmer’s Market this week and found some gorgeous fresh and organic vegetables, which included the pea shoots you see in this recipe as a garnish. If you haven’t tried these, please do yourself a favor and do so. I first had them from a restaurant that served them with fried calamari. It was all I could do to eat the calamari because these pea shoots were too delicious. Anyway, they are a must try if you can find them. They go great on top salad, in sandwiches, on top or raw food such as this or any other way you can think of!

Organic Raw Stuffed Sweet Peppers - sweetheatchefs.com

Organic Raw Stuffed Sweet Peppers - sweetheatchefs.com

My kids love meat (as do I), but recently I have been making meatless meals for myself and finding I still get filled up. I will never give up meat, it just isn’t in my bones, but every now and then not having to “worry” about what meat to use is a nice thing.

I had only 1 kid willing to try this meal, she said she liked them, but did she have another? NO! It’s ok though, sometimes food such as this are an acquired taste. Regardless, I was happy and cool while eating them with a nice refreshing vodka spritzer and my feet up listening to my spotify tunes! If you are ready to enjoy a quick, easy and healthy meal, read on:

Organic Raw Stuffed Sweet Peppers 6

Organic Raw Stuffed Sweet Peppers - sweetheatchefs.com

INGREDIENTS

2 avocado, mashed
2.5 Tbsp pesto
1 clove garlic, minced
juice of 1/2 a lime + zest + reserve some slices to drizzle over top
handful of organic cilantro, washed & stems removed
handful of organic pea shoots, washed
salt/pepper to taste
10-12 organic sweet peppers (depends on their size how many you will need), washed, de-stemmed and deseeded

DIRECTIONS

  1. Pulse all ingredients in food processor until smooth.
  2. Pour contents into a ziplock baggie
  3. Snip off tip and fill peppers (use the reserved lime to drizzle over tops before eating)

If you loved this recipe, check out more from Sweet Heat Chefs below;

Strawberry Swirled Lemon Bars

Strawberry Swirled Lemon Bars - sweetheatchefs.com

I was feeling in a rut with the foods I had been eating since I have been eating primarily so much healthy stuff. This particular afternoon I was getting ready to head to a Relay meeting, and I felt that thing..you know…that baking itch? I decided to make lemon bars since they are fairly easy and quick to make. However, since strawberries are in season I always have 1-2 quarts of them in my fridge on hand. I got to thinking of strawberry lemonade, then figured why not in my lemon bars? I took a quick Facebook poll (sad I know!) to determine if I should or not, the response was just as I had hoped…STRAWBERRIES! And so…this recipe was born and summer has officially begun in my house here in California!

I am loving nothing more and feeling so honored to be able to share this recipe for the first time with My Imperfect Kitchen readers! Sara is an amazing blogger, friend and person. I hope everyone loves this recipe as much as my Relay committee members and family did. I even snuck 3 of them into my belly!

Strawberry Swirled Lemon Bars - sweetheatchefs.com

INGREDIENTS

1 cup butter, softened
1 cup coconut flour, sifted
1 cup all purpose flour, sifted
4 eggs, beaten
1.5 cups white sugar
1/4 cup coconut flour
½ tsp baking soda
2 lemons, juiced and seeded (zest 1 lemon first and reserve)
4 strawberries pureed with a little coconut water to thin out
Powdered sugar for dusting top (optional)

Strawberry Swirled Lemon Bars - sweetheatchefs.com

DIRECTIONS Preheat oven to 350 degrees F

  1. In a bowl, combine butter, flours and 1/2 c of sugar. Mix well.
  2. In a greased 9×13″ pan, press crust into the bottom until even.
  3. Bake for 20 minutes or until golden brown. Remove and set aside.
  4. In another bowl whisk together the remaining sugar and flour, then whisk in the remaining ingredients, except strawberries (don’t forget the lemon zest).
  5. Pour the filling over the warm crust.
  6. In a blender or food processor puree the strawberries. Dollop 1 teaspoon at a time over the filling until it is all used up. Using a toothpick or wooden skewer, drag the strawberry mixture through the lemon mixture. Be sure not to press all the way to the crust.
  7. Put back in oven and bake for another 25 minutes or until center is firm. They do firm more when cooled. Dust with powdered sugar (optional) Cut into squares once completely cool and enjoy!

If you like this recipe, check out more from Sweet Heat Chefs:

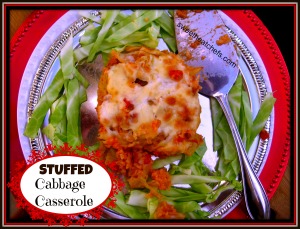
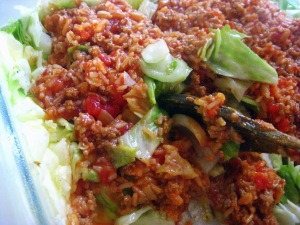
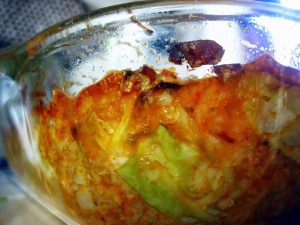
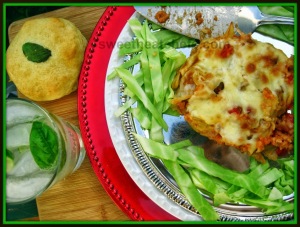
Stuffed Cabbage Casserole

Stuffed Cabbage Casserole - sweetheatchefs.com

The very moment I stumbled upon this recipe I knew it was a keeper and in fact I went out and bought the ingredients that same day. I love casseroles, and the cheesy crunchy top that reveals itself after baking so nicely in the hot oven! MMMMMMM I am a cheese & crispy bits  lover! I changed the recipe up some to suit my taste.  To see the original click here. For my edited version…READ ON!

INGREDIENTS:

  • 2 tbs olive oil, divided
  • 1 lb. lean ground turkey
  • 2 cloves garlic
  • 1/2 tsp. dried thyme
  • 2 tsp Paprika, I like hungarian but any will do even the hot stuff
  • salt and fresh ground black pepper to taste
  • 1 head green cabbage, coarsely chopped
  • 1 can (14.5 oz.) petite dice tomatoes with juice
  • 1 can (15 oz.) tomato sauce
  • 1/4 cup chicken stock
  • 2 cups cooked brown rice (I cooked in chicken stock instead of water to add more flavor)
  • 2 cups low-fat mozzarella cheese

stuffed cabbage casserole

(Love this shot)

stuffed cabbage casserole 6

DIRECTIONS – Preheat oven to 350°F.

  1. Spray a large glass casserole dish with non-stick spray. I used a 10×13″ pan and it was full!
  2. Cook rice and when it is finished set aside (use chicken stock instead of water for more flavor!)
  3. Heat a large frying pan on medium heat; add 1 tbs olive oil, and garlic. Cook until just fragrant (about 1 minute or less) Add salt, pepper, paprika thyme and finally ground turkey. Cook until browned.
  4. To the pan add the diced tomatoes with juice, tomato sauce and chicken stock.
  5. Simmer until thickened, around 15 minutes give or take.
  6. While meat mixture is thickening, cut up cabbage and make sure to cut out the core, and chop coarsely.
  7. Heat remaining olive oil in a large frying pan, add the cabbage and cook over medium heat until the cabbage is wilted (I added a lid to help the process along). You want the cabbage about half-cooked, turning it over several times so it all wilts and cooks. Season with salt and fresh-ground black pepper.
  8. Add your cooked rice to your meat mixture and stir to combine well.
  9. Take 1/2 of your wilted cabbage and place in your casserole dish, then 1/2 of your meat mixture and repeat until all is in pan. Mix together gently with large spoon.
  10. Add cheese to top and bake for 40 minutes uncovered.
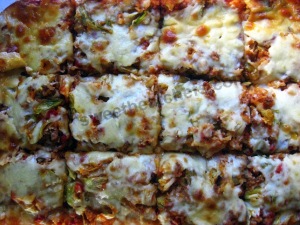
  11. Let casserole sit for a few minutes before cutting, the cheese will stay in place better this way and you get nice even squares for everyone to enjoy, serve hot.
  12. This dish is freezer friendly if you have leftovers. (which I did) I stored in a Tupperware container, air tight.

stuffed cabbage casserole - sweetheatchefs.com

stuffed cabbage casserole - sweetheatchefs.com

stuffed cabbage casserole - sweetheatchefs.com

Fresh Vodka Spritzer Recipe:

1 oz Pinnacle Cake Vodka
1 oz Pinnacle Whip Cream Vodka
2 oz Seltzer Water
Juice of 1/2 lime
Basil & lime slice for garnish

Blend first 4 ingredients together and garnish with basil and lime slice. Light and refreshing!


If you liked this recipe, check out more from Sweet Heat Chefs and tell a friend!


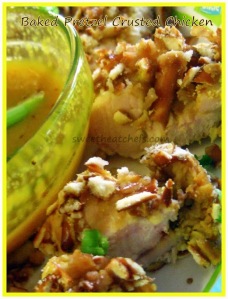
Baked Pretzel Crusted Chicken

Baked Pretzel Crusted Chicken - sweetheatchefs.com

With my new-found mission to a better healthier lifestyle, that rules out my love of frying and eating fried foods. After all , that is what got me where I was. Moderation is key, but having a good defense is the best offense! Meaning, I need a ton of good go to recipes that feel indulgent but aren’t. That way I can trick my body (and mind) into thinking I am eating things I shouldn’t be but am able to without regret and guilt. I initially founded this recipe with my daughter Jasmine as we were in final competition mode on the Rachael Ray vs. Guy Fieri cooking show. Our mission, was to cook the best chicken cutlet, which we did cuz we WON! Any who, that version was pan-fried and this one is low-calorie baked chicken tenders. Same great taste, without that pesky guilt I was talking about earlier 😀 Click here for the original version of the deliciousness!

Baked Pretzel Crusted Chicken 4

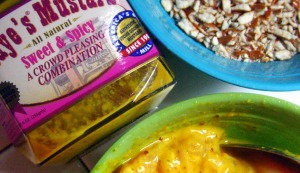
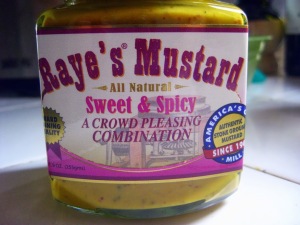
This version was obviously thought up since I am now eating healthier, but also was inspired by a secret ingredient swap. Some blogger pals got paired up and had to send the other one something that represented their state. I received this jar of golden deliciousness! Sweet & Spicy Stone Ground Mustard. As soon as I saw the jar I opened it, smelled it tasted it, smelled it tasted it and fell in ~love~

This jar came from Mishmawshandotherthings.

Baked Pretzel Crusted Chicken 3

INGREDIENTS

8 chicken tenderloin breasts
1/4 cup golden deliciousness aka Raye’s Sweet & Spicy Stone Ground Mustard
2 cups pretzels, ground semi fine (salted or non salted per your preference) I use the matchstick kind and pulse them in the food processor until I get the consistency I like.
1/4 cup finely shredded Parmesan cheese
salt/pepper to taste

DIRECTIONS –  Preheat oven to 375 degrees F.

  1. Using a sheet pan, line the bottom with foil, and top with a bakers wire cooling rack. Spray rack with non stick cooking spray and set aside.
  2. In a small bowl add mustard and chicken. Mix together so chicken is well coated. Set aside.
  3. In a food processor pulse the pretzels and Parmesan cheese until desired consistency. I like mine chunkier to be able to taste the pretzels. Add pepper to taste (and salt if using unsalted pretzels)
  4. Add the pretzel coating to a bowl and take 1 chicken strip at a time and coat with it.
  5. Place the pretzel crusted chicken tender on the baking rack and repeat until all chicken is coated. Be sure to discard leftover mustard and pretzel mixture as you can’t re-use it do to be contaminated with raw chicken.
  6. Drizzle olive oil over the tops of the chicken strips. You can use non stick spray for this too.
  7. Bake chicken for 15 – 20 minutes or until cooked through. You will want to turn chicken over 1/2 way through and drizzle with olive oil to crisp both sides.
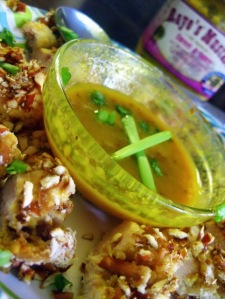
  8. Serve with Honey Mustard Dipper Sauce and sliced scallions!

Baked Pretzel Crusted Chicken - sweetheatchefs.com


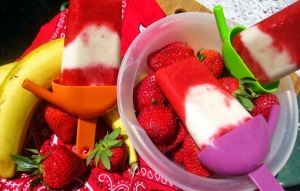
Strawberry Banana Yogurt Popsicles

Strawberry Banana Yogurt Popsicles - sweetheatchefs.com

This past weekend was a hot one! I found myself browsing recipes to try to find something that I could make to beat the heat. As usual I find many a recipe over at The Slow Roasted Italian. This was no exception, as I found just the recipe I needed. You can see their recipe here. I changed nothing about it, that is how good it is!

INGREDIENTS
  • 2 pounds ripe strawberries, washed and hulled
  • 3 tablespoons sugar, divided
  • 2 tablespoons lemon juice
  • 3 medium ripe bananas, mashed
  • 1 cup non-fat plain yogurt
  • 1 teaspoon vanilla extract

Strawberry Banana Yogurt Popsicles - sweetheatchefs.com

DIRECTIONS

Combine strawberries, 2 tablespoons sugar and lemon juice in a food processor and blend until smooth. 
Divide half of the strawberry mixture in your popsicle molds and set it aside.
In a small bowl combine bananas, yogurt, 1 tablespoon sugar and vanilla and stir to combine.
Add banana mixture on top of the strawberry mixture in the popsicles molds, filling them about 2/3 full.
Pour remaining strawberry mixture on top.  Freeze 4-24 hours until completely frozen.
Don’t have a Popsicle mold? Use an ice-cube tray, younger kids love to eat them this way too. Place a layer of plastic wrap over the top and insert toothpicks or popsicle sticks to keep in place while freezing. ENJOY your summer!
Strawberry Banana Yogurt Popsicles - sweetheatchefs.com

Dark Chocolate Coconut Banana Cake Bites

dark-chocolate-coconut-banana-cake-bites - sweetheatchefs.com
You look at this recipe and say..HEY I thought you were eating healthy? I know I know, B U T…my kids have the right to eat some nummy food and I have been depriving them of it because, well honestly, because I CAN’T have it in the house I am too tempted. I have been eating healthy for 8 weeks now and I think I can handle eating one or two of these delicious cake bites. Tastes like banana bread with a lighter cake texture and a sharp dark chocolate to satisfy that chocolate craving too. Hope you enjoy as we have…remember MODERATION!
I won a giveaway from a friend who runs A Girls Gotta Nest, she recently had acquired Coconut Flour and then found out she couldn’t use it. Luckily I won it and have been using it since the day I received it from her. It is gluten-free and makes everything taste just a little better in flavor.
Dark Chocolate Coconut Banana Cake Bites - sweetheatchefs.com
Ingredients
1 cup all purpose white flour, sifted
1 cup organic coconut flour, sifted
2 tsp. baking powder
1/2 tsp salt
1/2 cup packed dark brown sugar, sifted
1/2 cup white granulated sugar
2 tsp. wheat germ
2 eggs, room temp
1 cup plain yogurt ( you can sub in greek yogurt, you will have a stiffer dough)
1 tsp. vanilla extract
1/3 cup coconut oil
3 bananas, mashed
1 cup dark chocolate chips
toasted coconut for topping
 
DirectionsPreheat oven to 400 degrees F.
Mix all dry ingredients together with whisk and set aside.
Beat eggs, add vanilla & yogurt and mix well. Add coconut oil and bananas and mix well again.
Add dry ingredients (except dark chocolate chips & toasted coconut) to wet in 3 batches. Stir until combined but do not over mix.
Fold in dark chocolate chips
Using a tablespoon, add 2 tbs to brownie pan (or a muffin tin) and top with toasted coconut, bake for 15 minutes or until toothpick inserted comes out clean.
Dark Chocolate Coconut Banana Cake Bites - sweetheatchefs.com
Like this recipe? You might like these other ones from Sweet Heat Chefs too!

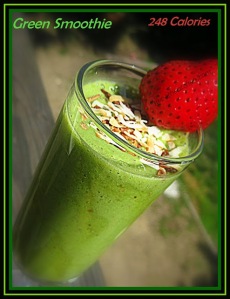
Green Smoothie

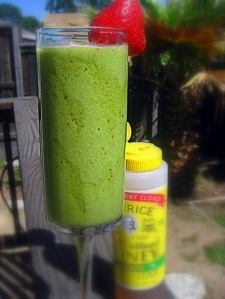
Green Smoothie - sweetheatchefs.com


I don’t know about you…but after a hard workout I come home and drink a TON of water. Sadly after birthing 4 kids, I can’t drink water while I workout or I’d never get through it without hitting the bathroom every 10 minutes (sadly I am NOT joking)!

The weather lately has been magnificent, in the 80’s warm and sunny! It has brought out the “smoothie” in me 😉 I haven’t ever tried smoothies as far as a meal replacement, I tend NOT to get full off them and feel like, well there was “x” amount of calories down the drain that didn’t stick to my ribs. So I usually just forego liquid food and end up eating food or munch a Luna bar instead.

I have though now, added this green smoothie to my post workout regimen. It is clean, refreshing and makes me feel re-hydrated after my runs. This drink is full of all kinds of yumminess fruits, veggies, and protein!

If you are a person who is ok with drinking a meal, (and no I don’t mean a bottle of wine…oh how I miss thee…) you can drink the entire content of this recipe and still be looking good in the end..REAR end 😛  

**Parent alert….even kids like it** 

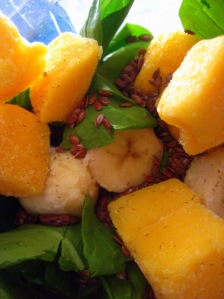
Green Smoothie 3

INGREDIENTS

1 cup fresh baby spinach, washed and packed
2 medium strawberries WITH the tops left on, washed
1.5 tbsp flax seed
1 medium sized banana ( I slice mine into 8 pieces (1 banana) and keep in freezer to make a thicker smoothie and so I don’t have to add ice)
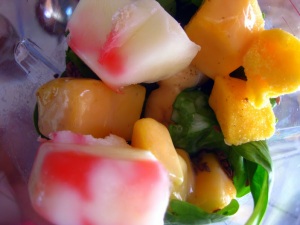
2 oz. Oikos Organic Greek Yogurt, Plain (I freeze mine in an ice cube tray. Each cube is 2 oz., see pic below)
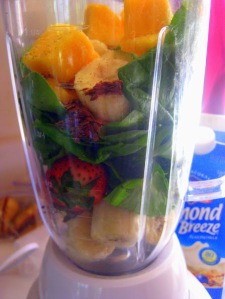
16 oz. Almond Breeze Almond Milk, Vanilla Unsweetened
1/3 cup fresh mango, sliced
2 tsp toasted unsweetened coconut
2 tbsp. honey or your favorite sweetener

Green Smoothie 5


Green Smoothie 4

DIRECTIONS

In a blender, add all ingredients except honey and coconut. 

Blend until well mixed and a gorgeous green color. 

Add honey (or whatever sweetener you are using) one of two ways:

1. I use honey and drizzled the glass before adding my smoothie, Starbucks style

Green Smoothie 6

2. After everything is blended add sweetener and blend again.

I then garnish the drink with a little toasted coconut that I keep in the cupboard in a mason jar for sassy little drinks like this 😀

Green Smoothie 7


Like this recipe? Then you might like these other low fat low cal recipes I made too!


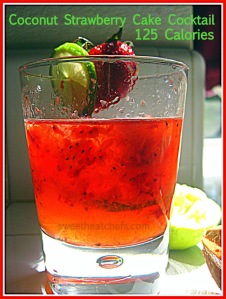
Coconut Strawberry Cake Cocktail!

Coconut Strawberry Cake Cocktail - sweetheatchefs.com

I only have 1 thing to say…

Let’s enjoy summer together shall we?


INGREDIENTS

1 oz. Smirnoff Iced Cake Vodka
1 oz. Malibu Caribbean Rum with Coconut Liqueur
2 tsp. fresh squeezed lime juice + 2 slices of lime
2 fresh strawberries; washed, trimmed and muddled + 1 whole for garnish

DIRECTIONS

  1. In a glass muddle the strawberries.
  2. Add lime juice and  1 thin slice of lime.
  3. Add 2 ice cubes.
  4. Add alcohol, stir and serve with strawberry and lime on rim of glass.

Coconut Strawberry Cake Cocktail - sweetheatchefs.com

This makes 1 glass at 125 Calories!

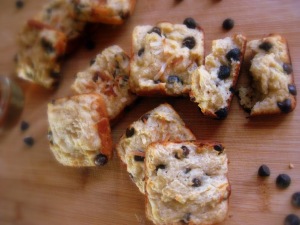
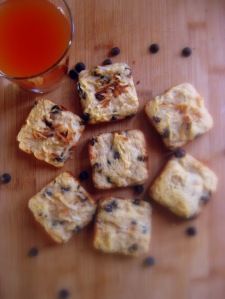
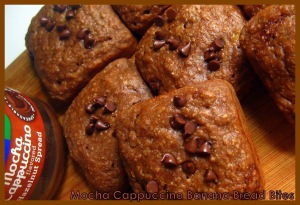
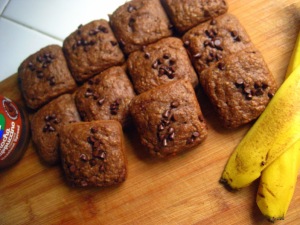
Mocha Cappuccino Banana Bread Bites

mocha cappuccino banana bread bites - sweetheatchefs.com

In keeping up with my low-fat and low-calorie diet, I still need 2 things: (1) SUGAR and (2) CHOCOLATE! There are a few things I won’t give up because, well, I LOVE FOOD and that won’t change! But the reality is you don’t have to give up foods you enjoy to lose weight. Moderation is key. When I say moderation, I mean moderation sometimes in small amounts. You are giving yourself the satisfaction to please your tummy, mind and soul without having to feel like you blew your day’s workout or the progress you’ve made in losing weight thus far. With all that in mind I came up with these banana bites with chocolate, fruit, & even sugar in combination with fiber and protein  seriously this is a WIN-WIN if I ever saw it!

mocha cappuccino banana bread bites - sweetheatchefs.com

INGREDIENTS
3 medium-sized ripe bananas, mashed
1/3 cup sweetened apple sauce (I use Tree Top pre-packaged for convenience in measuring each cup is 1/2 cup)
1.25 cups white whole wheat flour
3/4 tsp baking soda
1/4 tsp salt
2 tbsp butter, softened
1/3 cup brown sugar, packed
2 large egg whites
1/2 tsp real vanilla extract
3 tbsp Jif Mocha Cappuccino Hazelnut Spread (YUM!)
Mini Chocolate Chips (optional to sprinkle on top and is not included int he nutritional value of this recipe)

DIRECTIONS
1. Preheat oven to 325°. Spray a non-stick loaf pan, or muffin tin, or brownie pan ( I used brownie pan) with a non stick spray. IF your pans are non stick no need to do this.
2. Mash bananas and set aside. In a medium bowl, combine flour, baking soda and salt with a wire whisk. Set aside.
3. In a large bowl cream butter and sugar with an electric mixer. Add egg whites, bananas, apple sauce, Jif Mocha Cappuccino Hazelnut Spread, and vanilla. Beat with mixer until well combined.
4. Add flour mixture, then blend at low-speed until combined. Do not over mix.
5. Pour batter into prepared pan; bake for about 30 minutes, or until a toothpick inserted in the center comes out clean.

Serving Size: Makes 18 Mocha Cappuccino Banana Bread Bites at 1.75 oz each


mocha cappuccino banana bread bites - sweetheatchefs.com

~~~~~~~~~~~~~~~~~~~~~~~~~~~~

Nutritional Info

Servings Per Recipe: 18
Calories: 92.1
Total Fat: 2.1 g
Cholesterol: 1.9 mg
Sodium: 197.6 mg
Total Carbs: 18.8 g
Dietary Fiber: 1.6 g
Protein: 2.0 g

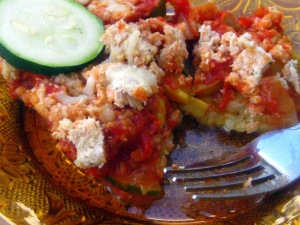
Zucchini Lasagna

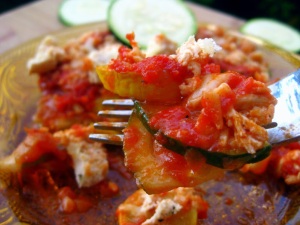
Zucchini Lasagne - sweetheatchefs.com

Well here we are several years later and the weight I feverishly fought so hard to get rid of (and did get rid of) is back on this bod like white on rice! When I found out I was preggers in 2009, I swore I would still go to the gym….that did not happen. I always saw this woman at my gym super cute, tiny, and a baby belly bump. I thought well that will be me soon, but it wasn’t and it never was.

Now my son is 2 1/2 and I have yet to return to the gym, don’t you know how easy it is to get away with an infant, then a toddler? Not to mention my 4 other kids. So they gym was not in the cards for me and I guess in my own mind I gave up. Sad really. I worked so hard to get rid of years of weight that I had gained for no real reason. Then in the blink of an eye I am close to being back to “that” person again, I vowed I would never let that happen. Before my clothes don’t fit and before I lose any more self respect, I am back in the game folks!

Zucchini Lasagne - sweetheatchefs.com

I have signed up to be in a 5K run that is so popular around here I found my MOJO. I gave myself enough time to train and get in shape before hand, so as not to feel like a dweeb when that day comes. In honor of my new goal I have made lasagna…I know lasagna is not low fat or low cals, but this one is 😀 The very thought of taking away food one loves, is the very reason people don’t stick with eating healthy. Here you can have your good stuff and eat it too! No carb, no noodles, gluten free, low fat, low cal lasagna

~YOUR WELCOME~

By the way…VEGETARIAN? Lose the chicken 😀

Zucchini Lasagne - sweetheatchefs.com

INGREDIENTS

1 cooked chicken breast, cooled and diced
1 sweet yellow onion, diced
3 medium Zucchini or Squash, sliced ( I used 2 green 1 yellow)
1 garlic clove, minced (I used the microplane)
2 cups of your favorite red pasta sauce
1/2 teaspoon Salt
1/2 teaspoon black pepper
2 tablespoons Parmesan Cheese, grated
2 tablespoons whole wheat bread crumbs
2/3 cup Mozzarella cheese, grated

DIRECTIONS

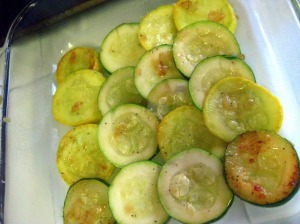
  1. Over medium heat, saute onion, garlic, and 1/2 of the salt/pepper until golden.
  2. Add zucchini and remaining salt/pepper and saute until fork tender.
  3. Pull off stove and set aside.
  4. In a 9″ x 9″ glass Pyrex dish begin layering zucchini in rows until the bottom is covered.
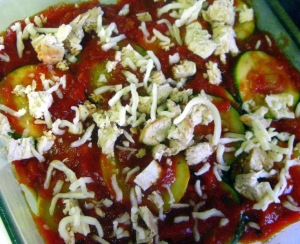
  5. Next add a layer of sauce, then diced chicken, then mozzarella cheese and repeat until all zucchini is used. Leave enough mozzarella cheese for the top.
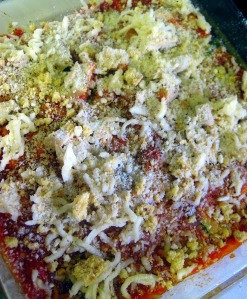
  6. Top with remaining mozzarella, parmesan, and bread crumbs.
  7. Bake at 350 for 30 minutes until bubbly and golden brown. Serves 6

Zucchini Lasagne - sweetheatchefs.com

Zucchini Lasagne - sweetheatchefs.com

Zucchini Lasagne - sweetheatchefs.com

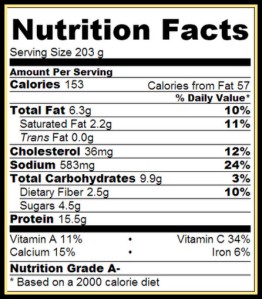
I decided to include the nutritional information for the dish. It will change slightly based on what type of red sauce you choose. I am not a dietitian or a Doctor, but this is one yummy dish! I used Calorie Count to find the nutritional information for the dish.

Zucchini Lasagne Nutritional Info

Spicy Avocado Deviled Eggs

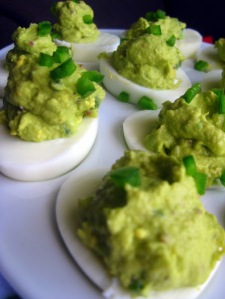
Spicy St. Patty's Day Deviled Eggs - sweetheatchefs.com

I found this idea from a friend, you can visit her page here. She had shared it on her Facebook page and I snagged it as soon as I saw it! If you don’t know I have decided to try to lose weight, and prepare for a 5K in 5 months, so I have been looking for alternative food options and low caloric fat content. Deviled eggs is so not on that list! Eggs in general are good for us, but when you add in mayonnaise (which I LOVE) it throws it back into oblivion.

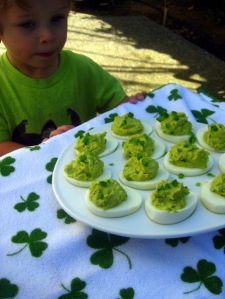
Anyway, my kids all like deviled eggs too and they usually like the same old same old. I have tried making variations to no avail, they just want the “plain” way. So when I made this I didn’t even think of them, I was just thinking this would be lunch and snacks for the next 2 days. As soon as the kiddos came home they instantly saw them and wanted to try, I mean they are green right, cool color, to the yellow version. AND it is creeping up on St. Patrick’s Day, they think I am trying to be festive! I love it 😀 They all grab one and chow down…EVEN my, “I hate mayo kid”! “Hey Mikey, they liked it!” (remember that commercial?)

Spicy St. Patty's Day Deviled Eggs - sweetheatchefs.com

Needles to say my plan of snack and lunch for 2 days went down the drain at that point, but that is ok, a good fat & mayo free snack has now been added to our repertoire AND it is holiday friendly!

WIN WIN =  HAPPY MOMMA = HAPPY BLOGGING = HAPPY  YOU!

Click here for the original version. Read on for mine 😀

INGREDIENTS

  • 6 hard-boiled eggs, peeled and cut lengthwise
  • 1 fully ripened avocado; peeled, pitted and diced
  • 1 tablespoon of my Home Made Plain Greek Yogurt
  • 1 teaspoon stone ground brown mustard
  • 1.5 teaspoon Dijon mustard (recommend French’s Dijon with Chardonnay)
  • 1 teaspoon fresh lemon juice
  • 1/2 teaspoon salt
  • 1/2 teaspoon ground black pepper
  • 1/2 of a jalapeno; seeded, ribs removed, diced fine
  • 1 tablespoon finely chopped onion ( I use the microplane)
  • 1 small clove garlic, minced (I use the microplane)
  • Garnish: Finely diced jalapeno & dash of hot sauce on top when ready to eat (recommend Tapatio Salsa Picante)

DIRECTIONS

1. In a medium sized bowl mash avocado and egg yolks until a creamy consistency.

2. Add yogurt, mustard, lemon juice, salt and pepper, jalapeno, onion, & garlic; mix thoroughly.

3. Spoon or pipe back into egg white shells, dividing equally. Garnish with jalapeno and hot sauce before serving. Should last 2 days, crossing fingers!

Spicy St. Patty's Day Deviled Eggs - sweetheatchefs.com

If you like this recipe you might also like:

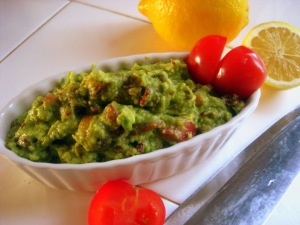
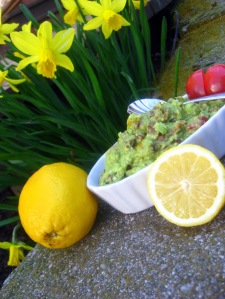
Bacon Guacamole…yes you heard right…BACON!

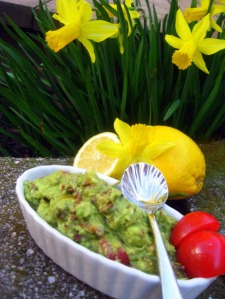
bacon guac - sweetheatchefs.com

There is one thing my household loves more than avocado and that is bacon. That is why when I saw this recipe I instantly knew I HAD to make it, and soon.

This recipe is from my sweetest and most awesome friend Bernadette. Her fabulous blog is Rantz From My Crazy Kitchen. You can find many amazing recipes there including a page with 58 bacon recipes from breakfast all the way through to dessert, which means you can have a PORK PARTY all day! You can view Bernadette’s recipe for her outta this world guacamole here. Below is my version with just a slight modification.

bacon guac - sweetheatchefs.com

INGREDIENTS

  • 2 avocados
  • 4 slices thick center cut bacon
  • 1/4 cup purple onion, diced fine
  • 3/4 tablespoon jalapeno, diced fine 
  • 4 heirloom cherry tomatoes diced
  • 1/2 lime juiced
  • 1/2 lemon juiced
  • 2 cloves garlic, minced (small cloves or 1 big one)
  • handful of freshly chopped cilantro
  • dash of salt and pepper

DIRECTIONS

  1. Cut up bacon in bite sized pieces and fry the bacon with the onions until crisp. (this is money right here, in the voice of Guy Fierre!) If you prefer less done/burnt onions, remove as you are cooking. I enjoy crispy bacon and crispy onion and they cooked together the entire process in a pan of marriage bliss! Drain everything on a paper towels when done.
  2. In a small bowl mash the avocado
  3. Next add; tomatoes, lemon juice, lime juice, garlic, cilantro and salt and pepper. Stir until well combined.
  4. Stir in the bacon and onion, cover tightly with plastic wrap pressed right on top of the guacamole and refrigerate for at least 1/2 hour. 

This recipe fed 3 of us, 2 boys and myself. We ate every last drop.

bacon guac - sweetheatchefs.com

I TEENY TINY PIECE OF ADVICE ON THIS RECIPE…..The yield here is NOT enough, plan to quadruple it for your first try. That way you won’t be licking the container clean just to get a little bit more.

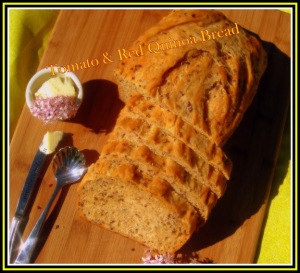
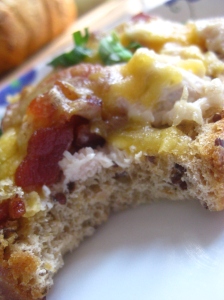
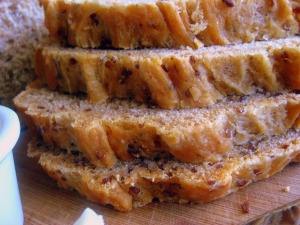
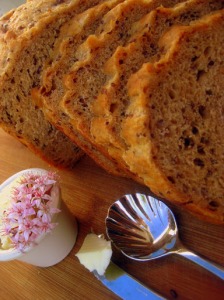
Tomato & Red Quinoa Bread

tomato and red quinoa bread - sweetheatchefs.com

The only commentary I am going to try to make up for this recipe is, be sure to make both loafs, as this first one will not last long. Oh and don’t let the title fool you…There were 5 of us for dinner last night and we devoured 1 loaf in its entirety. (finger licking good is not just for chicken!)

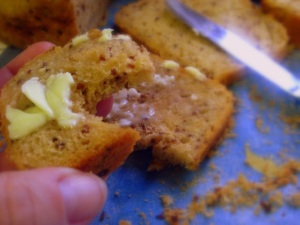
tomato and red quinoa bread - sweetheatchefs.com

Apparently we are carb loving fiends!! All is good, I am happy being one. This bread is good next morning for toast and then for lunch as an open faced sammy! It is not just about the bread and butter here.

sweetheatchefs.com

INGREDIENTS #1

DIRECTIONS #1

Rinse quinoa in a strainer and add to pot with V8 juice. Bring to a boil and then reduce heat to a simmer and cook for 15 minutes or until all liquid is absorbed. Set aside with lid off to cool. You need it cool for the next step.

tomato and red quinoa bread - sweetheatchefs.com

INGREDIENTS #2

  • 2 1/2 teaspoons active dry yeast
  • 1 cup lukewarm water
  • 2 cups warm V8 juice
  • 1 tablespoon salt
  • 2 tbs dried basil
  • 2 cups bread flour
  • 1 cup whole-wheat flour

DIRECTIONS #2

To the bread machine, add the yeast to the warm water and stir, let sit for 5 minutes.  Add the rest of the ingredients plus the cooled quinoa and mix thoroughly.  Let run through the dough cycle and sit for 1 hour.

INGREDIENTS #3

  • 1/4 cup olive oil
  • 3 to 4 cups white bread flour

DIRECTIONS #3

Add the dough that has been sitting for one hour into an oiled bowl and mix the above ingredients into the dough, start with 2 cups of flour first. Place dough on a clean surface, along with 1 more cup of flour and knead that into the bread. Continue to knead bread for about 5-10 minutes or until  smooth consistency.  Dough is relatively sticky, but if it is too sticky, add more flour 1/4 cup at a time.  Once ready, place back into the oiled bowl, cover and let sit for another 1.5 hours.

Preheat oven to 375 degrees F. After the 1.5 hours punch dough down and re-cover while oven is heating up.

When oven is ready, take 2 loaf pans, buttered and divide dough in half and place in pans

tomato and red quinoa bread - sweetheatchefs.com

INGREDIENTS #4

  • 3 tbs butter, melted
  • 2 tsp flax seeds

DIRECTIONS #4

Slice down the middle of the dough and drizzle half of the butter over the top of loaf. Sprinkle with half flax seeds, continue with second loaf.

Bake for about 50 minutes. Let cool about 10 minutes (if you can stand it) and then repeat after me:

SLICE BUTTER SCARF, REPEAT! 


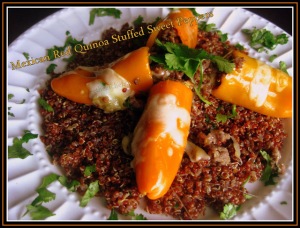
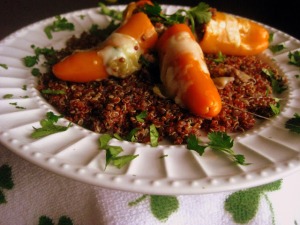
Mexican Red Quinoa Stuffed Sweet Peppers

Mexican Red Quinoa Stuffed Sweet Peppers5 - sweetheatchefs.com

Using leftovers in my house is ALWAYS a chore. 1:  My kids and hubby hate leftovers, 2:  it is hard to make only myself leftovers while they eat crap (aka boxed mac-n-cheese or cup of soups which my kids would live on if I’d let them) So today I decided I wouldn’t tell them I was using leftovers to create this dish, and see how that went over.

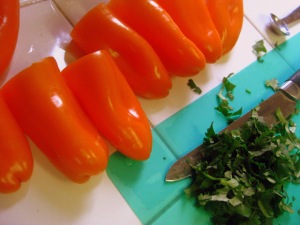
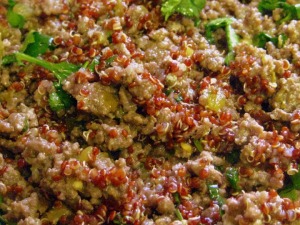
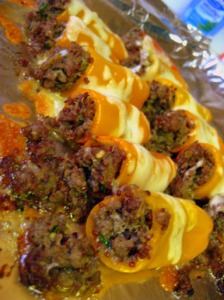
Mexican Red Quinoa Stuffed Sweet Peppers2 - sweetheatchefs.com

I had leftover ground turkey and some sweet peppers. I am rummaging through my fridge to see what I can make to go along with it. I always turn everything into a Mexican type meal so I was determined NOT to make this dish that way. Now I see your brow furrowing and your mind racing saying…wait the name of the dish begins with Mexican.

Mexican Red Quinoa Stuffed Sweet Peppers - sweetheatchefs.com

And…You are right, because there is simply no way for me to NOT make a Mexican based dish, I simply love it way too much. My favorite quote of the night was from my daughter, who upon returning home from the mall, ate dinner and stated: “It tastes like a party in my mouth” I do not know 1 chef who would not like that type of review! #missionaccomplished!

Now, this dish is packed full of flavor and guess what? FULL of nutrients too! How awesome is that?! Common, get your shopping list ready and get this dish done!

INGREDIENTS

  • 18 sweet peppers, cleaned, top off and de-seeded
  • 1/2 lb. ground turkey
  • 1 can diced green chilis
  • 1 clove garlic, minced (I use microplane)
  • juice of 1 lime
  • 2 tsp onion powder
  • salt/pepper, to taste
  • olive oil, as needed
  • 2 tbs fresh cilantro chopped & washed
  • 1/2 cup Red Quinoa
  • 1 cup beef broth
  • 1/2 cup jack cheese, shredded

Mexican Red Quinoa Stuffed Sweet Peppers4 - sweetheatchefs.com

DIRECTIONS

  1. Line a sheet pan with foil and drizzle olive oil over it, about 2 tsp.
  2. In a skillet brown ground turkey
  3. Add garlic, onion powder, and salt/pepper.
  4. Once almost browned, add lime juice and green chilis.
  5. Continue to cook over medium high until thoroughly cooked.
  6. While cooking stuffing mixture, rinse  1/2 cup red quinoa in a strainer
  7. Add to pot with beef broth.
  8. Bring to boil and reduce heat cooking on low simmer for about 15 minutes or until all liquid is absorbed.
  9. Once stuffing mixture is finished remove from heat and let cool.
  10. Once quinoa is finished add 1/4 cup to stuffing mix, combine well and add 1 tbs chopped cilantro.
  11. Using a teaspoon measure stuff the peppers until filled to the top.
  12. Roll in olive oil on sheet pan and continue until all peppers are stuffed.
  13. Top all peppers with shredded jack cheese evenly. (I push them all together to cheese is not wasted on pan, but ooey gooey goodness all over peppers) 
  14. Bake for 10 minutes on 375 degrees, then broil for 5-7 minutes.
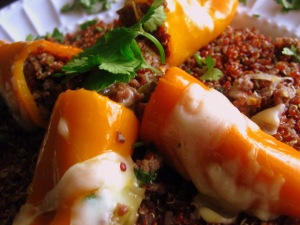
  15. Let cool for about 5 minutes. Serve peppers on top of remaining red quinoa and remaining cilantro, and prepare to lick your plate clean!

Mexican Red Quinoa Stuffed Sweet Peppers6 - sweetheatchefs.com

Mexican Red Quinoa Stuffed Sweet Peppers7 - sweetheatchefs.com

Additional Hint:

IF your kids are anti-peppers (I have 2) whether they are sweet or otherwise, wrap the filling into a corn or flour tortilla and heat up and roll like a burrito. They will be just as pleased with the dish as you. You still are getting that quinoa in them and a healthy meal!


Yummy Pics

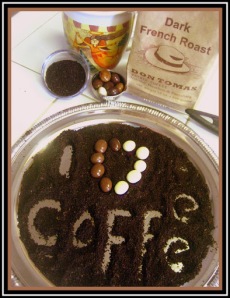
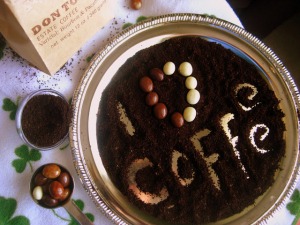
My New Coffee Obsession – Don Tomas Coffee

DT Coffee - sweetheatchefs

There are 2 things that are constant in my life (food wise) Wine and Coffee, and not necessarily in that order and if possible I’d drink them together! I am a huge fan of a particular coffee spot that I visit DAILY, yes DAILY. I have tried so many different coffees in a way it is like wine tasting, you try them to see what you like the best. In fact, why isn’t their coffee tasting…hmmm, maybe I stumbled upon something new…

Anyway, in my experience people are fans of either a light or mild coffee, or a medium coffee, or even a bold coffee or espresso. I am a HUGE fan of bold and espresso varieties. Again, each brand and company makes them differently so a bold at one company is not necessarily my idea of bold from another. With that being said, I continue to try different brands and flavors to make sure I am maximizing my coffee potential! 😛 After all I am raising 5 kids, going to school, blogging, and co-chairing this years Relay For Life event, so I’m a tad tired!

You can imagine my delight when I was offered a chance to taste coffee and do a review of it. It went something like this when I got the news:

S Q U E E E E E E L!!!! S H R I E K!!! W O O H O O!!!

DT Coffee 4 - sweetheatchefs.com

Now the details. My opportunity came from a company called Don Tomas Coffee, you can visit them here. I was not familiar with them at the time, but as I asked around people I knew had. I guess my head had been stuck at the previous coffee store too long. I read up on the history and the story behind this company, all I can say is O M G! I feel horrible for even drinking coffee from anywhere else besides Don Tomas! These farmers are 4’th generation coffee cultivators. They live on the farm they cultivate from, they give back to their community, they have built schools and medical clinics on the farm for their own employees AND their community! THAT IS NOT ALL…For every purchase that is made 30% goes to a fundraising organization of YOUR choice. (they have a list, but you can add your organization!) How dedicated and amazing is that??

Now, you are going to say “ok, well they do all that, but how is their coffee”. Have I mentioned that I love coffee?? Yes? Ok, well I consider myself a coffee snob, meaning I only drink the best of the best, because frankly life is too short to drink crappy coffee plain and simple. I LOVE DON TOMAS COFFEE! 2 years ago I got a Keurig machine for my birthday. I stopped using it because the pre-packaged coffees just did not suit me. They were too weak or un-flavorful, whatever the case, I was not happy with the coffee I had to use. I now know, you can make your own coffee blend with a special filter thing-a-ma-bob that I have. I just put my Don Tomas Coffee in it, and viola, it was done….smelled divine  and was out of this world CRAZY GOOD! I am serious, I don’t say I like or even LOVE something if I don’t, it isn’t in me (I am sure you know this by now).

DT Coffee 2 - sweetheatchefs.com

DT Coffee 3 - sweetheatchefs.com

I have found my new coffee company, Don Tomas Coffee. I can’t go wrong with a $10 bag of excellent tasting coffee, of which $3.00 is donated to an organization of MY choice. Knowing that the company is just as awesome as can be. I hope you will give this coffee a try, I think you will switching just like me….yep that is right, no more of “that” other coffee place for me folks, I have been converted!

Have you tried Don Tomas Coffee? Tell me about it, and leave a comment below 😀 I just can’t say enough awesome things about Don Tomas Coffee.

I said it once and I’ll say it a million times over…

DT Coffee 5 - sweetheatchefs.com

Strawberry Cake Cookies

strawberry cake cookies6 - sweetheatchefs

I have never heard of cake cookies. I came across a recipe the other day that talked about it, and I had to try it. I usually am about making my food from scratch, but something about this jumped out at me. Moist soft cookies with few ingredients, I just had to do it.

strawberry cake cookies4 - sweetheatchefs

With Valentine’s Day around the corner, I thought I’d surprise the kids with a little pre V- Day treat. They loved it, I loved it and I am almost teetering on the fence as to make more! Scary right? Ok, I won’t apologize for making my life easier by using cake mix to create cookies, but I will apologize for not finding these sooner!

strawberry cake cookies3 - sweetheatchefs

These cookies contain a whopping 4 ingredients 5 if you use the optional ingredient. I heart cake cookies and I’m not afraid to admit it. I am sure I will get some flack for even posting this on my blog, but it’s ok. We all need a quick and easy go to recipe, this is a perfect one! Enjoy 😀

INGREDIENTS

  • 1 stick butter, room temperature
  • 1 box strawberry cake mix
  • 2 large eggs, room temperature
  • 1.5 cups white chocolate chips 
  • heart shaped candy (optional)

DIRECTIONS

  1. Preheat oven to 350 degrees F and line a cookie sheet with foil or parchment paper.
  2. In a medium sized bowl combine, butter, cake mix and eggs. Stir until well mixed.
  3. Add white chocolate chips and stir until incorporated.
  4. Chill dough for about 2-3 hours or until firm.
  5. Take 1 tablespoon of dough and form a ball, roll in white chocolate chips or heart candies and place on cookie sheet. In between batches I keep dough in refrigerator to keep cold.
  6. Bake for 10-12 minutes.

strawberry cake cookies5 - sweetheatchefs

strawberry cake cookies2 - sweetheatchefs

strawberry cake cookies - sweetheatchefs

Manic Monday Feature photo ManicMondayfeatured_zpsc161d945.jpg

Ultimate S’mores Bread

s'mores8 - sweetheatchefs.com

Who doesn’t love a good S’more? It used to be it was just a camping affair, but not anymore. Not with all the talented cooks coming up with amazing recipes to create fond memories of campfires past. In fact this S’mores Bread was created by a good friend of mine Becca over at It’s Yummilicious.

s'mores6 - sweetheatchefs.com

Of course if given the chance to make a sweet treat that involves chocolate I have to over do it. So this is why I call it the Ultimate S’mores Bread. Now, there will be no more waiting for summer, no more waiting for camp fires…my S’mores addiction can be curbed at anytime with a few simple ingredients that I tend to keep on hand anyway. 

INGREDIENTS

  • 2 packages of Crescent Rolls
  • 1 cup of mini chocolate chips (reserve a few to sprinkle on top)
  • 1/2 cup white chocolate chips
  • 2 cups of mini marshmallows
  • 1 sleeve of graham crackers, crushed
  • 2 tbsp butter, melted
  • 2 tsp cinnamon

DIRECTIONS

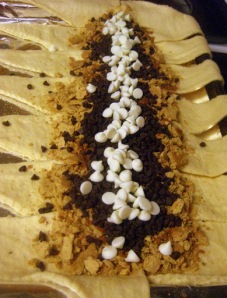
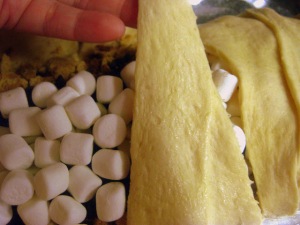
  • Using a foil or parchment paper lined cookie sheet, arrange the crescent rolls with the large side toward the middle and the points hanging over the edge.
  • Crush your graham crackers and sprinkle them down the center of the crescent rolls like the picture below.

s'mores - sweetheatchefs.com

  • Next add your chocolate chips & white chocolate chips

s'mores2 - sweetheatchefs.com

  • Next add your mini marshmallows and begin to fold the points of the crescents up and over the top creating a braid.

s'mores3 - sweetheatchefs.com

s'mores4 - sweetheatchefs.com

  • Melt the butter and brush over the top of the braid. (or you can cut up the butter and place on top)
  • Next sprinkle the cinnamon, marshmallows and a few mini chocolate chips over the top.

s'mores5 - sweetheatchefs.com

  • Cook at 400 degrees for 15-20 minutes or until the braid is golden brown and the marshmallows are too. Let cool for a few minutes before cutting into. Sink your teeth into the blissfully decadent sweet bread that since it is made with croissants, I justify eating for breakfast too! 

s'mores7 - sweetheatchefs.com

You might also like:

This recipe is being shared at:

 
<a Manic Monday Button

3-Way Whole Wheat Buns, Never buy from the store again!

Whole Wheat Buns5 - sweetheatchefs.com

I’m serious when I say you will not want to buy store made buns or rolls again. This process is not only easy, but you can make a double batch and freeze what you don’t use. They will keep for 2 months time in an airtight container. You can also use unbleached all-purpose flour in place of the whole wheat, this gives the bread a fluffier texture. 

I have always been intimidated with making bread or any type of dough that deals with yeast. I found this to be a super easy dough especially using the bread machine. Even when you go to roll out the dough, it is soft and pliable with not stickiness. 

INGREDIENTS

1 cup of milk
1/2 cup warm water
1/2 cup melted butter
4.5 cups whole wheat flour (I used whole wheat white)
1 packet, or .25 ounce instant yeast
2 Tbs granulated sugar
1.5 tsp salt
1 egg, beaten

Whole Wheat Buns2 - sweetheatchefs.com

DIRECTIONS

  1. Warm milk slightly in the microwave (approx 40 seconds) and place in bread machine
  2. Melt butter and place in bread machine, add water, sugar, salt, and egg.
  3. Add flour and stir a little to combine
  4. Turn bread machine on dough setting. *Mine has a 1 hr rise/rest period after it has mixed* If your’s doesn’t place in greased bowl and let rise for 1 hr.
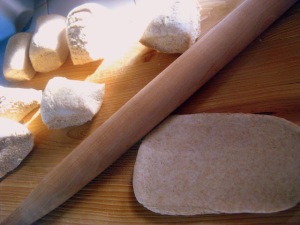
  5. Turn dough out onto a cutting board and cut into 12 – 16 pieces. Depending on if you are making burger buns, hot dog buns or rolls will depend on how you create the pieces.
  6. After you have your desired shapes and pieces, brush with a little melted butter.
  7. Top with sesame seeds, poppy seeds, garlic powder, or Parmesan cheese
  8. Then bake for 10-12 minutes. Mine all took 10 minutes from the get go. These are a dense bread due to the whole wheat, if you let them bake too far along you will have a rock.

Burger Buns

  • place on a greased sheet pan, cover and let rise 20-30 minutes
  • bake as above

Whole Wheat Buns4 - sweetheatchefs.com

Hot Dog Buns

  • shape the 12 pieces into approximately  6″ x 4″ rectangle shapes. This can vary depending on the size of the dogs you use.
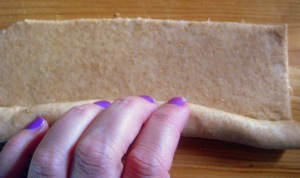
  • starting at the long end facing you, roll tightly away from you
  • pinch and tuck the ends
  • place on a greased sheet pan, cover and let rise 20-30 minutes
  • bake as above

Whole Wheat Buns3

Whole Wheat Buns

Rolls

  • cut into 16 pieces
  • shape into smooth round balls
  • place on to a greased sheet pan, cover and let rise 20-30 minutes
  • bake as above

Whole Wheat Buns6

You might also like:

Chocolate Chip Nutella Banana Bread

Choco Chip Nutella Banana Bread - sweetheatchefs.com

Be prepared to WOW your taste buds! I made some mini tarts with Nutella and topped with banana slices. After that it was on to see what else I could make with Nutella besides my spoon inserted into the container <blushing> So while sitting in the kitchen looking for inspiration I see browning bananas calling my name. I remembered seeing a recipe somewhere recently for Nutella muffins, from my good friend Becca over at It’s Yummilicious. If you want to check out her fantastic page click HERE. If you want to see all her amazing Nutella recipes click HERE.

This is a great recipe to share on Valentines Day for that special someone. Perhaps a neighbor who helps you out, your kids’ teacher, your daycare provider, or even your spouse! Imagine opening up a cute little box of this homemade treat instead of boxed candy this year!! It is quick, easy and ooey gooey bites of chocolaty deliciousness! Here is how…

Choco Chip Nutella Banana Bread4 - sweetheatchefs.com

INGREDIENTS

  • 3/4 cup sugar
  • 1/2 cup vegetable oil, or coconut oil; or 1/4 cup coconut oil and  1/4 cup applesauce
  • 1/2 cup Nutella (heaping)
  • 2 overripe bananas, smashed
  • 2 eggs, beaten
  • 1/2 cup buttermilk (no buttermilk? no problem, see additional notes at bottom of page)
  • 1 teaspoon baking soda
  • 2 cups sifted all-purpose flour
  • 1/2 cup mini milk chocolate chips

Choco Chip Nutella Banana Bread - sweetheatchefs.com

Choco Chip Nutella Banana Bread - sweetheatchefs.com

DIRECTIONS

  1. Preheat oven to 350°. Prepare two loaf pans by lining with parchment paper. Or you can just spray the tin, I use the parchment because I think it is easier to get out and makes the bread better when cooking.
  2. Mix oil, Nutella, and sugar in a large bowl with a stand mixer.
  3. Add the bananas, eggs, buttermilk, and baking soda to the Nutella mixture. Mix well.
  4. Slowly add flour and chocolate chips, just until combined.
  5. Divide the batter evenly between the two loaf pans.
  6. Top with a few mini chips or Valentine’s candy or colorful sprinkles.
  7. Bake for 30-40 minutes, or until toothpick inserted comes out clean.
  8. Make sure to let cool before slicing

Choco Chip Nutella Banana Bread - sweetheatchefs.com

Choco Chip Nutella Banana Bread5 - SWEETHEATCHEFS.COM

Additional Notes:

How to make your own Buttermilk:

  • 1 cup milk
  • 1 tbs vinegar

Combine ingredients and let sit for 5 minutes. Then add to recipe. That’s it!


You might also like:

Manic Monday Button

Carnitas & Cheese Tamales

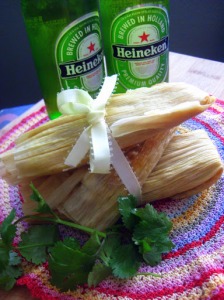
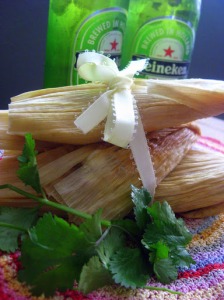
Tamales For Beginners - Sweetheatchefs.com

**FIRST OFF, please bear with me on the formatting of this post, I have tried everything I know to get it to look right, but it is not working. This post should have been published a week ago! Sorry The Mystic Blue Spice Co.

I took the past week of my life to try new adventures in the kitchen, keyword adventure. From crying, laughing, cursing, to smiling; it took place here. I never knew how much was at stake when I started this blog. I want to please my readers with quality food and ingredients along with perfect pictures to match what goes on in my kitchen. This week has been all but forgiving on my sanity, from losing the cotton twine to tying my tamales (subsequently finding it a few weeks later!) to losing 58 of the pictures for all my recipes and to put the whip cream on top, my blog formatting has all gone haywire! *insert BIG SIGH*! What technology can not take from me, is my recollection of my experience and the tricks and tips I can pass on to you, which I do wholeheartedly LOVE to do.

I thought the idea of making tamales sounded not only fun, but accomplishing. I read reviews and tips and ideas on how and what to do. I got advice from my mom who had made them for my son. I personally didn’t care for them. I have had a few in my day that were ok but nothing like knocking the ball out of the park delicious. So as with anything if it isn’t really that good why bother to eat it. Well my son and daughter both love them, so I decided I should probably figure out this feat.

After researching I compiled my list of ingredients, planned the day to do it, because after all it takes all day unless you break it into 2 – 1/2 days. I got all my equipment sorted, cleaned laid out and ready. I am telling you I could not be more ready for this than I was…or so I thought. I started at 11:30 cooking the meat, and all the sauces. By 7:00 pm that night I was still…steaming…tamales! Keep  in mind, in between I am running to and from school picking kids up and dealing with a 2-year old with a short attention span!

I suppose if you grow up in a household which makes these all the time or if you do this enough times you will be a pro. A beginner, will feel like it’s your first time writing your own name…remember that? I don’t want to deter you from trying to do this, I am just forewarning you it is tedious, time-consuming, rewarding, messy, frustrating and FUN!

If you have leftover sauce, meat and or masa, freeze it and the next go round won’t be as time-consuming. The goods will keep int he freezer for about 2-3 months!!

Now for the lowdown…

Things to know about making tamales, for tamale making dummies, aka beginners!

  1. Get all your ingredients laid out before you begin.
  2. Have your meat prepared ahead of time, this will save you time when taking on this project. Make the night before and refrigerate. Then you only have sauce to make and assemble day 2.
  3. Organize a large work space for assembling the tamales and a place to put them before steaming begins.
  4. Get yourself some type of cotton ties to secure the tamales. If you are not using cheese or a sauce, you won’t need this. If you are using cheese or a sauce you will WANT these!
  5. If you are making more than 1 type; meat & cheese, green sauce meat & cheese, red sauce meat & cheese, then be sure to label them or keep them grouped together, so you know what is what when you are done.
  6. Buy the largest corn husks you can find. The small ones are useless, unless you use 2 together  but when using sauce, it creates more of a mess (in my opinion!)
  7. Keep unused corn husks soaking in water the entire tamale making adventure.
Tamales For Beginners - Sweetheatchefs.com

INGREDIENTS

Meat
  • 2# pork picnic roast
  • 1 medium red onion large chopped 
  • 2 cloves garlic, sliced in half
  • 2 tbs oregano
  • 1 tbs The Mystic Blue Spice Co. tamale seasoning

Mystic Blue Spice Co - Tamale Seasoning

Masa Dough
  • 3 1/2 cups dried masa harina for tamales
  • 3 3/4 cups hot reserved pork broth or hot water
  • 10 ounces or 1 1/3 cups vegetable shortening softened
  • 2 teaspoons salt
  • 1 1/2 teaspoons baking powder
  • 1 package dried corn husk leaves
Filling Green
  • 4 Poblano Peppers
  • 4 Anaheim Peppers
  • 4 tomatillos
  • 12 ounces Monterey Jack Cheese, shredded
  • 19 oz verde enchilada sauce (mild) Las Palmas
  • 2 tbs olive oil
  • 2 cloves garlic
Filling Red
  • 2 tbs. vegetable shortening
  • 1 medium white onion, roughly chopped
  • 6 cloves garlic chopped
  • 2 ancho chiles, toasted, stemmed, seeded, soaked in very hot water for 15 minutes, and drained
  • 2 guajillo chiles, toasted, stemmed, seeded, soaked in very hot water for 15 minutes, and drained
  • 1 cups canned enchilada sauce Las Palmas
  • 1 1/2  cups (approximately) reserved pork cooking broth or lower-salt chicken broth
  • 1 tbs. masa harina
  • 1 tbs. brown sugar or honey; more as needed
  • 1/2 tsp. dried Mexican oregano
  • 1 tsp The Mystic Blue Spice Co. tamale seasoning
  • 12 oz Monterrey jack shredded cheese
DIRECTIONS

Meat
  1. In stock pot, add 8 cups water plus all ingredients.
  2. Bring to boil and continue to cook for 2 hours covered.
  3. KEEP ALL COOKING LIQUID
  4. Add meat to baking pan add 2 cups liquid and place in oven on 275 F. degrees for 1-2 hours. Check to make sure liquid does not evaporate and add more if so.
  5. When done remove from oven allow to cool and shred with fork.
Filling Green
  1. Roast the peppers under a broiler, turning occasionally until all sides are charred really well nice and dark.
  2. Place the charred peppers into a bowl covered with plastic wrap for 15 minutes to sweat and make the skin peel.
  3. In a medium stock pot, add olive oil and garlic, heat on medium heat until aromatic; about 2-3 minutes. keep heat low, do not burn garlic.
  4. Add verde enchilada sauce and bring to a boil, then simmer covered on low.
  5. While the sauce is simmering, peel the skins off the peppers and tomatillos. For the peppers remove all seeds, then roughly chop and add to verde sauce, for tomatillos, peel skin and rough chop. Add peppers and tomatillos in food processor and blend until smooth. Add to simmering sauce, cover and continue to simmer for 20-25 minutes.
  6. When done, take off heat and set aside to cool.
Filling Red
  1. Place dried chilies in a bowl of hot pork broth or hot water for 15 minutes.
  2. When chilies are done, heat 1-1/2 tbs. of the shortening in a 4-quart saucepan over medium heat. Add the onion and garlic and cook until beginning to brown, about 3-5 minutes.
  3. Add the masa and stir creating a thick paste.
  4. Add in soaked chiles & broth they soaked in, enchilada sauce, sugar, oregano, tamale seasoning, and the broth.
  5. Continue simmering on medium low until the sauce has darkened in color, 10-20 minutes, stirring occasionally  (The sauce may be made up to 2 days ahead; keep refrigerated.)
  6. Set aside and let cool.
  7. Once cool place in batches in the food processor until a smooth consistency. Replace in stockpot and set aside to cool.
 Masa Dough
  1. Combine the masa harina and 1.5 cups hot broth or hot water stir until mixed well.
  2. Using an electric mixer on medium-high speed, beat the lard or shortening with the salt and baking powder until light in texture, about 1 minute.
  3. Continue beating as you add the masa mixture in three additions.
  4. Reduce the speed to medium-low and add additional broth or water 1/4 cup at a time and continue beating for another minute or so, until a 1/2-teaspoon dollop of the batter floats in a cup of cold water (if it floats you can be sure the tamales will be tender and light).
  5. Beat in enough additional broth to give the mixture the consistency of soft, but not runny cake batter; it should hold its shape in a spoon.
  6. Taste the dough and season with additional salt if you think necessary.
  7. Refrigerate the batter for an hour, then use an electric mixer to beat enough additional broth to bring the mixture to the soft consistency it had before. About 1/2 – 3/4 cups worth.
Corn Husk Leaves
  1. Unfold the husks and place in a baking dish full of hot water, for approx 1 hr before ready to roll tamales. I placed a second dish on top to hold water and husks under water.
  2. Remove husks, a few at a time from the water, dry completely before use and set aside.
  3. Place 2-4 tbs of masa dough on the husk and work into a square or rectangular shape to lay the base for the meat and sauce mixture.
Steaming
  1. Work in batches; Use a large steamer or collapsible vegetable steamer set into a large, deep saucepan
  2. Line the steamer with leftover scraps of corn husks to protect the tamales from direct contact with the steam and to add more flavor, but make sure to leave small spaces between leaves so condensing steam can drain off.
Preparing the Tamales
  1. Lay out a corn husk
  2. Spread 2-4 tbs of masa dough over it creating a rectangle or square depending on size of husk.
  3. Spoon 2 tablespoons of the meat, 1 tbs cheese, and 1 tbs sauce over the dough
  4. Roll the corn husk away from you starting with the long end and work away from you.
  5. Tuck the left skinny side of the husk under and set aside. This leaves the top open and exposed. If you have cotton or corn ties, use these to tie each end instead of tucking under. (The tie is an optional step and the tamale will cook and be perfectly fine if this step is skipped)
Steaming the Tamales
  1. Place as many tamales as you can fit into the steamer. Stand them upright so the open end is up. (If using ties the placement of ends will not apply) Once in the steamer, set the lid in place and steam over a constant medium heat for about 1 1/4 hours. (Watch carefully that all the water doesn’t boil away, add more water if necessary)
  2. The tamales are done when pressed are a firm consistency. If mushy, they are not done.
  3. Let tamales stand in the steamer off the heat for a few minutes to firm up.

Tamales For Beginners - Sweetheatchefs.com

Manic Monday Button

Skinny(er) Scalloped Potatoes

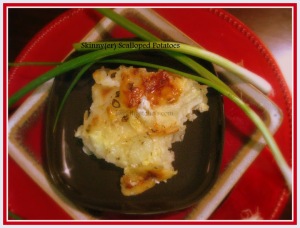
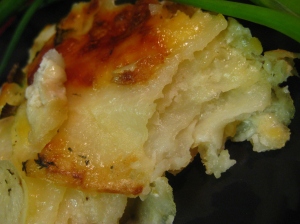
Skinny(er) Scalloped Potatoes - sweetheatchefs.com

INGREDIENTS

Non stick cooking spray
10 medium peeled Yukon Gold potatoes, sliced thinly. I used my food processor attachment at 2mm
2.5 tbsp butter
salt and fresh pepper to taste
1 clove of garlic, or if you are a garlic lover (like me) 2 cloves minced or microplaned (if you don’t have cloves, 1/2-1 tsp garlic powder)
1 cup shredded reduced fat Cheddar or Gruye cheese or a combo of both
1/4 cup large grate parmesan cheese
2 cup fat-free milk
1 bay leaf
pinch freshly grated nutmeg
3 tsp thyme
2 tsp dijon mustard
1 green onion, thinly sliced for garnish
 
 
sweetheatchefs.com
DIRECTIONS

  1. Preheat oven to 425°F. Spray a 9″x 13″ baking dish with cooking spray.
  2. In a large bowl add potatoes, salt, & fresh cracked pepper. Toss well so everything is coated.
  3. The placement of the potatoes will happen in 4 different batches. First batch take 1/4 of the potatoes and layer them on the bottom of the pan.
  4. Add 1/4 of the cheese on top, repeat until all potatoes and cheese are in pan.
  5. In a small saucepan, bring milk, butter, dijon mustard, thyme, bay leaf and nutmeg to a boil over medium heat stirring very frequently so it does not scaldpour over potatoes (remove bay leaf)
  6. Top with the Parmesan cheese and green onions.
  7. Bake uncovered, for 40 – 50 minutes (depending on how thick your potatoes were) or until potatoes are tender. 

sweetheatchefs.com

Manic Monday Button

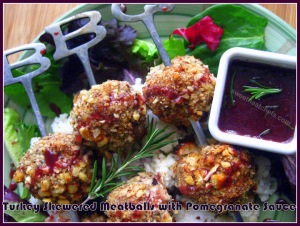
Turkey Skewered Meatballs with Pomegranate Sauce

sweetheatchefs.com

sweetheatchefs.com

This week in my kitchen has been a trial and tribulation week. Trial, error, success, mess, crying, laughing and doing it all over again. This recipe was no exception, including all the pictures that went with it that got erased! All I can say is if you don’t try you won’t succeed, AND make sure you read a recipe in its entirety before buying ingredients AND proceeding to make it. This recipe was adapted from one I saw recently on a blog, click here for the original version. I adapted it to fit our household and you can too. This is a healthy meal and pretty filling with just 2 meatballs served with the rice and a salad.

INGREDIENTS

  • 2 pomegranates (do not use pomegranate juice as it will not reduce)
  • 1 clove garlic, slightly pressed
  • 3/4 cup dry white wine
  • 1 sprig rosemary
  • 2 lb ground turkey
  • 1 large shallot, finely diced
  • 1/2 cup shredded Pecorino Romano cheese (divided)
  • 2 slices of whole wheat bread
  • 1 egg, beaten
  • ½ cup plain breadcrumbs or panko crumbs (divided)
  • 1 cup stock (chicken or vegetable)
  • 1 cup chopped hazelnuts (can use pecans or walnuts instead)
  • 1/4 tsp nutmeg or to taste
  • 1/2 tsp salt or to taste
  • 1/2 tsp black pepper
  • 1/4 cup freshly chopped baby spinach, fine chop
  • 2 tbsp extra-virgin olive oil

DIRECTIONS – Preheat oven to 400 degrees F. Cooks for 30 minutes (or see alternate cooking method at the end)

  1. Halve the pomegranates and over a fine mesh strainer squeeze the juice into it until you get 1 cup. 
  2. In a heavy (or non-stick) saucepan or skillet, heat 1 tbsp olive oil and add a sprig of rosemary and 1 clove of garlic.When the garlic is golden brown, discard it and add wine and the pomegranate juice to the pan. Season with salt and pepper and allow to reduce over medium heat, stirring occasionally. 
  3. Chop the hazelnuts and add 2 tbs bread crumbs and 1/4 cup pecorino romano cheese and set aside.
  4. Heat a tablespoon of olive oil in a small skillet, add the shallots and garlic and cook until translucent over low and make sure not to brown.  Dump the shallot and garlic mixture into the fine mesh strainer and let set aside to let drain and cool.
  5. Soak the bread in broth until soft, then drain by squeezing all the liquid out, and set aside.
  6. In a bowl, combine the ground turkey with the cooked shallots and garlic, the salt and pepper, spinach, drained bread, nutmeg, egg and additional breadcrumbs as needed to firm up the mixture. Mix everything together really well.
  7. Allow to rest for two minutes until it firms up, making the mixture easier to shape. 
The consistency of the mixture should be soft and wet and hold together in a ball.
  8. Shape into 1″ to 1 ½” sized meatballs.
  9. Roll the meatballs into the hazelnuts and bread crumb mixture.
  10. Line a baking tray with a sheet of foil and brush with a small amount of  olive oil.
  11. Thread the meatballs onto skewers (If you’re using wooden skewers, soak them in water for 30 minutes before cooking)
  12. Arrange the meatballs on the foil in one layer and lightly drizzle the top with a little more olive oil.
  13. Bake until golden brown about 30 minutes. Drizzle pomegranate sauce over the top and serve over my coconut rice and side of salad greens.

Alternate Cooking Method

You can skewer the meatballs and place over indirect heat on the BBQ. Using a medium heat cook the meatballs for approx 25 minutes, checking frequently to make sure they don’t burn. I placed them on an old cookie sheet lined with foil and oiled generously. I turned them every 5-10 minutes to avoid one side from getting too done at a time. Mine took about 30 minutes but remember all ovens & BBQ’s vary in temperature, so your cooking time might not be the same as mine. The flavor you will get from grilling these will add that much extra to the lean protein you are working with here.

This recipe is being shown at Bobbi’s Cozy Kitchen, Manic Monday Party!

Loaded Bake Potato Soup Crock Pot Style

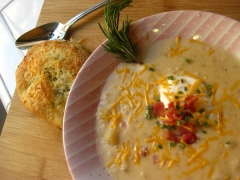
IMG_3174

INGREDIENTS

6 large baking potatoes, peeled, cut in 1/2″size
1 large onion, chopped
1 quart chicken broth
3 garlic cloves, minced 
1/4 cup butter (REAL butter)
2 1/2 teaspoons salt
1 teaspoon pepper
1 cup cream or 1 cup half-and-half cream
1 cup shredded sharp cheddar cheese
3 tablespoons chopped fresh chives
1 cup sour cream (optional)
8 slices bacon, fried & crumbled
cheese, for sprinkling

IMG_3175

DIRECTIONS

Combine first seven ingredients in a large crock pot; cover and cook on HIGH for 4 hours or LOW for 8 hours (potato should be tender).

Mash mixture until potatoes are coarsely chopped and soup is slightly thick. If you want it thicker, add 1/4 cup instant mashed potatoes.

Stir in cream, cheese and chives.

Top with sour cream (if used), sprinkle with bacon and more cheese.

Loaded Baked Potato Soup

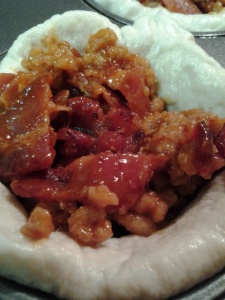
BBQ Beef Cups

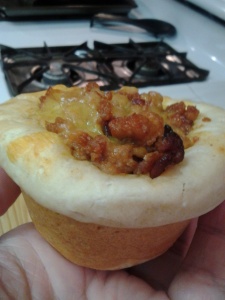
2012-12-17 17.29.42

This is a quick and easy dinner or appetizer for the family or the family get together, it would be great for a party too. You could halve the biscuits and use mini muffin tins!!

My kids are always helping in the kitchen, and this is a great way to get them in there where they can do little damage if something goes wrong. I have 1 kid roll the biscuits and 1 scoop the meat mixture in the muffin tins. They are happy as clams!

This dish comes out as a nice savory dense biscuit, when you bite into it you get a sweet tangy bite on the tongue. After 2 biscuits, the kids have full bellies!

In about 30-40 minutes you are done with the entire meal (except clean up) but the kids can do that while you put your feet up and relax with a glass of wine! After all, all you had was a itty bitty muffin for dinner 😀

Can you believe my grandma sent me this recipe??!! LOVE YOU GRANDMA!!!

INGREDIENTS:

2 tubes (10 oz.) Pillsbury buttermilk biscuits 
1.5 lb lean ground beef or ground turkey
1/2 lb thin lean cut bacon
3/4 cup ketchup
5 tbsp brown sugar pressed firmly into spoon
2 tbsp cider vinegar
1 tsp chili powder
4 oz sharp cheddar cheese + 1 tsp per cup

DIRECTIONS:

Roll each biscuit into a flat circle twice its normal size and place in greased muffin tins and set aside.

2012-12-17 16.55.21

In a skillet brown ground beef or turkey. When done set aside.

Cook bacon until crispy. Drain on paper towels and cut into bite sized pieces. Combine with reserved meat.

In a medium-sized bowl combine; ketchup, brown sugar, cider vinegar, and chili powder. Stir until well combined.

Add meat mixture to BBQ sauce mixture and stir well.

2012-12-17 17.05.44

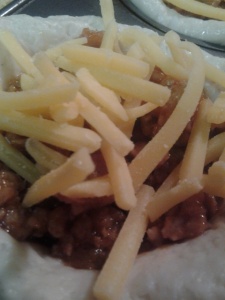
Add 2-3 tbsp of mixture to each biscuit and top with 1 tsp cheese.

2012-12-17 17.07.06

Bake in 375 degree F. oven for 15-18 minutes.

2012-12-17 17.29.16

You might also like:

Rosemary & Garlic Infused Oil (sweetheatchefs)

Browned Butter Strawberry Eggnog Pancakes (sweetheatchefs)

Stuffed Poblano Pepper (sweetheatchefs)

Rosemary & Garlic Infused Oil

Rosemary & Garlic Infused Oil - sweetheatchefs.com

THINGS YOU NEED

Vegetable Oil or Olive Oil

Rosemary Sprigs, washed and thoroughly dried

Garlic Cloves, peeled and sliced in half lengthwise

Cleaned and thoroughly dried glass bottles in various sizes shapes and designs

Stoppers; corks, wine bottle stoppers etc.

IMG_4125

DIRECTIONS:

Process takes 1 week to infuse, keep that in mind when planning for your gift or for yourself.

  1. In a glass bottle, place 1 Rosemary sprig and 1 half of garlic clove.
  2. Using a funnel add oil until almost to the top so as not to overflow.
  3. Add cork on top.
  4. Place in a safe, cool environment for 1 week. Everyday swirl the bottle around to mix up the contents. Do not tip upside down it might leak.
  5. After 1 week, dump oil into a bowl to remove Rosemary and garlic.
  6. Replace back in bottle with stopper. 
  7. Refrigerate for longevity. Lasts 2 weeks, if you opt to keep in rosemary and garlic, 1 week. 

IMG_4138

You can change up the ingredients to your tastes. I use these two ingredients all the time so this is my favorite. This makes a nice gift for Grandparents, Parents, Bosses, Mother’s Day, Father’s Day, Christmas, Hostess Gift, & Housewarming. Use for making salad dressings, pan frying chicken, fish, shrimp, beef, pork, & lamb.

IMG_4120

OTHER HERBS TO USE:

  • Thyme
  • Oregano
  • Whole Dried Chili Peppers
  • Dried Chili Pepper Flakes
  • Fresh Sage Leaves (another fav!!)
  • Lemon Peelings + zest
  • Lime Peelings + zest
  • Whole Peppercorns

When choosing herbs and combinations of them, (especially the spicy ones) make sure to start off with small quantities and add to it from there. As you can see in the original recipe I only use small quantities. Fresh herbs are very powerful and infuse the oil very well. 

This recipe is beign shared over at Foodie Friends Friday

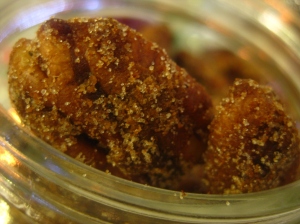
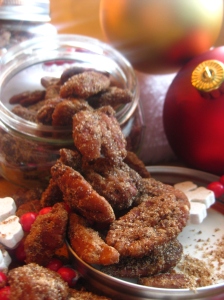
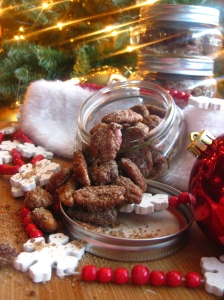
Candy Brandy Pecans

IMG_4146

INGREDIENTS:

6 tbsp butter, melted
1 cup brown sugar
5 tbs brandy
2 tbsp Gingerbread Spice Mix
10 oz-bag whole shelled pecans

IMG_4141

DIRECTIONS:

Preheat oven to 325 degrees F. 

Line a baking sheet with tin foil and spray with non stick spray.

Melt butter in sauce pot on medium heat.

Add brown sugar, brandy and Gingerbread Spice Mix, cook for 1 minute until bubbly stirring constantly.

Add pecans and stir until all coated.

Spread out in an even layer on cookie sheet with rubber spatula and bake for 20-25 minutes stirring several times throughout.

Remove from oven to cool and in medium bowl combine:

1/2 cup sugar

2 tsp Gingerbread Spice Mix

Pour pecans in bowl and stir until all coated with sugar mixture. 

IMG_4107

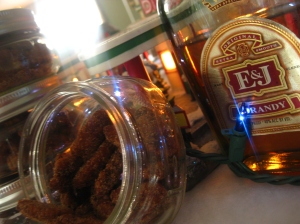
Let cool completely and store in airtight container. I put mine in decorative mason jars for Christmas gifts. This would also be good for birthday gifts, hostess gifts, parties, baby showers, Thanksgiving snacks, mother’s day gifts, and father’s day gifts

IMG_4103


This recipe is being shared at Foodie Friends Friday


Gingerbread Spice Mix

IMG_4057

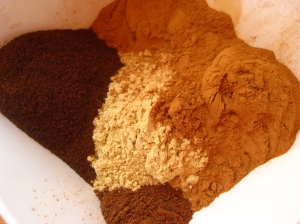
This is the beginning of so many things you can create. This Gingerbread Spice Mix is versatile for gift giving and for making different recipes out of it, some of which I have in this post for you. 

INGREDIENTS:

1/2 cup ground ginger
6 tbsp ground cinnamon
4 tbsp ground cloves
2 tsp ground nutmeg

DIRECTIONS:

Mix all ingredients together and store in an airtight container  until ready to use.

IMG_4128

Bag up and give as gifts for Christmas or any event that calls for one! This does not have to be a holiday only gift!  

I gave mine as Christmas gifts, added tags with the recipes below and tied on to the bag with a decorative ribbon. This gives the recipient an idea of what to use it with and get creative in the kitchen!

IMG_4136

IMG_4184

You can add this mix to the following recipes: (more coming soon)

Crispy Gingerbread Treats

3 tbsp butter, melted
1 bag (10 oz) mini marshmallows
1 tbsp Gingerbread Spice Mix
6 cups crispy rice cereal

Melt and mini marshmallows in a large sauce pot over medium heat stirring occasionally. Stir in Gingerbread Spice Mix and crispy rice cereal. Press into a greased 13 x 9″ baking dish. let cool and cut into squares.

Do you have a recipe to make with this? I’d love to share it and see what you come up with. Leave me a comment below with the deets and you could be featured on SHC in the near future!

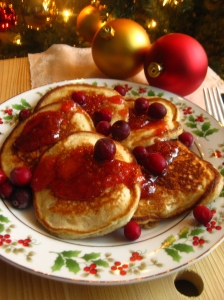
Browned Butter Strawberry Eggnog Pancakes

IMG_4037

That ah-ha moment when you serve this at the breakfast table will be all the redemption you need. Once they taste the fluffy, sweet & tartness of these pancakes they will not know there is a hidden secret ingredient PACKED full of nutrients, Chia Seeds. 

  1. Chia seeds carry the omega-3 fats our bodies need.
  2. Chia seeds have more omega-3’s than salmon and they also contain a fat called omega-6. Both of these “good” fats help regenerate cells in our bodies and regulate processes of our bodies. Our bodies themselves do not make these fats and that is why it is essential to eat them daily.
  3. They have 11 grams of fiber per ounce! That is 42% of your recommended daily allotment in just 1 ounce. 
  4. Chia seeds are full of calcium too, 3 times MORE than skim milk!

I could go on about all the benefits, but I think you get the idea. Eggnog is one of my favorite drinks this time of year, I have yet to make my own, but I try to put it into everything during the season it is around. My husband absolutely HATES the stuff, so I am limited somewhat. BUT since he is at work, I am playing in the kitchen, shakin’ my groove thang to Dominic the Donkey (no I’m not Italian) and drinking my coffee! There is nothing better today…

IMG_4038

These pancakes and nutritious, sweet, tart and beautiful to look at. They are easy to make ahead and refrigerate for Christmas morning. All you have to do is get up and cook them while listening to some relaxing Christmas Music or some soothing jazz!

This recipe yields approximately 16-18 pancakes give or take. 

INGREDIENTS:

3 cups all-purpose flour
7 teaspoons baking powder
1.5 teaspoon salt
1 tablespoon white sugar
1.5 cups eggnog
1 cup milk
2 eggs, beaten & room temperature
1/2 teaspoon pure vanilla extract
pinch of cinnamon
2 tablespoons strawberry jam (I use my homemade jam, use a good quality one for this recipe)
3 teaspoons Chia Seeds
Butter for cooking with

DIRECTIONS:

  1. In a large bowl, sift together the flour, baking powder, salt and sugar; then sift again into another bowl. The second sifting creates a fluffier pancake.
  2. In a small bowl or measuring cup, beat the eggs and add vanilla and pinch of cinnamon to it.
  3. Make a well in the center of the flour mixture and pour in the eggnog, milk, egg mixture; mix until combined (no need to over do it)
  4. Add strawberry jam and Chia seeds and stir until just combined.
  5. Heat 1-2 teaspoons of butter in skillet and brown it, if you want the method for browned butter click here.
  6. Once browned and ready to go add 1/4 cup of batter to skillet and cook until golden brown on both sides. Wipe out pan after each batch with a paper towel adding fresh butter to the pan for the new batch. Repeat until desired number of pancakes are reached.
  7. Drench or drizzle your strawberry jam over the top. I heat mine up for about 30 seconds in the microwave prior to the pancakes being completed.
  8. Garnish with some cranberries or blueberries or strawberries.

IMG_4036 (2)

Nutritional information cited from Dr. Oz

This recipe was shared at Wicked Good Wednesday & Manic Monday.

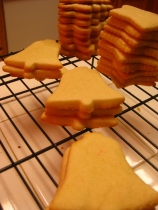
Don’t ever buy it again, make your own…Homemade Sugar Cookies

IMG_3989

The reality is we all have busy lives and when we want to please our kids or ourselves with a little Christmas Cheer and make the infamous Sugar Cookies during the holiday season, it is EASY to get wrapped up in the convenient pre-made store bought dough. If you do one thing this year, PLEASE make your own. You will see how easy it is AND you can easily double or triple the recipe and freeze it for your convenience later so you are not tempted to buy the pre-made dough.

IMG_3987

A friend of mine Katrin over at Running with The Devil(ed) Eggs and I agree, MAKING cookies involves the process from buying ingredients to actually making the cookies. BAKING cookies involves pre-made slice and bake. Your kids and grandkids will have much fonder memories of the entire MAKING cookie process than the slice and bake version. The hope is they will continue the tradition and do the same with their kids and future generations to come. Honestly, the fondest memories I have are with my grandma MAKING cookies, pies, bread, noodles, bread everything was homemade.

As a society we have strayed so far away from that reality, I wonder if our kids or their kids will even know what homemade truly is and to me that is very sad.  I just think it is important to show our kids fresh food, non processed food, the art of being together (isn’t that what holiday’s are for anyway?) quality time together, the fun of checking the oven to see if the food is done, the aroma your house has while it is cooking, the laughter between you while you listen to Christmas Music and mess up on the words! Pre-made dough has you in and out of the kitchen before  you know it, much like the society we have turned in to; quick, easy, and impersonal. 

IMG_3984

Not only does homemade food taste incredibly better, but you know exactly what you are putting into it, there are no preservatives, you can make it organic and feel good about feeding your own belly, Santa’s and your kids’ 😀 *Stepping off soap box**

With all that being said, (and thank you for staying tuned this long) I just want to offer this recipe that is easy enough for the beginner baker and just as fun for the novice baker. With few ingredients and LOTS of decorations for the finished product afterward you are sure to build lasting memories, new traditions and fun for years to come.

INGREDIENTS:

3 cups all-purpose flour
3/4 teaspoon baking powder
1/4 teaspoon salt
1 cup unsalted butter, softened (salted butter works too if you don’t have the other)
1 cup sugar
1 egg, beaten
1 teaspoon real vanilla extract
1 tablespoon milk
Powdered sugar, for rolling out dough ( learned this from my grandma, this is key to a soft non over-worked cookie)

DIRECTIONS:

Sift together flour, baking powder, and salt. Set aside.

Place butter and sugar in large bowl of electric stand mixer and beat until combined.

Add egg and milk and beat to combined. Add vanilla extract.

Set mixer on low speed, gradually add dry ingredients, and beat until mixture pulls away from the side of the bowl. Don’t over mix here.

Create a disk, or divide dough up if you will be making different colors or adding candies to it. Wrap in waxed paper, and refrigerate for 2 hours. *NOTE* If you are adding colors or candies to the dough, now is the step to do it BEFORE you refrigerate for 2 hours. The dough will be hard once it is refrigerated. Ideas for add ins:

  • crushed candy canes + red food coloring color
  • roasted pecans
  • diced cranberries + green food coloring
  • macadamia nuts
  • white chocolate chips + blue food coloring
  • dark chocolate chips

IMG_3980

When ready to start baking, preheat your oven to 375 degrees F.

Sprinkle your rolling out surface with a light dusting of powdered sugar. Remove 1 wrapped pack of dough (or the entire ball if you did not divide) from refrigerator at a time, sprinkle rolling pin with powdered sugar, and roll out dough to 1/4-inch thick.

Move the dough around as you roll and check frequently to make sure it is not sticking.

Using cookie cutters, cut into desired shapes.

Place at least 1-inch apart on greased baking sheet, parchment, or silicone baking mat, and bake for 7 to 9 minutes or until cookies are just beginning to turn brown around the edges.

Cool on wire rack.

Serve as is or ice as desired. Store in airtight container for up to 1 week or freeze for 1 month in an airtight ziplock.

IMG_3990

IMG_3993

This recipe is being shown over at: 

Manic Monday Party

Wicked Good Wednesday

No Santa Cookies This Year…Eggnog Rum Bread

Eggnog Rum Bread


So this year we will not be making Santa cookies, nope this is not a joke nor is it us protesting against Christmas. THIS year we will be making dear old Santa some  delicious, decadent, sweet, moist Eggnog Rum Bread. Crazy you say? Read this recipe I found from an awesome blogger named Robin over at Knead To Cook and you will know the only one crazy is YOU for still reading this and not checking to see if you have all the ingredients in your pantry 😀 by the way make sure to visit Robin’s page, she has a TON of great recipes to share.

I URGE you to try this recipe and leave Santa a new treat this year, he will be happy you did! 

I doubled this recipe and both loaves were gone within 3 days…just sayin, if you have a large family you might want to invest in 2 loaves! Breakfast, snack, dessert, anytime is a great time for this bread. It shows well, it maintains it’s structure and glaze really well for traveling. As Robin did, she made mini loaves for gifts, be careful with this…the people you give this to will never leave you alone again!!

2012-11-27 18.12.25


INGREDIENTS:

2 eggs
1 and 1/2 cups of regular eggnog (not low fat)
2 tsp Spiced Rum
1 cup white sugar
1 teaspoon vanilla extract
1/2 cup butter @ room temperature
2 1/4 cup all purpose flour
1 (3.4 ounces of powdered) package of instant French vanilla pudding mix
2 tsp baking powder
1/2 tsp salt
1/2 tsp ground nutmeg

IMG_3963
DIRECTIONS:

Preheat oven to 350. Spray your loaf, muffin etc. pan with non stick spray with flour. 

In your stand mixer use your paddle attachment and mix together the eggs, eggnog, rum, sugar, vanilla and butter. The butter will remain clumpy but that is just fine.

In a separate bowl, sift the flour, pudding mix, baking powder, salt and nutmeg.

Add the dry mixture to the wet and blend until incorporated. Avoid over mixing. The butter will remain clumpy and this is how the batter should look, the butter will melt when cooking.

Pour into your prepared choice of pan(s). Bake mini loaves for approximately 30 minutes or until a toothpick comes out clean. A regular loaf pan will take about 45-55 minutes. A double batch using 2 loaf pans take about 80 minutes. Just be sure to check, check and check you don’t want this over done. All your hard work put into this decadent bread you won’t want it ruined, especially after you smell the batter alone, you can imagine how scrumptious the actual cooked bread will turn out.

Lemon Rum Glaze:

1 cup sifted confectioners sugar
2 teaspoon eggnog
2 tablespoon Spiced Rum
1/8 tsp of ground nutmeg
Lemon zest, about 1/4 of a lemon ( I added this to the original recipe, you can omit)

2012-11-27 19.30.57
Whisk together and pour over your cooled eggnog bread. (If you can wait until it’s cooled)

The glaze recipe yields enough for both loaves with a lot left over, don’t be worried about really drizzling until your heart’s content! I wish I had used more…NEXT TIME, NEXT TIME!

IMG_3967

Cranberry Rosemary Dip – EASY & QUICK


INGREDIENTS

  • 10 ounces cream cheese, softened
  • 3/4 teaspoon garlic powder
  • 6 tablespoons dried sweetened cranberries ( I course chop them, but you could leave them whole)
  • 4 teaspoons chopped fresh rosemary ( I used the spice grinder)
  • fresh cracked pepper and kosher salt (to taste)

Place all ingredients in bowl and using a spoon smooth, smash and stir together all ingredients until well combined. Taste it with a cracker and see if you want to add more of any of the ingredients! Place back in refrigerator covered for about 1 hour before serving with crackers. Garnish with a few whole cranberries and a sprig of Rosemary. Super easy, beautiful in color and a HUGE hit! Enjoy 😀


Cranberry Swirl Cheesecake – Perfect for the holidays!

Have a holly jolly Christmas, it’s the best time of the year….Oh sorry I have these Christmas jingles in my head  this time of year and yes I know it isn’t even Thanksgiving yet. 😀  I’m hopeless when this time of year comes around! Just imagine your friends and families face when you break out this beauty for desert! I think this is truly one of the best cheesecakes I have ever had.

As you know I am not the best baker around, so when I make a cheesecake that comes out looking at gorgeous as this one..I am a happy camper! You know what it means? It means YOU can do this too!! LOL

My mom gave me a ton of fresh cranberries and I was trying to figure out what the heck to do with them, when of course cheesecake comes to mind. The cinnamony chocolatey graham cracker crust paired with the creamy cheesecake and tartness of cranberries is like a bite of heaven in each mouthful. The cranberry compote is a MUST to save even after the cheesecake is gone. It is great on crackers with a sharp cheddar cheese or to add into your mixed cocktails! YUM

Cranberry Compote:

  • 2 cups of fresh or frozen cranberries
  • 2/3 cup granulated white sugar
  • 2/3 cup orange juice
  • 1/4 tsp nutmeg, ground
  • 1/2 tsp cinnamon, ground
  • zest of one lemon or orange
  • 4 tsp vanilla

Graham Cracker Crust:

  • 2 3/4 cups of graham crackers
  • 1 tsp cinnamon
  • 1 tablespoon unsweetened Cocoa powder
  • 2 tablespoons granulated white sugar
  • 1/2 cup unsalted butter, melted

Cheesecake Filling:

  • 4 – 8 ounces packages cream cheese, room temperature (I used 2 full fat and 2 reduced fat cream cheese and this is crazy rich)
  • 1 cup granulated white sugar
  • 1 cup sour cream
  • 1/2 cup whipping cream or half and half
  • 1 tablespoon vanilla
  • 4 large eggs, room temperature
  • 1 tsp pure vanilla extract
  • cranberry compote

Make cranberry compote:
Combine all ingredients except vanilla in large saucepan. Cook over medium high heat until mixture thickens, stirring occasionally, about 5-10 minutes. Cool slightly. Transfer to food processor and add vanilla. Puree until smooth. Strain into a bowl and cover  Refrigerate at least 6 hours or freeze for 3.

Make crust:
Spray 10-inch-diameter Springform pan (I used 2 pie dishes) with nonstick spray. If using a Springform pan, wrap outside of pan with 2 layers of heavy-duty foil. Blend all ingredients except butter in food processor. Add butter; blend until moist clumps form. Press crumb mixture onto bottom and up sides of pan. Chill crust while preparing filling.

Make filling:
Position rack in center of oven and preheat to 350°F. Using electric mixer, beat cream cheese in large bowl until fluffy. Beat in sugar. Beat in eggs 1 at a time. Mix in sour cream, half and half and vanilla.

Transfer 1/3 of filling to prepared crust. Dollop 1/3 of cranberry puree atop filling. Repeat layering of filling and puree 2 more times. Using knife, skewer or toothpick, swirl puree through filling, creating marbled design.

Place springform pan or pie dish in large baking dish or roasting pan. Pour enough hot water into roasting pan or baking dish to come halfway up sides of springform pan or pie dish. Bake until cheesecake puffs around edges, about 1 hour 15 minutes. Turn off oven. Let cake stand in oven 1 hour, leaving oven door ajar.

If using  springform pan: Transfer cake to rack. Run knife around pan sides to loosen cake. Cool completely. Remove foil from pan sides. Cover cake and chill overnight. (Can be made 2 days ahead. Keep refrigerated.) Remove pan sides.

If using a pie dish: Cover with plastic wrap and place in refrigerator for 6 hours or 3 hours in freezer.

Serve cake with Cranberry Compote either on top or on the side for dipping each tart bite into!

This recipe is was shared over at:

Thursday’s Treasures

Wicked Good Wednesdays

Focaccia – Don’t miss this!

I have made this recipe a few times now and each time it just gets better since I get more comfortable with the whole dough making business. A baker, I AM NOT, N-K?! So..if I can do this ANYONE, can do this. I follow this dough recipe to the “T” and then add the other stuff to suit mine and my families taste. I found this recipe at this amazing blog…ready for the name?….The Barefoot Kitchen Witch! Love her name, love her blog, check her out and you’ll see why. While you are there tell her we sent ya over 😀

Ok, back to the Focaccia yumminess. I could eat these things as a meal in-and-of-itself, however to save face and not look like a total carb overload eater, I make this with either a veggie packed salad or delicious soup, like my Creamy Chicken Veggie & Rice Soup.

Let your heart and tummy guide you through this process of what to top it with. Your options are as vast as your imagination on this one, that is half the fun coming up with toppings and combinations. Just imagine yourself biting into a light warm crispy and soft doughy bite filled with your favorite toppings….now your talking!
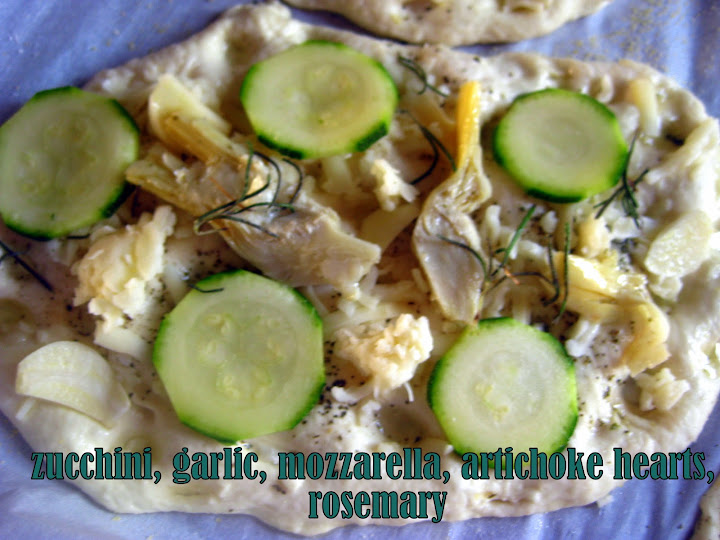
Take your time with the recipe, nurture it, follow it and enjoy the outcome when finished. I will guide you through a step by step process that will ensure complete success!

Things to know about this recipe:

  1. Kids love helping with this; let them dimple the dough, let them pick their own ingredients and let them top their own with what they picked!
  2. The dough is sticky; keep flour out until  you are done with all the handling of it
  3. Small kitchen? Make sure you have room for 2 sheet pans and a cutting board and a floured surface all at once.
  4. Use a kitchen aid (or whatever brand) stand up mixer for this, a hand held mixer will not work.
  5. If you want smaller portions, I have made this recipe into 18 focaccias, it is possible.
  6. Pre cut your parchment paper and set out on sheet pans ahead of time or during the rising process.

INGREDIENTS:

  • 2  1/2 tsp (1 pkg) active dry yeast or 1 small cake (18 grams) fresh yeast
  • 1  cup warm water
  • 1/2 cup milk (warmed in microwave for about 1 minute)
  • 2 T olive oil
  • 2 1/2 T lard, at room temperature (I used vegetable shortening)
  • 3 1/4 cups unbleached all-purpose flour
  • 1 1/2 tsp salt
  • Olive oil for brushing the tops
  • Salt for sprinkling the tops
  • Cornmeal for dusting the bottoms before baking
  • Toppings – thinly sliced vegetables, grilled or sautéed to intensify the flavor.  Garlic, Cheeses, Whatever sounds good.

DIRECTIONS:

Stir the yeast, water and milk in the bowl of a stand mixer; let stand until creamy, 10 minutes. 

Stir in the oil, and lard with the paddle. 

Add the flour and mix at low speed about 2 minutes. 

Change to the dough hook and knead 4 to 5 minutes. 

Add the salt and knead another 1 to 2 minutes.  The dough will climb up the collar of the hook, and you will have to stop several times to push it down.  The dough should be smooth, velvety, and softer than bread dough but firmer than croissant dough.

First Rise:

Place the dough in a lightly oiled bowl, cover tightly with plastic wrap (don’t forget to spray the plastic wrap), and let rise until doubled, 2 hours.
Cut the dough into 6 pieces (or however many you want to make, remember I made mine into 18 once) on a lightly floured surface and shape into balls. Let rest under a towel for 15 minutes.
Dimple the dough balls (remember kids love this part, no matter what age!), spreading each into a circle, and let rest under a towel another 15 minutes. 
Dimple tops with oil and sprinkle lightly with salt alone or your seasoning. (Here I used basil and salt) Place the dough circles on parchment-lined or oiled baking sheets or baker’s peels sprinkled with cornmeal.
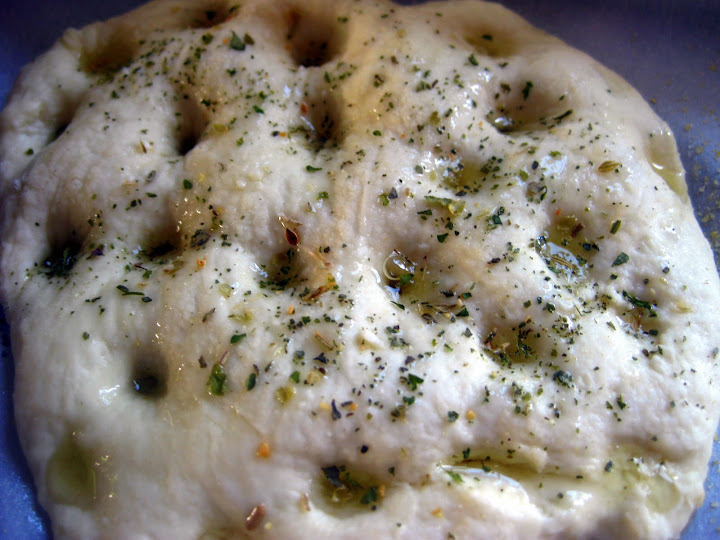
Second Rise:

Cover with a towel and let rise until doubled, about 1 hour.

Dimple the dough again with your fingertips, stretching it as you go.  Sprinkle with salt and brush with oil. 

Mist water very lightly over the top to cover and trap the oil and then cover with the toppings of your choice.
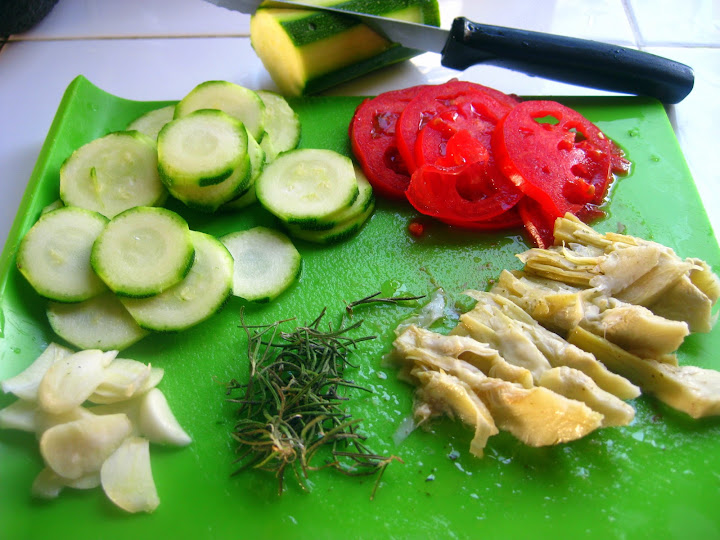
Preheat the oven to 425 degrees F. at least 20 minutes before you plan to bake.  Bake 18 to 20 minutes.  Immediately brush the surfaces with oil.  Serve hot, or cool on racks to room temperature.

This recipe is being shown over at Thursday’s Treasures!!
Creamy Chicken Veggie and Rice Soup – Warm the Heart, Warm the Soul!

Don’t let the sunny picture fool you…well ok I’m not even going to go there. Living in California sure its fun in the sun. But when my favorite time of year comes, FALL, I am saddened that the weather is not cool enough to reflect that. I love making soup and bread and warm you up goodies, but when the temperature reaches 80 in November, well sometimes it just isn’t that easy to get my family to eat hot soup! Luckily in between these warm days are a few hit or miss cool and even rainy ones. Leaving me to explore the world of Fall cooking.

Today I made a creamy, warm, stick to your ribs with a hearty healthy kick soup. This soup is almost too hearty to have a second bowl…I did say ALMOST! Filled with vegetables for great nutrition and a little creaminess to round it out, you will surely want to accompany it with a carb filled side! For me I have been making this Focaccia Bread that is just delicious and pairs perfectly with any soup or is fabulous on its own. Take a weekend, get your ingredients together you will want to make both of these delights this weekend!

INGREDIENTS

  • 8 c. Low-Sodium Chicken Broth
  • 2 Stalks Celery, thinly sliced
  • 1 Red  Onion, diced
  • 1/2 c. Carrots, I used the shredded ones
  • 1 head of broccoli, washed and cut up in small pieces (reserve 1/2 of the florets)
  • 1 bunch of Asparagus, washed and trimmed; reserve the stems
  • 2 cloves Garlic, minced
  • 1 tsp. Dried Oregano
  • Extra Virgin Olive Oil
  • 2 tbsp. All Purpose Flour
  • 3/4 c. Cream of Chicken Soup (could substitute in heavy cream, I just had this left over so I wanted to use it)
  • 1/4 c. 2% Milk
  • 1/2 cup sharp cheddar cheese (optional)
  • Kosher Salt, to taste
  • 1/4 tsp. Fresh Ground Pepper
  • 3 cooked Chicken Breasts, diced

DIRECTIONS:

In a large stockpot, drizzle olive oil on the bottom and add your diced chicken. Season with salt/pepper and cook until browned and cooked through.

Remove from pot and add 1 tbs of olive oil, add; carrots, celery, onion, broccoli, stems of your asparagus and saute for 5 minutes.

*NOTE* Using the stems to the asparagus:

  1. Cut the very bottoms off, discard and do not use
  2. Bend the bottom of one the asparagus spears until it snaps, this will be your guide for cutting the rest of the bunch
  3. Cut the remaining spears and cut the stems into 1/2″ dices, add these to your stockpot.

Add flour and saute for 2 minutes to get the flour taste out of it.

Add chicken broth slowly stirring as you add to avoid clumps. Once all broth is incorporated, bring to a boil and then reduce heat to just at a boil for about 20 minutes, or until all veggies are super soft.

Remove from heat and using an immersion blender (these things ROCK!) start blending until you get the desired consistency you like.

Return pot to stove and reduce heat to low. Add rice stir to combine.

Take a microwave safe bowl and add your milk and cream of chicken soup and combine. Add cheese if using.

Add this to your stockpot along with your reserved chicken and simmer for about 30 minutes or until the rice is cooked through.

While simmering place your asparagus spears & broccoli florets in a microwave safe bowl and add about 2 tbs water. Cover with Saran wrap and cook for 1 minute. Immediately add to an ice bath to stop the cooking process.

When soup is finished garnish with a few of your steamed broccoli florets and asparagus spears.

Chicken Bacon Ranch Mac-N-Cheese – It’s not too late for dinner plans!

Nothing says comfort quite like home-made mac-n-cheese. I never could resist cheese nor the crunchy browned goodness on top of a casserole. Putting the two together is sheer bliss in my book. Besides the boxed mac-n-cheese is nowhere near what mac-n-cheese should be. I have never purchased powdered cheese so why would I use it in a meal for my kids? Last time I looked cheese was something that was fresh!

This is a great go to meal, it comes together quickly and the aroma of cheese and bacon fill your home with deliciousness. Once you bite into the crunchy bacon topped, oozy gooey cheesy pasta you will be digging in for more!

My kids ask for this at least once a week. I have to restrict them, so I make a second smaller batch that I freeze. Let me tell you the frozen one is almost better than the fresh. 

INGREDIENTS

  • 16  ounces  uncooked elbow macaroni
  • 1/2 lb sliced smoked bacon of your choice
  • 3 chicken breasts, skinned boned and diced into bite sized pieces
  • 3  tablespoon  butter
  • 3  tablespoon  all-purpose flour
  • 3 cups milk
  • 1/3  cup  condensed cream of chicken soup, undiluted
  • 2.5 cups shredded cheese, 1 cup jack, 1 cup pepper jack, 1/2 cup sharp cheddar (or whatever your favs are!)
  • 2 tbs powdered ranch
  • 1/2  teaspoon  salt
  • Cooking spray

DIRECTIONS

Cook pasta according to package directions until al dente.

Cook bacon in a large nonstick skillet over medium heat until crisp. I cut it up before cooking using my handy kitchen shears into bite sized pieces, then drain on paper towel and set aside. Reserving drippings in pan.

Add chicken to drippings in pan, sprinkle with pepper and a little salt (remember the bacon is salty) sauté for 10 minutes or until done.

Melt butter in a large saucepan over medium heat; sprinkle flour evenly into pan. Cook 2 minutes to get the flour taste out, stirring constantly with a whisk. Combine milk and soup in a bowl with a whisk; gradually add milk mixture to saucepan, stirring with a whisk, then add ranch powder.

Bring to a boil; cook 2 minutes or until thick. Remove from heat and add cheese. Once cheese is all melted into sauce, stir in pasta and most of the chicken and most of the bacon. (Reserve a little of each to sprinkle on top)

Preheat oven to 375 degrees F.

Spoon mixture into a greased 9 x 11″ glass baking dish, and an 8 x 8″ glass baking dish. (Or if you have a super large one use that. I freeze the small one for later.) Sprinkle evenly with reserved bacon and chicken.

Bake for 20-25 minutes or until heated through. DO NOT BROIL IN GLASS DISH, IT WILL BREAK ON YOU.

Serve with a side salad or vegetable to round out the meal.

My concoction of cheeses

Ready for the oven

Just out of the oven

Finished!

Cornbread Casserole – Easy Weeknight Dinner!

This recipe is being shown over at Thursday’s Treasures!

Just in time for Fall! I have been down with a cold that won’t quit! My kids enjoyed every moment as I lost my voice for the entire week! This is a quick throw together type of meal that is perfect when your fam is on the go, just like Halloween, no one wants to sit around eating “good” food, they want that dang candy! You can feel good about having this ready in the oven and the little gobblins can have something yummy in their tummy before trick-or-treating.

Dressing

  • 1/2 c ranch dressing ( I use the packet kind)
  • 1/2 cup verde salsa
  • 1 cup cilantro leaves

Topping

  • 2 tbs olive oil
  • 2 cloves garlic
  • 1.5 lb ground turkey meat
  • 1/4 cup taco seasoning
  • 3/4 cup hot water
  • 3 tbs cilantro, chopped
  • 1 can corn
  • 1 can diced roasted tomatoes and green chilies
  • 1/2 cup sharp cheddar cheese, grated
  • 1/2 cup pepper jack cheese, shredded

Crust

  • 7  to 16 oz size – 1 package cornbread mix, i used a 16 oz package, we love cornbread (make as directed on package)
  • 3/4 cup crushed corn tortilla chips (i used these colorful orange and black for Halloween)

DIRECTIONS:

  1. Pre-heat oven to 400 degrees F.
  2. Make ranch dressing and combine, ranch, verde salsa and cilantro in food processor until well combined. Cover and chill in refrigerator.
  3. Heat olive oil and garlic. Heat until garlic is just fragrant, then add ground turkey. Cook until browned.
  4. Combine taco seasoning and hot water, add to pan. Heat through on medium high for about 5-7 minutes.
  5. Add canned tomatoes & cilantro and cook for an additional 5 minutes.
  6. Drain all juices out of pan and set mixture aside.
  7. Combine cornbread mix as directed on package.
  8. Get a baking dish, should be around 9″ x 9″ size or use a pie dish will work. I used a circular baking dish. Spray with non stick cooking spray, crush up your chips and line the bottom of the dish with your chips. You can add more or less depending on the size of your dish.
  9. Then add 1/4 cup of your corn and sprinkle on top of chip layer.
  10. Pour your cornbread mixture over the top of that, and top the cornbread with your meat mixture.
  11. On the very top add your cheese.
  12. Bake for 25-30 minutes or until bubbly golden brown on top. Everything is cooked you are just heating through and browning the cheeses!
  13. Allow to sit for 5-7 minutes after removing from the oven. This gives the casserole a chance to pull back and tighten up so when you cut it, it is not falling apart all over the plate.
  14. Drizzle over the top, or if you are like me, drench the top with your ranch verde salsa dressing, top with more cilantro and avocado.

Mini Pumpkin Spice Doughnuts + BONUS Recipe

DOUGHNUTS…anyone else feel like Homer Simpson when thinking of doughnuts? I do! And for that reason I stay my distance from the beasts that like to make my thighs bigger! My mom recently gave me a mini doughnut pan and I was like, REALLY mom? Are ya kidding me? This is the LAST thing I need.

After several hours of research online and seeing that there were some good recipes out there for them, I decided to give it a go. I mean they can’t be to bad, 1) they are baked, 2) they are tiny! Well, and after all it is: “All Things Pumpkin” here at Sweet Heat Chefs this week, so why not go for the gusto and make them Pumpkin doughnuts right?! Ok, let’s not be silly, we all know I can’t make much without chocolate being in it (yes that is the sweet tooth jabbering away at my inner self). So with regard to that I have included a BONUS recipe for that very inner self!

INGREDIENTS

1.5 cups canned pumpkin pie mix
1.5 cups granulated sugar, room temperature
3 large eggs, room temperature and scrambled
1/4 cup coconut oil, room temperature (make sure it is in liquid form)
1/4 cup applesauce, room temperature OR sour cream OR non fat greek yogurt
1 teaspoon salt
1/2 teaspoon vanilla
1.5 teaspoon baking powder
1 3/4 cups flour + 2 tablespoons

Topping

1 cup sugar
2 tablespoons cinnamon
Preheat oven to 350 degrees.

DIRECTIONS

In a large bowl, combine everything except the flour, and beat until smooth.

Add the flour and mix until combined.
Pipe batter into mini-doughnut pans. Fill them just a little over half full. Aren’t they super cute?
Bake at 350 degrees for about 12 minutes, until a toothpick comes out clean. When touched they should spring back and not be doughy. The smell is heavenly!
Remove from pans and place on baking rack to cool. While still warm, but not hot, place a few at a time in bowl with your cinnamon & sugar mixture and coat lightly. Yes this step is needed. I saw lots of recipes with a more refined topping and drizzle, this is the best option. It give a little sweetness and changes the entire flavor in lieu of leaving the doughnut plain. Try it, eat one without first, then toss in this mixture…YOU’LL SEE!!
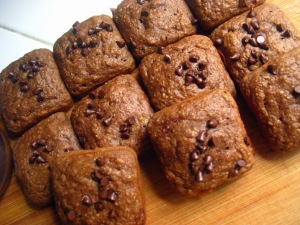
Makes approximate 4 dozen depending on size AND how quickly you devour the baby doughnuts before anyone notices because they are school and work…wait what?
A little plug for my favorite coffee maker Keurig my hubby Mr. Sweet Heat Chefs, my mom and mom-in law bought me for my birthday this year. This Coconut Mocha coffee is the BOMB with these doughnuts! WINK
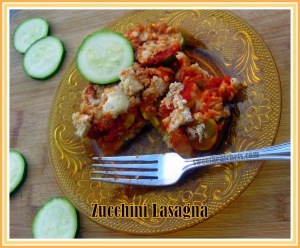
Alternative ideas for the doughnuts are:
Add mini chocolate chips on top of batter after filling and drizzle with melted chocolate chips for topping
Add 1/2 teaspoon chopped pecans/walnuts to batter and drizzle with this:
Glaze: 1 cup powdered sugar, 1 tablespoon milk, 1/2 teaspoon vanilla (mix together until sugar is dissolved) and top that with crushed pecans/walnuts.

Woah, wait a minute…SECOND RECIPE DOUBLE

TAKE FOR FRIDAY MADNESS!!
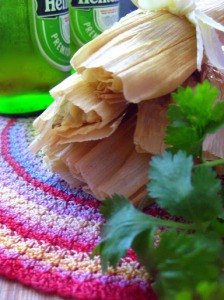
Mini Chocolate Espresso Doughnuts

INGREDIENTS

¾ cup all-purpose flour
¼ cup unsweetened cocoa powder
⅓ cup granulated sugar
1 tsp baking powder
¼ tsp salt
2 tbsp plain yogurt
¼ cup milk
1 egg
3 tbsp vegetable oil
¼ tsp vanilla extract
2 tblsp instant espresso, in hot water

DIRECTIONS
  1. Preheat oven to 375 degrees F.
  2. Whisk dry ingredients together in a mixing bowl and wet ingredients in another mixing bowl.
  3. Add dry ingredients to wet slowly stirring to incorporate evenly.
  4. Fill doughnut pan with batter almost full and not overflowing
  5. Bake for about 7 minutes. When touched they should spring back and not be doughy.
  6. Melt 1/4 cup chocolate chips in a baggie (30 seconds) with 1 teaspoon of shortening and 1/2 teaspoon vanilla extract. OPTIONAL: You could add espresso in with the chocolate chips while melting. Just make sure you dissolve it in hot water first.
  7. Cut tip off end of baggie and drizzle over doughnuts

Gingerbread Pumpkin Cheesecake

Cheesecake you might as well know now…is a serious weakness for me. This time of year with pumpkin all around, I decided to add it to my cheesecake recipe. Talk about some exquisite delectability! This cheesecake has a really creamy center with a semi sweet gingerbread crust and is topped with a tangy sour cream yogurt mixture that rounds out this delicious dessert that is great for after your Thanksgiving meal or even a date night for 2 with a glass of Port. *Thank you to a reader who found some errors, this recipe has been updated!*
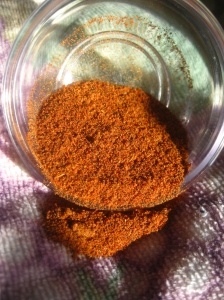
Foodie Friends Friday

INGREDIENTS

1.5 cups gingersnaps or gingerbread cookies, crumbs
3 tablespoons butter, melted
2.5 packages cream cheese, softened
1 can (15 oz) pumpkin pie mixture (or canned pumpkin if you prefer, just add 1 tablespoon of pumpkin pie spice to it)
1/2 cup of granulated sugar if using pumpkin pie; if using canned pumpkin use 1 cup sugar (can also use brown sugar)
1 egg, beaten
1 teaspoon vanilla
1/2 cup plain greek yogurt
1/2 cup sour cream
2 teaspoons sugar

DIRECTIONS

  1. Place cookies in food processor and pulverized until fine consistency.
  2. Pre-heat oven to 350 degrees F.
  3. Melt butter and add to cookie crumbs, place in a pie dish or tart pan and press firmly covering the bottom of the pan.
  4. Bake in oven for 7 minutes.
  5. In a bowl, cream together; cream cheese, vanilla, and pumpkin. Add beaten egg and continue mixing for 1 minute on low speed.
  6. Pour mixture into tart pan or pie dish and bake for 45-50 minutes, until no longer “jiggly” or until a toothpick inserted comes out clean.

  1. In a small bowl combine yogurt, sour cream and sugar, stir until well combined.
  2. Pour over top of cheesecake and return to oven for 5 minutes.

Let cool for about 20 minutes and begin to loosen edges with knife. Continue to let cool for 30 more minutes. Refrigerate for a minimum of 2 hours before serving.

Featured at: Foodie Friends Friday!

Banana Pumpkin Pie Ice Cream – Gluten & Dairy Free, Indulge!

Day #3 of All things pumpkin continue here at Sweet Heat Chefs. I know a lot of families have issues with allergies and slowly there are recipes surfacing for alternative options. It is nice to have a quick, healthy alternative to a store purchased ice cream. This is so easy, it is a shame to even call it a recipe, but not many people realize ice cream DOES NOT, I repeat, DOES NOT have to go into an ice cream maker, nor does it have to contain dairy. TWO INGREDIENTS people 2, AND 3, if you are like me and have to have chocolate atop everything! Eating healthier is not hard to do and takes little to no effort for this recipe. 

Kids LOVE to help with this. Get a plastic knife and have them peel and slice up the bananas, then place in a zip-lock and put in freezer! They have just made 1/2 of the ice cream! When kids are a part of what you are doing in the kitchen, they are that much more likely to eat what has been made. Even if it is only a bite, that is a triumph!

Makes 4 servings using 2 scoops per serving

INGREDIENTS

3 Bananas, sliced and frozen
2 Tbsp. pumpkin pie from a can
dark chocolate chips, optional

DIRECTIONS

Freeze banana slices for about 1 hour

Remove from freezer and place in food processor with pumpkin pie. Mix until thoroughly blended.

Place in a freezer safe container and re-freeze for another 1-3 hours until desired consistency is achieved  I like mine on the softer side, so mine was in there for 1.5 hours.

Scoop into a bowl and sprinkle a few dark chocolate chips on top!

2 YEAR-OLD KID TESTED AND APPROVED!

Featured at: Foodie Friends Friday


Swirly Pumpkin Brownies

Day #2 of all things pumpkin at Sweet Heat Chefs!

Who doesn’t love brownies? My daughter, Jasmine’s favorite thing to make are brownies, usually from a box though. I decided to try my hand at home-made brownies and well with FALL officially here and all, why not mess with the best of both worlds and add some pumpkin to the mix?! The result is a dense chocolatey ooey gooey creamy pumpkin mass of goodness, yes I said all that! You won’t believe me until you try the ridiculously rich brownies you are about to see here!

INGREDIENTS

1/2 cup (1 stick) butter
1 cup dark chocolate chips
4 large eggs
1 1/2 cups sugar
2 tsp. vanilla
2 cups all-purpose flour
1 tsp. baking powder
1/2 tsp. salt
1 cup pumpkin puree
3 Tbsp. coconut oil
1 tsp. cinnamon
1/4 tsp. ground nutmeg

DIRECTIONS

  • Preheat the oven to 350 degrees F. and spray a 9″x 9″ cake pan with nonstick spray.
  • In a small saucepan, melt the butter over medium heat. Add the chocolate and remove from heat. Let sit for a few minutes, then stir until smooth.
  • In a large bowl add eggs, sugar and vanilla and in a smaller bowl add flour, baking powder and salt.
  • In the large bowl beat mixture for 3-4 minutes, until thick.

Add the flour, baking powder and salt mixture slowly and beat just until combined.

  • Take about 2 cups of the batter into the smaller bowl that had the dry ingredients and add in the pumpkin, oil, cinnamon and nutmeg and stir until well combined.

Dump melted chocolate into the remaining batter (without pumpkin) and spread a little more than half of the batter into the prepared pan.


Top the brownie mixture with 3/4 of the pumpkin batter and smooth over top.

Top pumpkin mixture with remainder of brownie batter

Using a tablespoon, dollop 9 spoonfuls of  remaining pumpkin mixture on top of brownies.

Using a skewer or knife swirl the pumpkin dollops through the first layer of brownie batter creating a swirly/marbled effect.

Bake for 40 minutes, until just set and starting to pull away from the sides of the pan. Makes 16 brownies.

Featured on Foodie Friends Friday!

Dark Chocolate Covered Pumpkin Truffles

Kicking off Day #1 of All things pumpkin at Sweet Heat Chefs

Fall is officially here…YAY! I love this time of year, the weather, the brightly colored trees, the crispness of the morning air, and all the pumpkins and colors around the city. Pumpkin recipes are in full swing out on the internet and int he culinary world. I am happy to contribute to the “madness”.

I feel like I repeat myself a lot when I say this recipe is quick and easy! But I guess that is because I am always looking for quick ways to get food finished for the fam. Sure some of my recipes are more complex, but for the most part they are everyday recipes anyone can do and quick for everyone who is short on time, there are a lot of us out there after all!

Foodie Friends Friday

INGREDIENTS

1/4 cup pumpkin puree
1/4 cup powdered sugar
1/2 cup cream cheese, softened
1/2 teaspoon pumpkin pie spice
1/2 teaspoon vanilla extract
1 cup graham crackers, crushed

1 bag dark chocolate chips, melted

Beat first 5 ingredients in a bowl until well combined. 

Add graham crackers and stir well.

Chill for 30-40 minutes and roll into balls.

Place in the freezer for about 30 minutes and cover with melted dark chocolate.

Store in refrigerator or freezer until ready to eat! they only take about 5 minutes to un-thaw enough to eat. Or if you are like me, I just eat it frozen. The creaminess of the pumpkin melts in your mouth while the cold dark chocolate is frozen and has that deep sweetness to balance it all out.

shown on Foodie Friends Friday!

Carbless & Gluten Free Turkey Burger

Carb-less Turkey Burger - sweetheatchefs

I definitely enjoy my carbs, but sometimes when eating healthy limiting carbs are a great way to lose weight. I can’t in any way shape or form eliminate foods I love to eat entirely. As I have said before everything in moderation. This burger not only tastes good, but is low in fat, calories and no carbs. Very figure friendly and you can enjoy your meal without the guilt 😀

INGREDIENTS

  • 1/2 pound ground turkey meat
  • 1/4 cup baby spinach, washed and diced
  • 1 clove of garlic, minced
  • 2 tbs green onion, washed and diced
  • 1 tsp Worcestershire sauce
  • 1 tsp powdered ranch mix
  • 1 egg white
  • 1 oz pepper jack cheese
  • salt/pepper to taste
  • Coconut oil for cooking

DIRECTIONS

  1. Mix all ingredients together except cheese.
  2. Divide mixture into 4 equal parts and create a ball.
  3. Add a piece of pepper jack inside and form meat mixture around it creating a burger patty. Continue with the rest of the mixture.
  4. Pan fry with 1 tsp coconut oil until cooked through. I served mine with 1/2 slice of pepper jack cheese on top and 2 slices of avocado. 

Calories for 1 burger + avocado = 105 calories and 5.5 grams of fat!

I store the other burgers in the freezer in an airtight container until ready to cook!

Week 3 Healthy Eating

Week 3

Week 3 brought out the BEAST in me 😀

I think this was one of the best feeling weeks yet. I can tell a difference in how some clothes fit, heck I even found a pair of capri jeans that fit and I don’t think I ever wore them to begin with! My shin splints are near gone and I can pick up the pace when I walk and I can alternate some running in. I feel great!

One of my staple foods this week was this Carb-less Turkey Burger! I am all for carbs, but when counting calories, you have to be careful where you use them. So for this burger I chose to eat it without, and it was just as good 😀 Hidden inside is a small piece of pepper jack cheese waiting to be let out!

Carb-less Turkey Burger

  • 1/2 pound ground turkey meat
  • 1/4 cup baby spinach, washed and diced
  • 1 clove of garlic, minced
  • 2 tbs green onion, washed and diced
  • 1 tsp Worcestershire sauce
  • 1 tsp powdered ranch mix
  • 1 egg white
  • 1 oz pepper jack cheese
  • salt/pepper to taste
  • Coconut oil for cooking

Carb-less Turkey Burger - sweetheatchefs

Mix all ingredients together except cheese. Divide mixture into 4 equal parts and create a ball. Add a piece of pepper jack inside and form meat mixture around it creating a burger patty. Continue with the rest of the mixture. Pan fry with 1 tsp coconut oil until cooked through. I served mine with 1/2 slice of pepper jack cheese on top and 2 slices of avocado. Calories for 1 burger + avocado = 105 calories and 5.5 grams of fat! I store the other burgers in the freezer in an airtight container until ready to cook!

For lunches I found a quick and easy soup. I don’t like store canned soup, but I broke down and tried a few and liked them. My favorite was the Creamy Tomato Basil by Progresso. High in fiber and only 100 calories per 8 oz. I just heat it up and add 1/4 cup of Trader Joe’s Brown Rice Medley and I have a full meal that fills up my belly! This soup has been a staple lunch all week!

Motivating music for the week:

Kelly Clarkson: Stronger

My workout regimen has changed from walking & running 1.8 miles to 2.5 miles twice a day. Some days I struggle to get it done, I have a 2 year old that I have to bring a long and pushing his weight (30 pounds) plus the car stroller (10 pounds) is hard. I think of it as resistance training! hahaha When my other kids get home I have them watch him so I can do my second run alone and it is so much better. But we can’t always have things nice and tidy like that so I do what I have to, to get my time in.

This week I was nervous to get on the scale, yes I knew I had lost weight because those pants I tried on fit, but I just lost 4 pounds last week and was unsure if I could loose more again. To my surprise…I lost 4 more pounds!!!! OMG! I stared at the scale, got off, and re-weighed myself! Yep, sure enough, 4 pounds! WOO-HOO! That brings my total to MINUS 10 pounds from this bod! I am super stoked. 

i can and i will

~~~~~~~~~~~~~~~~~~~~~~~~~~~~~~~~~~~~~~~~~~~~~~~~~~~~~~~~~~~~~~~~~~~~~~~~~~~~~~~~~~~~~

Missed a week? 

You might also like these healthy recipes from Sweet Heat Chefs:

Mocha Cappuccino Banana Bread Bites

Coconut Strawberry Cake Cocktail

Zucchini Lasagna