Cranberry Swirl Cheesecake – Perfect for the holidays!

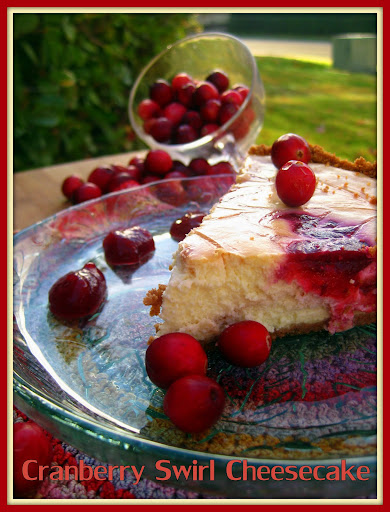
Have a holly jolly Christmas, it’s the best time of the year….Oh sorry I have these Christmas jingles in my head  this time of year and yes I know it isn’t even Thanksgiving yet. 😀  I’m hopeless when this time of year comes around! Just imagine your friends and families face when you break out this beauty for desert! I think this is truly one of the best cheesecakes I have ever had.

As you know I am not the best baker around, so when I make a cheesecake that comes out looking at gorgeous as this one..I am a happy camper! You know what it means? It means YOU can do this too!! LOL

My mom gave me a ton of fresh cranberries and I was trying to figure out what the heck to do with them, when of course cheesecake comes to mind. The cinnamony chocolatey graham cracker crust paired with the creamy cheesecake and tartness of cranberries is like a bite of heaven in each mouthful. The cranberry compote is a MUST to save even after the cheesecake is gone. It is great on crackers with a sharp cheddar cheese or to add into your mixed cocktails! YUM

Cranberry Compote:

  • 2 cups of fresh or frozen cranberries
  • 2/3 cup granulated white sugar
  • 2/3 cup orange juice
  • 1/4 tsp nutmeg, ground
  • 1/2 tsp cinnamon, ground
  • zest of one lemon or orange
  • 4 tsp vanilla

Graham Cracker Crust:

  • 2 3/4 cups of graham crackers
  • 1 tsp cinnamon
  • 1 tablespoon unsweetened Cocoa powder
  • 2 tablespoons granulated white sugar
  • 1/2 cup unsalted butter, melted

Cheesecake Filling:

  • 4 – 8 ounces packages cream cheese, room temperature (I used 2 full fat and 2 reduced fat cream cheese and this is crazy rich)
  • 1 cup granulated white sugar
  • 1 cup sour cream
  • 1/2 cup whipping cream or half and half
  • 1 tablespoon vanilla
  • 4 large eggs, room temperature
  • 1 tsp pure vanilla extract
  • cranberry compote

Make cranberry compote:
Combine all ingredients except vanilla in large saucepan. Cook over medium high heat until mixture thickens, stirring occasionally, about 5-10 minutes. Cool slightly. Transfer to food processor and add vanilla. Puree until smooth. Strain into a bowl and cover  Refrigerate at least 6 hours or freeze for 3.

Make crust:
Spray 10-inch-diameter Springform pan (I used 2 pie dishes) with nonstick spray. If using a Springform pan, wrap outside of pan with 2 layers of heavy-duty foil. Blend all ingredients except butter in food processor. Add butter; blend until moist clumps form. Press crumb mixture onto bottom and up sides of pan. Chill crust while preparing filling.

Make filling:
Position rack in center of oven and preheat to 350°F. Using electric mixer, beat cream cheese in large bowl until fluffy. Beat in sugar. Beat in eggs 1 at a time. Mix in sour cream, half and half and vanilla.

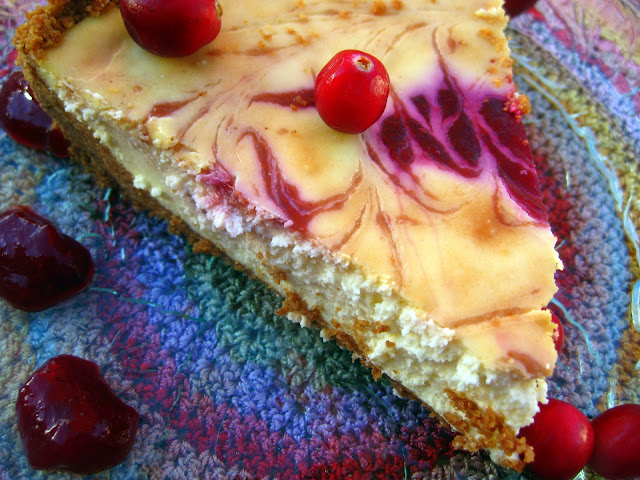
Transfer 1/3 of filling to prepared crust. Dollop 1/3 of cranberry puree atop filling. Repeat layering of filling and puree 2 more times. Using knife, skewer or toothpick, swirl puree through filling, creating marbled design.

Place springform pan or pie dish in large baking dish or roasting pan. Pour enough hot water into roasting pan or baking dish to come halfway up sides of springform pan or pie dish. Bake until cheesecake puffs around edges, about 1 hour 15 minutes. Turn off oven. Let cake stand in oven 1 hour, leaving oven door ajar.

If using  springform pan: Transfer cake to rack. Run knife around pan sides to loosen cake. Cool completely. Remove foil from pan sides. Cover cake and chill overnight. (Can be made 2 days ahead. Keep refrigerated.) Remove pan sides.

If using a pie dish: Cover with plastic wrap and place in refrigerator for 6 hours or 3 hours in freezer.

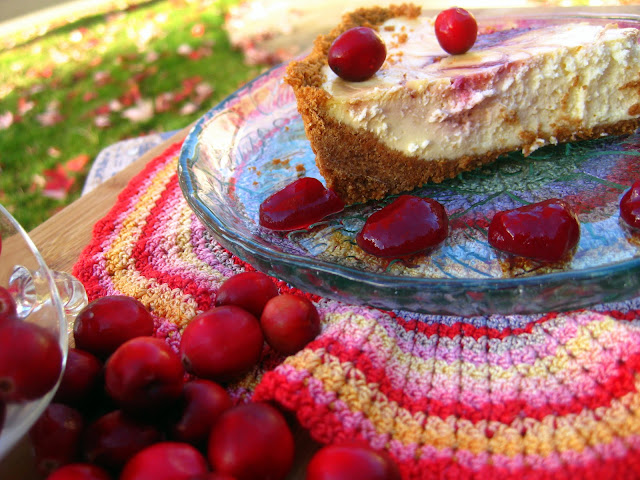
Serve cake with Cranberry Compote either on top or on the side for dipping each tart bite into!

This recipe is was shared over at:

Thursday’s Treasures

Wicked Good Wednesdays

Double Espresso Chocolate Chip Kahlua Shortbread Cookies

Picture

Say that 3 times fast…go ahead I dare you!

So one thing for sure, my family loves sugar! I love to give them homemade goodies instead of store bought so I know what they are and are not getting. I also love getting them in the kitchen as you know me by now and doing so at a young age is the best! For this recipe I got the help from my youngest child, Dylan. A 2 year old spunky lil guy that never slows down, not even when he sleeps. I figured a little baking TLC was in order for him…along with a little sampling of the mixing beaters. No worries, the batch he is sampling had no alcohol in it! 😀 All I know it is only takes a little espresso powder and chocolate to send the aromatics through the house to get my other 4 kids ages; 14, 13, 12 and 10 year old running to the kitchen asking what is cooking and when can they taste it. If it were only this easy to get them to do their chores or homework, I’d be a millionaire! Be forwarned on these delicate cookies, they ARE addicting. One must refrain from eating too many or bellah aches will ensue! Just ask my kids! LOL

…adapted from Smitten Kitchen
 INGREDIENTS 
2 tbsp instant espresso powder 
2 tbsp boiling water
2 tbsp Kahlua
8 oz. unsalted butter, room temperature
2/3 cup confectioners’ sugar
1/2 tsp almond extract
2 cups all-purpose flour
6 oz. semisweet chocolate chips coarsely chopped
confectioners’ sugar, for dusting (optional)

DIRECTIONS

  1. Dissolve espresso powder in boiling water. Set aside to cool to tepid. 
  2. Cream butter and powdered sugar together on medium speed for about 2 minutes, or until the mixture is very smooth. Beat in almond extract, espresso, and Kahlua on low until well combined. 
  3. Find an extremely cute helper (see my pic) and have them slowly add the flour to your mixture while you mix on low speed until just combined. Don’t work the dough much once the flour is incorporated. 
  4. Fold in the chopped chocolate chips with a sturdy rubber spatula. 
  5. Using the spatula, transfer dough to a gallon-size zip-loc bag. 
  6. Place bag on a flat surface, leaving the top open, and roll the dough into a 9 x 10 1/2 inch rectangle that’s 1/4 inch thick. As you roll, turn the bag occasionally and lift the plastic from the dough so it doesn’t cause creases. When you get the right size and thickness, seal the bag, pressing out as much air as possible, and refrigerate the dough for at least 2 hours, or for up to 2 days. 
  7. Preheat the oven to 325°F. Put the plastic bag on a cutting board and slit it open. Turn the firm dough out onto the board and using a sharp knife, cut the dough into squares. 
  8. Transfer the squares to the baking sheets and carefully prick each one twice with a fork. ( I forgot this step and they turned out fine)
  9. Bake for 18 to 20 minutes, rotating the sheets from top to bottom ½ way through the cooking time. 
  10. Transfer the cookies to a cooling rack after a few minutes of cooling on pan. 
  11. If you’d desire, dust the cookies with confectioners’ sugar while they are still hot (I didn’t do this). 
  12. Cool the cookies to room temperature before serving 
  13. (if you can stand it, because the whole house smells delish and everyone comes running from wherever they are to see what you are cooking!). 
  14. Makes about 3 dozen. (mine only made 20 cookies the way I cut them, next time double batch is in order)

Picture

Picture

Picture

Picture

Picture

Picture

Picture

Picture

Picture

Picture

Picture

Picture

This recipe is being show on Thursday Treasures!!