Focaccia – Don’t miss this!

I have made this recipe a few times now and each time it just gets better since I get more comfortable with the whole dough making business. A baker, I AM NOT, N-K?! So..if I can do this ANYONE, can do this. I follow this dough recipe to the “T” and then add the other stuff to suit mine and my families taste. I found this recipe at this amazing blog…ready for the name?….The Barefoot Kitchen Witch! Love her name, love her blog, check her out and you’ll see why. While you are there tell her we sent ya over 😀

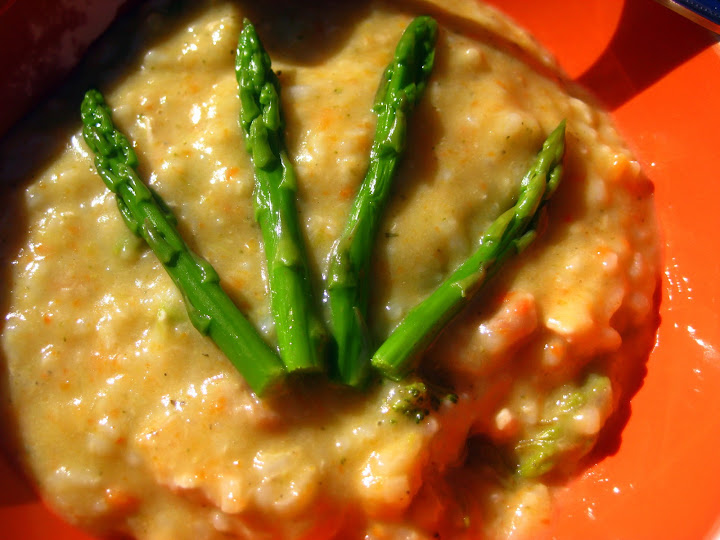
Ok, back to the Focaccia yumminess. I could eat these things as a meal in-and-of-itself, however to save face and not look like a total carb overload eater, I make this with either a veggie packed salad or delicious soup, like my Creamy Chicken Veggie & Rice Soup.

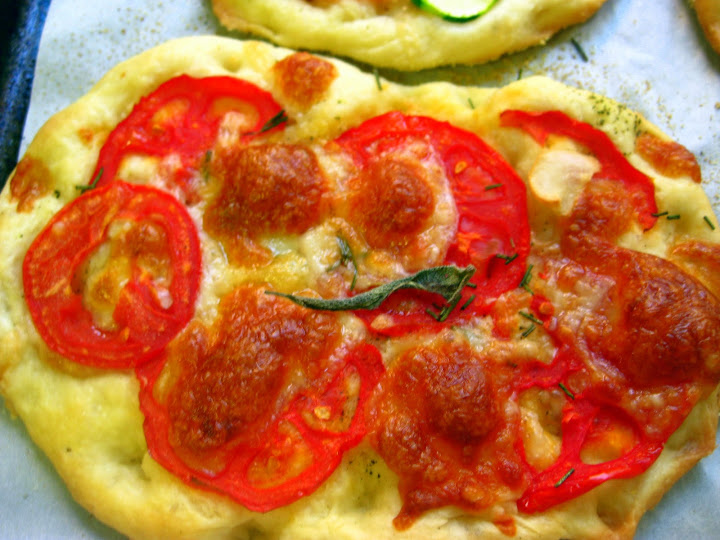
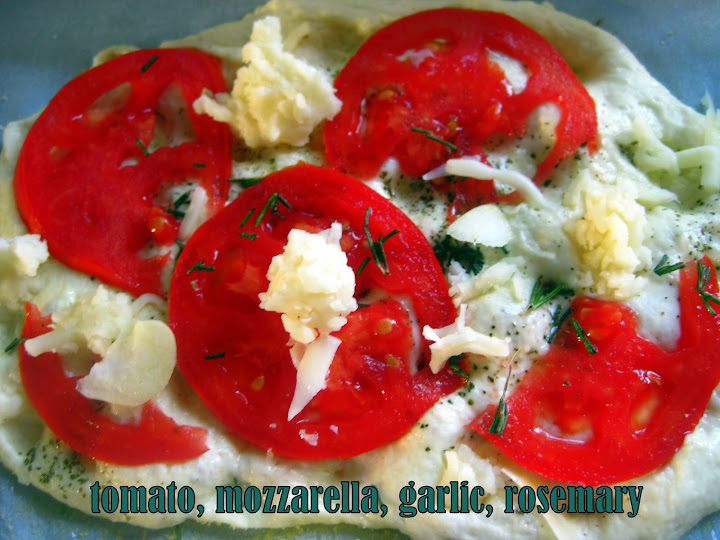
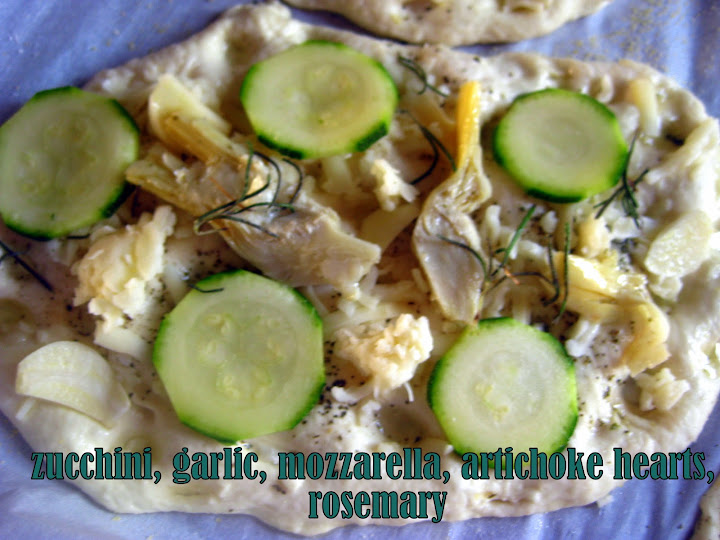
Let your heart and tummy guide you through this process of what to top it with. Your options are as vast as your imagination on this one, that is half the fun coming up with toppings and combinations. Just imagine yourself biting into a light warm crispy and soft doughy bite filled with your favorite toppings….now your talking!

Take your time with the recipe, nurture it, follow it and enjoy the outcome when finished. I will guide you through a step by step process that will ensure complete success!

Things to know about this recipe:

  1. Kids love helping with this; let them dimple the dough, let them pick their own ingredients and let them top their own with what they picked!
  2. The dough is sticky; keep flour out until  you are done with all the handling of it
  3. Small kitchen? Make sure you have room for 2 sheet pans and a cutting board and a floured surface all at once.
  4. Use a kitchen aid (or whatever brand) stand up mixer for this, a hand held mixer will not work.
  5. If you want smaller portions, I have made this recipe into 18 focaccias, it is possible.
  6. Pre cut your parchment paper and set out on sheet pans ahead of time or during the rising process.

INGREDIENTS:

  • 2  1/2 tsp (1 pkg) active dry yeast or 1 small cake (18 grams) fresh yeast
  • 1  cup warm water
  • 1/2 cup milk (warmed in microwave for about 1 minute)
  • 2 T olive oil
  • 2 1/2 T lard, at room temperature (I used vegetable shortening)
  • 3 1/4 cups unbleached all-purpose flour
  • 1 1/2 tsp salt
  • Olive oil for brushing the tops
  • Salt for sprinkling the tops
  • Cornmeal for dusting the bottoms before baking
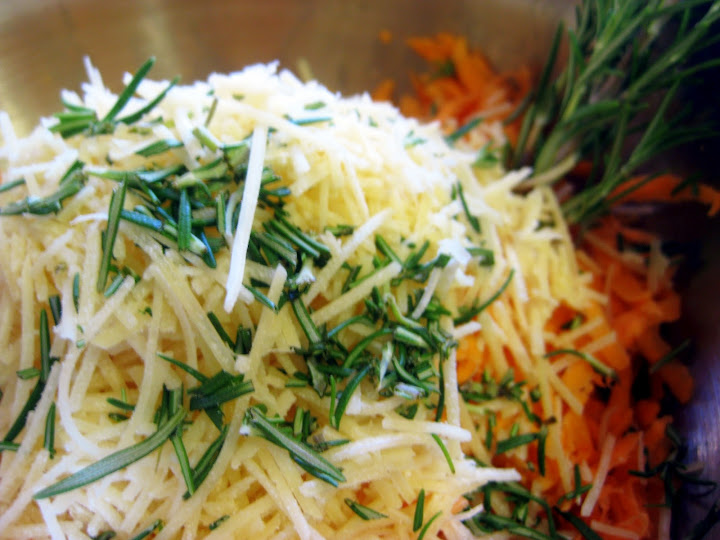
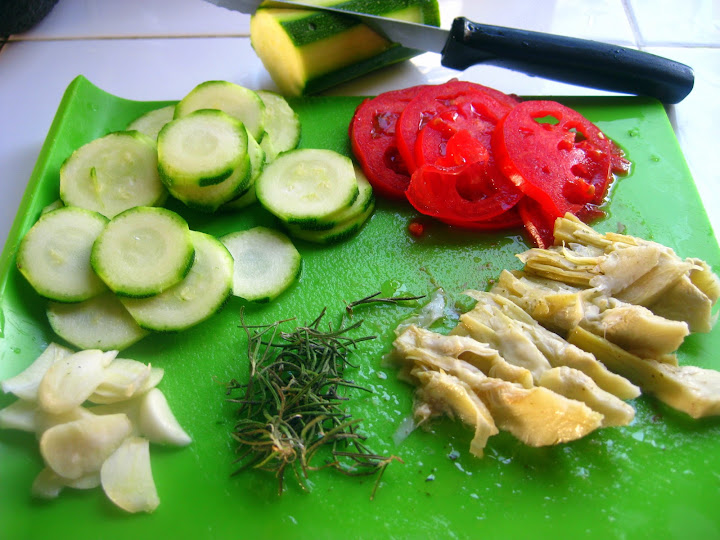
  • Toppings – thinly sliced vegetables, grilled or sautéed to intensify the flavor.  Garlic, Cheeses, Whatever sounds good.

DIRECTIONS:

Stir the yeast, water and milk in the bowl of a stand mixer; let stand until creamy, 10 minutes. 

Stir in the oil, and lard with the paddle. 

Add the flour and mix at low speed about 2 minutes. 

Change to the dough hook and knead 4 to 5 minutes. 

Add the salt and knead another 1 to 2 minutes.  The dough will climb up the collar of the hook, and you will have to stop several times to push it down.  The dough should be smooth, velvety, and softer than bread dough but firmer than croissant dough.
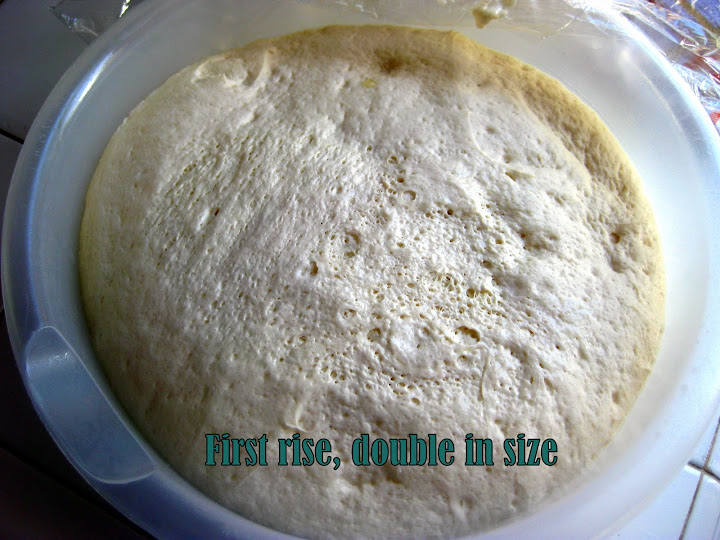
First Rise:

Place the dough in a lightly oiled bowl, cover tightly with plastic wrap (don’t forget to spray the plastic wrap), and let rise until doubled, 2 hours.

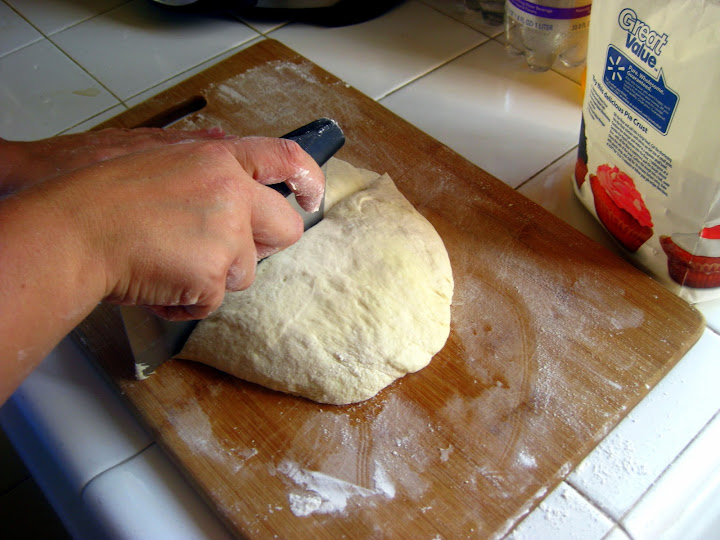
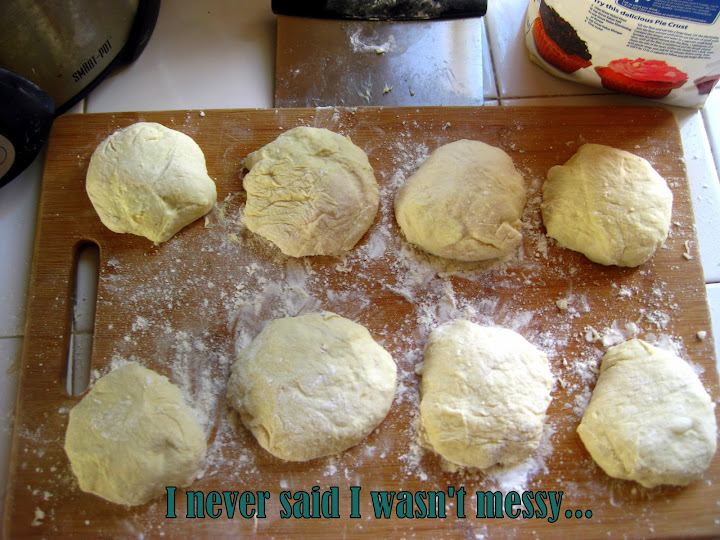
Cut the dough into 6 pieces (or however many you want to make, remember I made mine into 18 once) on a lightly floured surface and shape into balls. Let rest under a towel for 15 minutes.

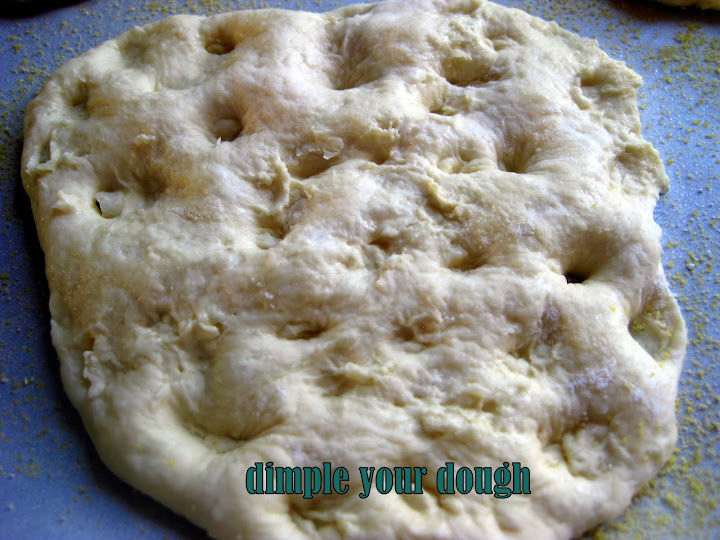
Dimple the dough balls (remember kids love this part, no matter what age!), spreading each into a circle, and let rest under a towel another 15 minutes. 

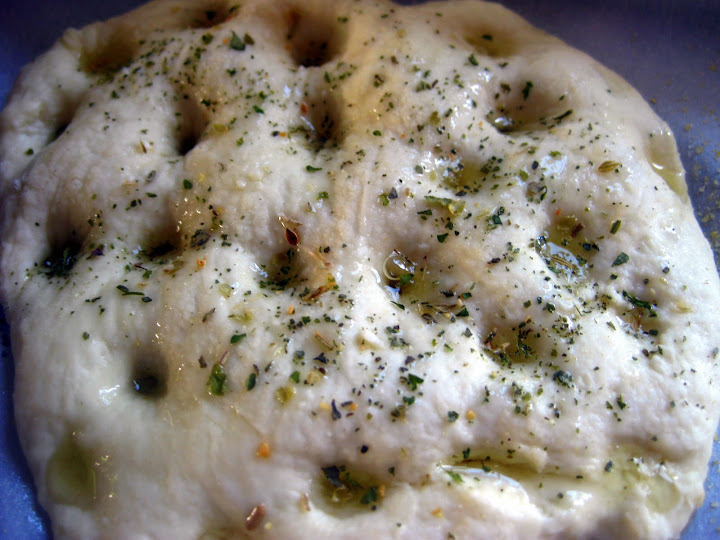
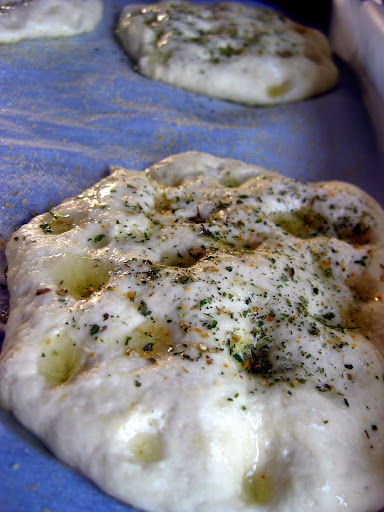
Dimple tops with oil and sprinkle lightly with salt alone or your seasoning. (Here I used basil and salt) Place the dough circles on parchment-lined or oiled baking sheets or baker’s peels sprinkled with cornmeal.

Second Rise:

Cover with a towel and let rise until doubled, about 1 hour.

Dimple the dough again with your fingertips, stretching it as you go.  Sprinkle with salt and brush with oil. 

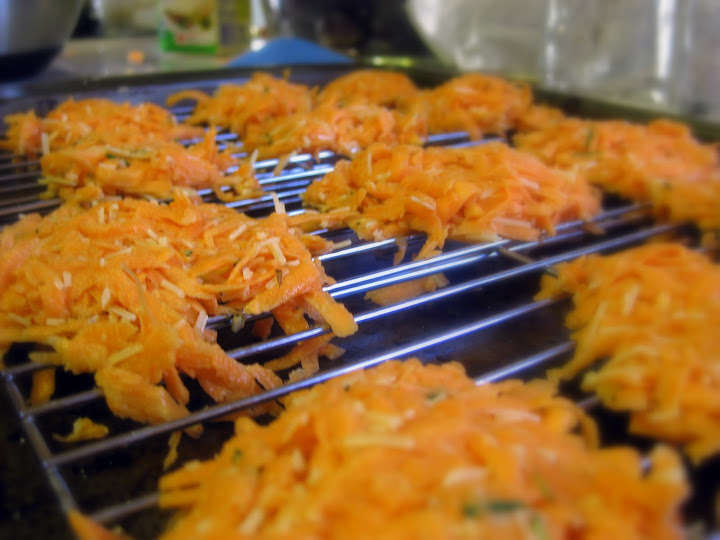
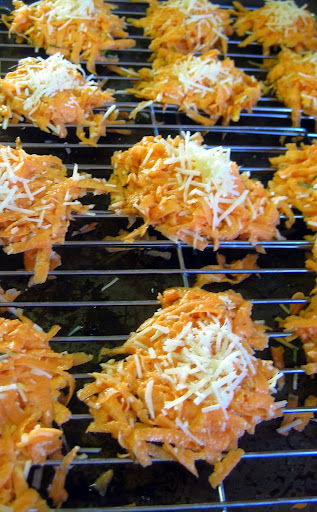
Mist water very lightly over the top to cover and trap the oil and then cover with the toppings of your choice.

Preheat the oven to 425 degrees F. at least 20 minutes before you plan to bake.  Bake 18 to 20 minutes.  Immediately brush the surfaces with oil.  Serve hot, or cool on racks to room temperature.

This recipe is being shown over at Thursday’s Treasures!!

Creamy Chicken Veggie and Rice Soup – Warm the Heart, Warm the Soul!

Don’t let the sunny picture fool you…well ok I’m not even going to go there. Living in California sure its fun in the sun. But when my favorite time of year comes, FALL, I am saddened that the weather is not cool enough to reflect that. I love making soup and bread and warm you up goodies, but when the temperature reaches 80 in November, well sometimes it just isn’t that easy to get my family to eat hot soup! Luckily in between these warm days are a few hit or miss cool and even rainy ones. Leaving me to explore the world of Fall cooking.

Today I made a creamy, warm, stick to your ribs with a hearty healthy kick soup. This soup is almost too hearty to have a second bowl…I did say ALMOST! Filled with vegetables for great nutrition and a little creaminess to round it out, you will surely want to accompany it with a carb filled side! For me I have been making this Focaccia Bread that is just delicious and pairs perfectly with any soup or is fabulous on its own. Take a weekend, get your ingredients together you will want to make both of these delights this weekend!

INGREDIENTS

  • 8 c. Low-Sodium Chicken Broth
  • 2 Stalks Celery, thinly sliced
  • 1 Red  Onion, diced
  • 1/2 c. Carrots, I used the shredded ones
  • 1 head of broccoli, washed and cut up in small pieces (reserve 1/2 of the florets)
  • 1 bunch of Asparagus, washed and trimmed; reserve the stems
  • 2 cloves Garlic, minced
  • 1 tsp. Dried Oregano
  • Extra Virgin Olive Oil
  • 2 tbsp. All Purpose Flour
  • 3/4 c. Cream of Chicken Soup (could substitute in heavy cream, I just had this left over so I wanted to use it)
  • 1/4 c. 2% Milk
  • 1/2 cup sharp cheddar cheese (optional)
  • Kosher Salt, to taste
  • 1/4 tsp. Fresh Ground Pepper
  • 3 cooked Chicken Breasts, diced

DIRECTIONS:

In a large stockpot, drizzle olive oil on the bottom and add your diced chicken. Season with salt/pepper and cook until browned and cooked through.

Remove from pot and add 1 tbs of olive oil, add; carrots, celery, onion, broccoli, stems of your asparagus and saute for 5 minutes.

*NOTE* Using the stems to the asparagus:

  1. Cut the very bottoms off, discard and do not use
  2. Bend the bottom of one the asparagus spears until it snaps, this will be your guide for cutting the rest of the bunch
  3. Cut the remaining spears and cut the stems into 1/2″ dices, add these to your stockpot.

Add flour and saute for 2 minutes to get the flour taste out of it.

Add chicken broth slowly stirring as you add to avoid clumps. Once all broth is incorporated, bring to a boil and then reduce heat to just at a boil for about 20 minutes, or until all veggies are super soft.

Remove from heat and using an immersion blender (these things ROCK!) start blending until you get the desired consistency you like.

Return pot to stove and reduce heat to low. Add rice stir to combine.

Take a microwave safe bowl and add your milk and cream of chicken soup and combine. Add cheese if using.

Add this to your stockpot along with your reserved chicken and simmer for about 30 minutes or until the rice is cooked through.

While simmering place your asparagus spears & broccoli florets in a microwave safe bowl and add about 2 tbs water. Cover with Saran wrap and cook for 1 minute. Immediately add to an ice bath to stop the cooking process.

When soup is finished garnish with a few of your steamed broccoli florets and asparagus spears.

Broccoflower Fritters

Normally when you hear the word “fritter” you, or at least I, think of a nice warm gooey apple fritter! Sadly not much nutrients in one of those, but in my veggie fritter, you will get a ton of them. From cancer fighting agents to helping fight those nasty cold buggies searching your immune system for a place to live. There is no end to the wonderful benefits of broccoli. You can make this recipe with just broccoli, or just cauliflower, I used a combination of broccoli and a broccoflower I found at the store that looked beautiful. This cross-breed between broccoli and cauliflower is it’s sweeter counterpart. You can eat it raw as is, or cook how you would broccoli or cauliflower. I love the taste of both so I decided to have the best of both worlds 😀

The crispy exterior of these fritters mixed with the tender interior with the nutty parmesan cheese and rosemary flavors really blend well together. Bringing a well-rounded side dish to your meal or just to eat as a snack.

INGREDIENTS

2 eggs, beaten
1/2 cup parmesan cheese
1/4 cup cornmeal
2 stalks rosemary, toasted and chopped
1/2 c flour
2 stalks brocoli
1/2 broccoflower
1/4 tsp red pepper flakes
salt/pepper to taste
rosemary oil to cook in

DIRECTIONS

Steam your broccoli or broccoflower until fork tender.

In a medium sized bowl combine; eggs, parmesan cheese, cornmeal, rosemary, flour, red pepper flakes, salt/pepper (if using).

Add steamed broccoli or broccoflower and mash away. Using a potato masher works wonders for this process. You don’t want the consistency of mashed potatoes, you want a chunkier mixture with pieces of the vegetable throughout. 

In a skillet heat 3 tablespoons of extra virgin olive oil and 1 sprig of rosemary. Heat on medium low to infuse the oil with the rosemary flavors. About 5-7 minutes.

Using a tablespoon, scoop 1 tablespoon of fritter batter into the hot rosemary oil and flatten with spatula.

Cook until brown on edges about 3-4 minutes, then flip over and cook an additional 3-4 minutes.

Remove from oil and place on paper towel and give a light dusting of parmesean cheese & salt (optional). I omit the salt from the recipe and use it here instead.

Recipe makes approximately 15 fritters depending on the size you make them. They can be stored in an airtight ziplock or container in fridge for 3-4 days and in the freezer for 2 weeks.

Best served warm.  If re-heating, warm oven to 375 degrees F. Take a cookie sheet with a wire rack and place on cookie sheet, place fritters on rack and bake for 20 minutes or until warmed through. 

Featured at: Foodie Friends Friday

Baked Cheesy Sweet Potato Cakes

INGREDIENTS

2 medium-sized sweet potatoes
1/2 cup liquid egg whites
1 cup grated Parmesan cheese
1 teaspoon rosemary, fresh and chopped
1/4 teaspoon pepper
1/4 teaspoon salt

If you are looking for a way t build muscle in your arm, try this recipe. NO JOKE grating these sweet potatoes with a grated is a great work out! I am always look for new ways to get my kiddos to eat veggies, if you follow my blog then you know this already, and if not then you probably are the same with your own kids unless you have UBER awesome kids that eat their veggies. I was blessed with 5 kids, but 5 kids that DON’T eat or like veggies! So….I came across this recipe that looked and sounded good. How can one go wrong with cheese anyway. Not just any cheese Parmesan cheese at that. Only 1 oz of this cheese and you are at 11 grams of protein and contain the bone building nutrients calcium and phosphorus. Combine that with the sweet potatoes Vitamin C content and I’ll take it! Now you aren’t going to tell the little kiddos how awesome this snack is, you just indulge them with the fact it is “cool” looking with the brightly orange color and tell them it is full of cheese. You can also talk them off the ledge by telling them this is a new Halloween recipe you are trying! That’s it, nothing more and they will be happy to try it and continue asking for more.

This baked sweet potato cake when you bite into it has a nice savory crisp to it, you immediately taste the nutty Parmesan cheese and then the rosemary hits your taste buds like a final explosion of flavor. I found this recipe from a sweet blog called Carrots and ‘N’ Cake. I didn’t really change the recipe too much it is that good! Here is all you need to know to get started!

Preheat oven to 425. Set a wire rack on top of a baking sheet. Spray rack with non-stick spray. Make sure you don’t skip this step or you will have this…

…and you will be trying to gnaw off the little bits of deliciousness while trying not to burn your mouth…wait what? No I didn’t do that! Ok, so back to our regularly scheduled programming, where was I…?

Peel sweet potatoes and shred them using a cheese grater.

Squeeze the moisture from the sweet potatoes. I used a kitchen towel and put 1 handful in the towel at a tie and gave it a twist until all potatoes were free of moisture.  The moisture keeps the crisps from getting crispy in the oven, so make sure you don’t skip this step.

Add Parmesan cheese

add egg whites

add rosemary, salt and pepper

Take a foil lined cookie sheet and spray with non stick cooking spray. Place 2 cooling racks on top (make sure they are sprayed unless you don’t mind gnawing). Take a scoop of the sweet potato mixture and create a pancake in the palm of your hand. Press firmly to create as flat of a pancake you can and place on rack. Repeat until  rack is full.

Top with a little pinch of shredded parmesan cheese and pop in the oven for 30 minutes or until crispy.

When you bite into the warm sweet potato crisp you immediately taste the rosemary and then the nutty flavor of the Parmesan hits you. It is a low-fat no guilt treat that is baked and you can feel good about eating more than one!

shown on Foodie Friends Friday!


Harvest Meatloaf Cups

INGREDIENTS
1 teaspoon olive oil
1/2 pound ground beef
1/2 pound ground pork
1/4 cup onion, finely chopped
2 cloves garlic, minced
1/2 teaspoon salt
1/8 teaspoon pepper
1 tablespoon Hot Sauce
1.5 tablespoons Dijon mustard
4 springs of fresh thyme
1/4 cup flat-leaf parsley, chopped
1/4 cup Panko breadcrumbs (or saltines)
1/8 cup milk
1 large egg
1 large carrot peeled and grated
1 large zucchini grated
1/2 cup sharp shredded cheddar cheese
1 puff pastry sheet, defrosted

DIRECTIONS

  1. Preheat oven to 400 degrees.
  2. Put olive oil into a large skillet and heat it up over medium heat. Add your onion, cook for 2-3 minutes, add garlic and cook until fragrant, another 30 seconds. Set it aside. Now turn the heat up to medium high, and add ground beef and pork. Cook until just about browned, set aside too cool.
  3. In a large bowl, combine cooled onion, garlic, ground beef and pork with all the rest of the ingredients from salt down to the 1/2 cup of shredded cheddar. You can use a spoon to combine everything, I use my hands, it mixes so much easier.
  4. Now take a muffin pan, grease it and set aside. *Don’t forget to grease the pan* Take your thawed puff pastry sheet cutting it in thirds length-wise along the folds. Cut those three long pieces into three smaller pieces in the opposite direction, you’ll end up with 9 pieces.
  5. Place each of those rectangles of pastry dough into the muffin tins, letting the corners hang over each tin. Now spoon about a tablespoon and a half of your meat mixture into each. Go back and continue to fill until the mixture is all set.
  6. Add a sprinkling of panko breadcrumbs and cheese to top.
  7. Pop into the oven and bake for 15-17 minutes until your pastry is nicely browned.
  8. Let cool for 1-2 minutes then loosen with a rubber tip spatula and remove from tins.

NOTES

**DON’T FORGET TO GREASE THE PAN**
I would add bacon pieces to the mixture next time


Picture

Picture

Picture

Picture

Parmesan Crusted Tilapia Salad & Poppy Seed Dressing

INGREDIENTS

2 – 3 oz tilapia fillets, de-boned
1/4 c. parmesan cheese
1/4 c. bread crumbs (I make them myself)
1 c. flour
1/4 c cornmeal
1 egg, beaten
salt/pepper to taste
1 tsp. italian seasonings 
Fresh sage leaves, removed from stem and whole
4 garlic cloves, skin removed and whole
1 Stalk asparagus, trimmed and cleaned
1 lemon
2 tbsp. poppy seeds
4 c. baby butter leaf lettuce and baby spinach, washed

DIRECTIONS

  1. In skillet drizzle 1-2 tbsp Olive Oil in pan, add 2 sage leaves and 2 garlic cloves.
  2. Heat until fragrant, just a few minutes. Remove garlic from pan and add asparagus.
  3. Cook asparagus until the desired tenderness is desired. I cook for approximately 5 minutes, tossing often in sage and garlic oil.
  4. While cooking asparagus, you will lay out 3 bowls or trays. (1) for flour, (1) egg, (1) bread crumbs. In the container for the flour add; flour, cornmeal, salt and pepper. Container for the bread crumbs add; bread crumbs, parmesan cheese, italian seasoning. Container for egg; beaten egg.
  5. Heat another skillet with 2 tbsp. olive oil. Add 2 sage leaves and 2 cloves garlic. Heat until fragrant and remove garlic cloves.
  6. Battering the fish is as follows:  dip in flour mixture, dip in  egg wash, dip in bread crumb mixture then add to preheated skillet
  7. Cook on medium heat until cooked thoroughly about 10 minutes total depending on thickness of fish, or until internal temperature reaches at least 150 degrees F.
  8. Drain on paper towel to get rid of any excess oil (there won’t be hardly any) set aside until ready to top salad.
  9. Meanwhile if asparagus is finished, drain on paper towel.
  10. On a plate add 2 c. of salad mixture. Top with fish, asparagus, lemon wedge, poppy seeds.

Keep in mind I am doing this out of my head on this one, if the measurements are not exact, I apologize.

DRESSING INGREDIENTS
1/4 c. olive oil
1/4 c. red wine vinegar
4 tbsp. sugar or honey
1-2 tsp. yellow mustard
juice of 1/2 lemon
dash of poppy seeds

DIRECTIONS

In bowl combine all ingredients and whisk together. Taste test to see if more vinegar, sugar or mustard is needed. Best if chilled for 30 minutes. Drizzle over salad as needed.

Picture

Picture

Picture

Picture