
The reality is we all have busy lives and when we want to please our kids or ourselves with a little Christmas Cheer and make the infamous Sugar Cookies during the holiday season, it is EASY to get wrapped up in the convenient pre-made store bought dough. If you do one thing this year, PLEASE make your own. You will see how easy it is AND you can easily double or triple the recipe and freeze it for your convenience later so you are not tempted to buy the pre-made dough.

A friend of mine Katrin over at Running with The Devil(ed) Eggs and I agree, MAKING cookies involves the process from buying ingredients to actually making the cookies. BAKING cookies involves pre-made slice and bake. Your kids and grandkids will have much fonder memories of the entire MAKING cookie process than the slice and bake version. The hope is they will continue the tradition and do the same with their kids and future generations to come. Honestly, the fondest memories I have are with my grandma MAKING cookies, pies, bread, noodles, bread everything was homemade.
As a society we have strayed so far away from that reality, I wonder if our kids or their kids will even know what homemade truly is and to me that is very sad. I just think it is important to show our kids fresh food, non processed food, the art of being together (isn’t that what holiday’s are for anyway?) quality time together, the fun of checking the oven to see if the food is done, the aroma your house has while it is cooking, the laughter between you while you listen to Christmas Music and mess up on the words! Pre-made dough has you in and out of the kitchen before you know it, much like the society we have turned in to; quick, easy, and impersonal.
Not only does homemade food taste incredibly better, but you know exactly what you are putting into it, there are no preservatives, you can make it organic and feel good about feeding your own belly, Santa’s and your kids’ 😀 *Stepping off soap box**
With all that being said, (and thank you for staying tuned this long) I just want to offer this recipe that is easy enough for the beginner baker and just as fun for the novice baker. With few ingredients and LOTS of decorations for the finished product afterward you are sure to build lasting memories, new traditions and fun for years to come.
INGREDIENTS:
3 cups all-purpose flour
3/4 teaspoon baking powder
1/4 teaspoon salt
1 cup unsalted butter, softened (salted butter works too if you don’t have the other)
1 cup sugar
1 egg, beaten
1 teaspoon real vanilla extract
1 tablespoon milk
Powdered sugar, for rolling out dough ( learned this from my grandma, this is key to a soft non over-worked cookie)
DIRECTIONS:
Sift together flour, baking powder, and salt. Set aside.
Place butter and sugar in large bowl of electric stand mixer and beat until combined.
Add egg and milk and beat to combined. Add vanilla extract.
Set mixer on low speed, gradually add dry ingredients, and beat until mixture pulls away from the side of the bowl. Don’t over mix here.
Create a disk, or divide dough up if you will be making different colors or adding candies to it. Wrap in waxed paper, and refrigerate for 2 hours. *NOTE* If you are adding colors or candies to the dough, now is the step to do it BEFORE you refrigerate for 2 hours. The dough will be hard once it is refrigerated. Ideas for add ins:
- crushed candy canes + red food coloring color
- roasted pecans
- diced cranberries + green food coloring
- macadamia nuts
- white chocolate chips + blue food coloring
- dark chocolate chips
When ready to start baking, preheat your oven to 375 degrees F.
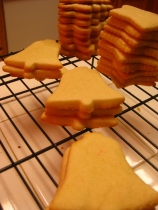
Sprinkle your rolling out surface with a light dusting of powdered sugar. Remove 1 wrapped pack of dough (or the entire ball if you did not divide) from refrigerator at a time, sprinkle rolling pin with powdered sugar, and roll out dough to 1/4-inch thick.
Move the dough around as you roll and check frequently to make sure it is not sticking.
Using cookie cutters, cut into desired shapes.
Place at least 1-inch apart on greased baking sheet, parchment, or silicone baking mat, and bake for 7 to 9 minutes or until cookies are just beginning to turn brown around the edges.
Cool on wire rack.
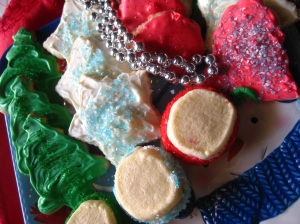
Serve as is or ice as desired. Store in airtight container for up to 1 week or freeze for 1 month in an airtight ziplock.

This recipe is being shown over at:
Related articles
- Candy Cane Oreo Stuffed Sugar Cookies (asweetbaker.com)
- Spiced Bacon Sugar Cookies (bacontoday.com)
- Holiday Baking Recipes: Kid-Friendly Sugar Cookies on a Stick Recipe (miscfinds4u.com)

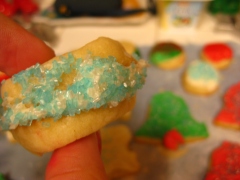
 Picture courtesy of