Stuffed Cabbage Casserole

Stuffed Cabbage Casserole - sweetheatchefs.com

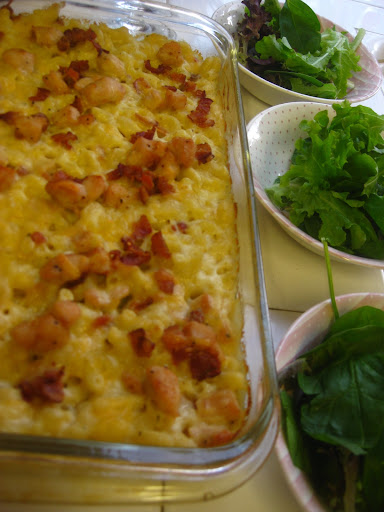
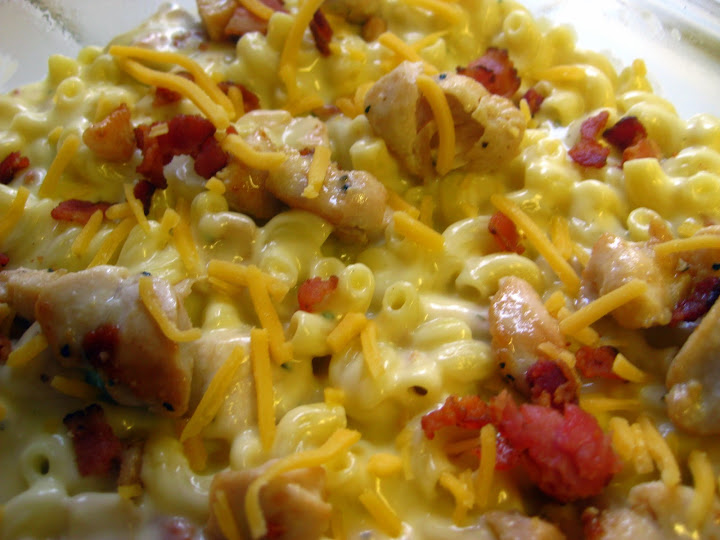
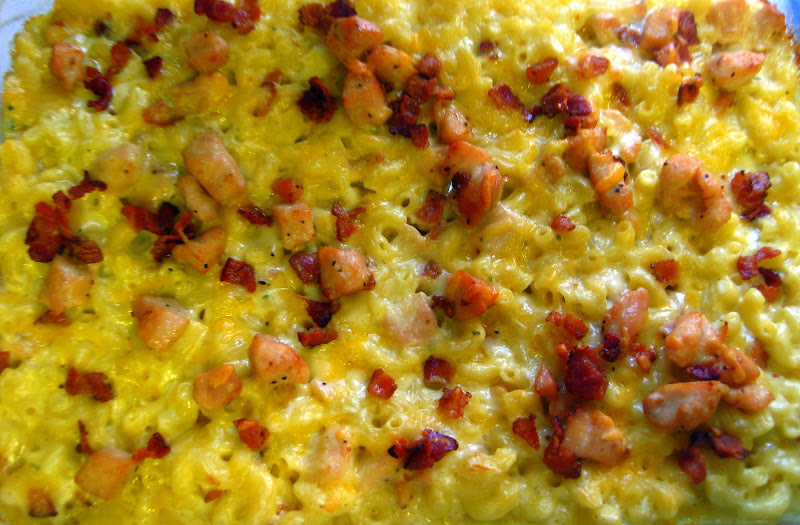
The very moment I stumbled upon this recipe I knew it was a keeper and in fact I went out and bought the ingredients that same day. I love casseroles, and the cheesy crunchy top that reveals itself after baking so nicely in the hot oven! MMMMMMM I am a cheese & crispy bits  lover! I changed the recipe up some to suit my taste.  To see the original click here. For my edited version…READ ON!

INGREDIENTS:

  • 2 tbs olive oil, divided
  • 1 lb. lean ground turkey
  • 2 cloves garlic
  • 1/2 tsp. dried thyme
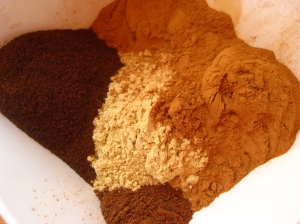
  • 2 tsp Paprika, I like hungarian but any will do even the hot stuff
  • salt and fresh ground black pepper to taste
  • 1 head green cabbage, coarsely chopped
  • 1 can (14.5 oz.) petite dice tomatoes with juice
  • 1 can (15 oz.) tomato sauce
  • 1/4 cup chicken stock
  • 2 cups cooked brown rice (I cooked in chicken stock instead of water to add more flavor)
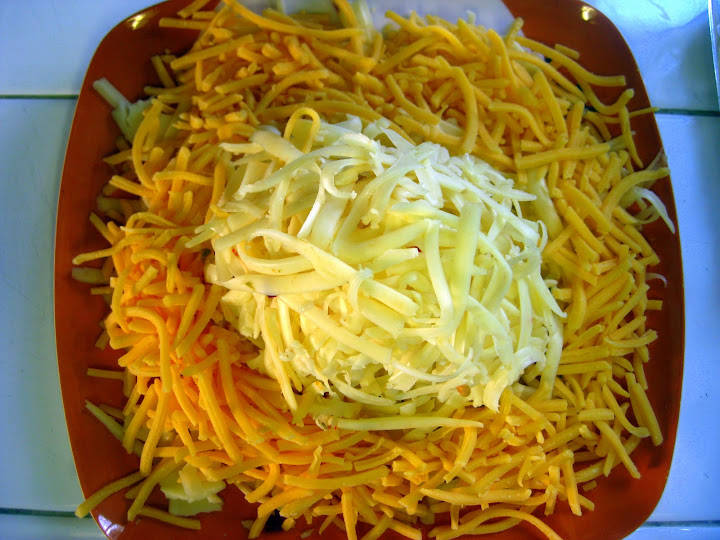
  • 2 cups low-fat mozzarella cheese

stuffed cabbage casserole

(Love this shot)

stuffed cabbage casserole 6

DIRECTIONS – Preheat oven to 350°F.

  1. Spray a large glass casserole dish with non-stick spray. I used a 10×13″ pan and it was full!
  2. Cook rice and when it is finished set aside (use chicken stock instead of water for more flavor!)
  3. Heat a large frying pan on medium heat; add 1 tbs olive oil, and garlic. Cook until just fragrant (about 1 minute or less) Add salt, pepper, paprika thyme and finally ground turkey. Cook until browned.
  4. To the pan add the diced tomatoes with juice, tomato sauce and chicken stock.
  5. Simmer until thickened, around 15 minutes give or take.
  6. While meat mixture is thickening, cut up cabbage and make sure to cut out the core, and chop coarsely.
  7. Heat remaining olive oil in a large frying pan, add the cabbage and cook over medium heat until the cabbage is wilted (I added a lid to help the process along). You want the cabbage about half-cooked, turning it over several times so it all wilts and cooks. Season with salt and fresh-ground black pepper.
  8. Add your cooked rice to your meat mixture and stir to combine well.
  9. Take 1/2 of your wilted cabbage and place in your casserole dish, then 1/2 of your meat mixture and repeat until all is in pan. Mix together gently with large spoon.
  10. Add cheese to top and bake for 40 minutes uncovered.
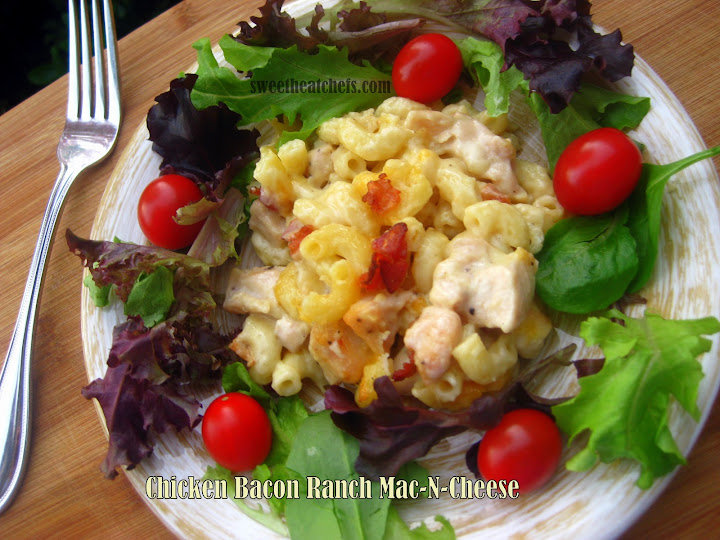
  11. Let casserole sit for a few minutes before cutting, the cheese will stay in place better this way and you get nice even squares for everyone to enjoy, serve hot.
  12. This dish is freezer friendly if you have leftovers. (which I did) I stored in a Tupperware container, air tight.

stuffed cabbage casserole - sweetheatchefs.com

stuffed cabbage casserole - sweetheatchefs.com

stuffed cabbage casserole - sweetheatchefs.com

Fresh Vodka Spritzer Recipe:

1 oz Pinnacle Cake Vodka
1 oz Pinnacle Whip Cream Vodka
2 oz Seltzer Water
Juice of 1/2 lime
Basil & lime slice for garnish

Blend first 4 ingredients together and garnish with basil and lime slice. Light and refreshing!


If you liked this recipe, check out more from Sweet Heat Chefs and tell a friend!


Baked Pretzel Crusted Chicken

Baked Pretzel Crusted Chicken - sweetheatchefs.com

With my new-found mission to a better healthier lifestyle, that rules out my love of frying and eating fried foods. After all , that is what got me where I was. Moderation is key, but having a good defense is the best offense! Meaning, I need a ton of good go to recipes that feel indulgent but aren’t. That way I can trick my body (and mind) into thinking I am eating things I shouldn’t be but am able to without regret and guilt. I initially founded this recipe with my daughter Jasmine as we were in final competition mode on the Rachael Ray vs. Guy Fieri cooking show. Our mission, was to cook the best chicken cutlet, which we did cuz we WON! Any who, that version was pan-fried and this one is low-calorie baked chicken tenders. Same great taste, without that pesky guilt I was talking about earlier 😀 Click here for the original version of the deliciousness!

Baked Pretzel Crusted Chicken 4

This version was obviously thought up since I am now eating healthier, but also was inspired by a secret ingredient swap. Some blogger pals got paired up and had to send the other one something that represented their state. I received this jar of golden deliciousness! Sweet & Spicy Stone Ground Mustard. As soon as I saw the jar I opened it, smelled it tasted it, smelled it tasted it and fell in ~love~

This jar came from Mishmawshandotherthings.

Baked Pretzel Crusted Chicken 3

INGREDIENTS

8 chicken tenderloin breasts
1/4 cup golden deliciousness aka Raye’s Sweet & Spicy Stone Ground Mustard
2 cups pretzels, ground semi fine (salted or non salted per your preference) I use the matchstick kind and pulse them in the food processor until I get the consistency I like.
1/4 cup finely shredded Parmesan cheese
salt/pepper to taste

DIRECTIONS –  Preheat oven to 375 degrees F.

  1. Using a sheet pan, line the bottom with foil, and top with a bakers wire cooling rack. Spray rack with non stick cooking spray and set aside.
  2. In a small bowl add mustard and chicken. Mix together so chicken is well coated. Set aside.
  3. In a food processor pulse the pretzels and Parmesan cheese until desired consistency. I like mine chunkier to be able to taste the pretzels. Add pepper to taste (and salt if using unsalted pretzels)
  4. Add the pretzel coating to a bowl and take 1 chicken strip at a time and coat with it.
  5. Place the pretzel crusted chicken tender on the baking rack and repeat until all chicken is coated. Be sure to discard leftover mustard and pretzel mixture as you can’t re-use it do to be contaminated with raw chicken.
  6. Drizzle olive oil over the tops of the chicken strips. You can use non stick spray for this too.
  7. Bake chicken for 15 – 20 minutes or until cooked through. You will want to turn chicken over 1/2 way through and drizzle with olive oil to crisp both sides.
  8. Serve with Honey Mustard Dipper Sauce and sliced scallions!

Baked Pretzel Crusted Chicken - sweetheatchefs.com


Week 2 Healthy Eating

Week 2

Ah the infamous week 2! It brought both pain, tears and laughter. Apparently I gave myself shin splints as I didn’t have the correct shoes to run in. Without an extra $60+ lying around I had to grin and bear it. Icing my leg after each run, resting with my foot up and later in the week I got smart and bought the old ICY HOT to rub on! Oh boy did I smell “old”. I ended up borrowing the money from my dad to get the shoes I need because the pain became unbearable. Quite frankly I didn’t deserve the pain I was in and due to the fact I was trying so hard to lose this weight, it seemed unfair, so I bit the bullet and asked my dad if he wanted to contribute to the Monica get fit fund! LOL

Right away I could tell the shoes helped. Until I had gotten them I had stopped running and just walked as fast as I could. I still had to ice when I got home, but as the days went by the pain became bearable again. I upped my workout this week to 2 times a day, equaling close to 2 miles each workout. You know you are dedicated when you push through the pain and “just do it” day in and day out. My kids looked at me and wondered why in the world I would put myself through the torment. I think one day they will get it, but they don’t see me as I see myself. I hope I have inspired them as interestingly I have inspired myself. I just want my kids to look up to me and see all that I am doing is to become a better version of me.

This week in food I made sure to measure-measure-measure. Remember last week I only lost 2#? I was NOT going to live through that again. Someone told me, and I know it’s true, that losing 1=2# a week is normal and the way you should lose weight. I am too impatient for that. I do all this work, I want results! HA! So this week as I said I was going to make sure I lost more than 2#. Although that same person told me to go find something that weighed 2# and pick it up to see just how heavy it really was. You know what? She was right, 2# is not light! I felt better after that.

sweetheatchefs.com

BBQ Chicken Wrap: (in photo above)

1 10″ large jalapeno cheddar tortilla

4.5 oz. boneless skinless chicken breast, cooked and diced

1/4 cup baby spinach, washed

3 tsp. shredded mozzarella cheese

28 grams of asparagus, cooked but still firm

1.5 tbs your favorite barbecue sauce (I use Bullseye, be careful on the sugar content)

Add all ingredients to tortilla and roll up. I had a side of shelled edamame beans (super great source of protein) the BBQ Chicken Wrap comes in at 450 Calories and 11 grams of fat!

I again ate my Luna bars trying various flavors. so far the Chocolate Peppermint Stick and Chocolate Dipped Coconut are my favorite and I highly recommend them. I have even given them to my kids as a treat and they LOVE them! 

Music motivation this week:

P.O.D. – Here Comes the Boom

Since one of my weaknesses is sweets, I made a yummy version of banana bread that will set your heart a fluttering! Mocha Cappuccino Banana Bread Bites, only 92 calories!! Curbs that sweet tooth after just 1! Freeze them and take out as needed or store in an airtight container. 

mocha cappuccino banana bread bites - sweetheatchefs.com

When Monday rolled around, I was so excited to step on that scale…the result…4# that means I am down 6#!!!! WOO-HOO!!! I knew I could do this, what a confidence booster! I do not go to the gym, I do not take diet pills, I do eat REAL butter AND had chocolate and lost 4#, SUCCESS= ME!

2013-03-29 09.53.13

If I can do this, ANYONE, can do this! Did you have an amazing feat this week? Tell me about it in the comments I’d love to hear about it!

Photo taken from the Spark People Pinterest page

Photo taken from the Spark People Pinterest page


Missed week 1? Check it out here:

Zucchini Lasagna

Zucchini Lasagne - sweetheatchefs.com

Well here we are several years later and the weight I feverishly fought so hard to get rid of (and did get rid of) is back on this bod like white on rice! When I found out I was preggers in 2009, I swore I would still go to the gym….that did not happen. I always saw this woman at my gym super cute, tiny, and a baby belly bump. I thought well that will be me soon, but it wasn’t and it never was.

Now my son is 2 1/2 and I have yet to return to the gym, don’t you know how easy it is to get away with an infant, then a toddler? Not to mention my 4 other kids. So they gym was not in the cards for me and I guess in my own mind I gave up. Sad really. I worked so hard to get rid of years of weight that I had gained for no real reason. Then in the blink of an eye I am close to being back to “that” person again, I vowed I would never let that happen. Before my clothes don’t fit and before I lose any more self respect, I am back in the game folks!

Zucchini Lasagne - sweetheatchefs.com

I have signed up to be in a 5K run that is so popular around here I found my MOJO. I gave myself enough time to train and get in shape before hand, so as not to feel like a dweeb when that day comes. In honor of my new goal I have made lasagna…I know lasagna is not low fat or low cals, but this one is 😀 The very thought of taking away food one loves, is the very reason people don’t stick with eating healthy. Here you can have your good stuff and eat it too! No carb, no noodles, gluten free, low fat, low cal lasagna

~YOUR WELCOME~

By the way…VEGETARIAN? Lose the chicken 😀

Zucchini Lasagne - sweetheatchefs.com

INGREDIENTS

1 cooked chicken breast, cooled and diced
1 sweet yellow onion, diced
3 medium Zucchini or Squash, sliced ( I used 2 green 1 yellow)
1 garlic clove, minced (I used the microplane)
2 cups of your favorite red pasta sauce
1/2 teaspoon Salt
1/2 teaspoon black pepper
2 tablespoons Parmesan Cheese, grated
2 tablespoons whole wheat bread crumbs
2/3 cup Mozzarella cheese, grated

DIRECTIONS

  1. Over medium heat, saute onion, garlic, and 1/2 of the salt/pepper until golden.
  2. Add zucchini and remaining salt/pepper and saute until fork tender.
  3. Pull off stove and set aside.
  4. In a 9″ x 9″ glass Pyrex dish begin layering zucchini in rows until the bottom is covered.
  5. Next add a layer of sauce, then diced chicken, then mozzarella cheese and repeat until all zucchini is used. Leave enough mozzarella cheese for the top.
  6. Top with remaining mozzarella, parmesan, and bread crumbs.
  7. Bake at 350 for 30 minutes until bubbly and golden brown. Serves 6

Zucchini Lasagne - sweetheatchefs.com

Zucchini Lasagne - sweetheatchefs.com

Zucchini Lasagne - sweetheatchefs.com

I decided to include the nutritional information for the dish. It will change slightly based on what type of red sauce you choose. I am not a dietitian or a Doctor, but this is one yummy dish! I used Calorie Count to find the nutritional information for the dish.

Zucchini Lasagne Nutritional Info

Turkey Skewered Meatballs with Pomegranate Sauce

sweetheatchefs.com

sweetheatchefs.com

This week in my kitchen has been a trial and tribulation week. Trial, error, success, mess, crying, laughing and doing it all over again. This recipe was no exception, including all the pictures that went with it that got erased! All I can say is if you don’t try you won’t succeed, AND make sure you read a recipe in its entirety before buying ingredients AND proceeding to make it. This recipe was adapted from one I saw recently on a blog, click here for the original version. I adapted it to fit our household and you can too. This is a healthy meal and pretty filling with just 2 meatballs served with the rice and a salad.

INGREDIENTS

  • 2 pomegranates (do not use pomegranate juice as it will not reduce)
  • 1 clove garlic, slightly pressed
  • 3/4 cup dry white wine
  • 1 sprig rosemary
  • 2 lb ground turkey
  • 1 large shallot, finely diced
  • 1/2 cup shredded Pecorino Romano cheese (divided)
  • 2 slices of whole wheat bread
  • 1 egg, beaten
  • ½ cup plain breadcrumbs or panko crumbs (divided)
  • 1 cup stock (chicken or vegetable)
  • 1 cup chopped hazelnuts (can use pecans or walnuts instead)
  • 1/4 tsp nutmeg or to taste
  • 1/2 tsp salt or to taste
  • 1/2 tsp black pepper
  • 1/4 cup freshly chopped baby spinach, fine chop
  • 2 tbsp extra-virgin olive oil

DIRECTIONS – Preheat oven to 400 degrees F. Cooks for 30 minutes (or see alternate cooking method at the end)

  1. Halve the pomegranates and over a fine mesh strainer squeeze the juice into it until you get 1 cup. 
  2. In a heavy (or non-stick) saucepan or skillet, heat 1 tbsp olive oil and add a sprig of rosemary and 1 clove of garlic.When the garlic is golden brown, discard it and add wine and the pomegranate juice to the pan. Season with salt and pepper and allow to reduce over medium heat, stirring occasionally. 
  3. Chop the hazelnuts and add 2 tbs bread crumbs and 1/4 cup pecorino romano cheese and set aside.
  4. Heat a tablespoon of olive oil in a small skillet, add the shallots and garlic and cook until translucent over low and make sure not to brown.  Dump the shallot and garlic mixture into the fine mesh strainer and let set aside to let drain and cool.
  5. Soak the bread in broth until soft, then drain by squeezing all the liquid out, and set aside.
  6. In a bowl, combine the ground turkey with the cooked shallots and garlic, the salt and pepper, spinach, drained bread, nutmeg, egg and additional breadcrumbs as needed to firm up the mixture. Mix everything together really well.
  7. Allow to rest for two minutes until it firms up, making the mixture easier to shape. 
The consistency of the mixture should be soft and wet and hold together in a ball.
  8. Shape into 1″ to 1 ½” sized meatballs.
  9. Roll the meatballs into the hazelnuts and bread crumb mixture.
  10. Line a baking tray with a sheet of foil and brush with a small amount of  olive oil.
  11. Thread the meatballs onto skewers (If you’re using wooden skewers, soak them in water for 30 minutes before cooking)
  12. Arrange the meatballs on the foil in one layer and lightly drizzle the top with a little more olive oil.
  13. Bake until golden brown about 30 minutes. Drizzle pomegranate sauce over the top and serve over my coconut rice and side of salad greens.

Alternate Cooking Method

You can skewer the meatballs and place over indirect heat on the BBQ. Using a medium heat cook the meatballs for approx 25 minutes, checking frequently to make sure they don’t burn. I placed them on an old cookie sheet lined with foil and oiled generously. I turned them every 5-10 minutes to avoid one side from getting too done at a time. Mine took about 30 minutes but remember all ovens & BBQ’s vary in temperature, so your cooking time might not be the same as mine. The flavor you will get from grilling these will add that much extra to the lean protein you are working with here.

This recipe is being shown at Bobbi’s Cozy Kitchen, Manic Monday Party!

Taco Wreath

2012-12-28 17.57.39

This recipe was inspired by Spice Gals version. Click here to see their version CHUCK full of yumminess!!

INGREDIENTS

1 roll Pillsbury crescent rolls ( 8 count)
1/2 lb ground beef, turkey or pork
2 tbs. olive oil
taco seasoning
1 cup cheese (I used shredded mozzarella and provolone)
1/4 cup queso fresco
parmesan cheese for dusting
1 egg for brushing tops with

2012-12-28 17.57.50

DIRECTIONS

  1. Pre-heat the oven to 375 degrees F.
  2. Heat olive oil in skillet over medium high heat and brown meat through.
  3. Add taco seasoning and a little water and let evaporate
  4. Line a cookie sheet with foil and spray with non stick cooking spray
  5. Line up crescent rolls in a circle pattern creating a wreath, placing the wide end toward the middle. You will overlap the edges and press to connect them.
  6. Add shredded cheese mixture across the wreath without a break for each roll, just keep it going in circle fashion
  7. Next add meat in the same manner, also spreading meat up the crescent roll toward the thin end
  8. Top with a little of the queso fresco.
  9. Fold the narrow end of the crescent roll toward the center of the wreath until all are done. I connected them together, you can tuck them under each roll too.
  10. Brush top with egg and dust with parmesan cheese
  11. Bake for 15-18 minutes (mine took 18)
  12. Remove from oven and immediately top with remaining queso fresco and let sit for 2-3 minutes.
  13. Top with sour cream, hot sauce, sliced olives and avocado!

2012-12-28 18.07.06

Gingerbread Spice Mix

IMG_4057

This is the beginning of so many things you can create. This Gingerbread Spice Mix is versatile for gift giving and for making different recipes out of it, some of which I have in this post for you. 

INGREDIENTS:

1/2 cup ground ginger
6 tbsp ground cinnamon
4 tbsp ground cloves
2 tsp ground nutmeg

DIRECTIONS:

Mix all ingredients together and store in an airtight container  until ready to use.

IMG_4128

Bag up and give as gifts for Christmas or any event that calls for one! This does not have to be a holiday only gift!  

I gave mine as Christmas gifts, added tags with the recipes below and tied on to the bag with a decorative ribbon. This gives the recipient an idea of what to use it with and get creative in the kitchen!

IMG_4136

IMG_4184

You can add this mix to the following recipes: (more coming soon)

Crispy Gingerbread Treats

3 tbsp butter, melted
1 bag (10 oz) mini marshmallows
1 tbsp Gingerbread Spice Mix
6 cups crispy rice cereal

Melt and mini marshmallows in a large sauce pot over medium heat stirring occasionally. Stir in Gingerbread Spice Mix and crispy rice cereal. Press into a greased 13 x 9″ baking dish. let cool and cut into squares.

Do you have a recipe to make with this? I’d love to share it and see what you come up with. Leave me a comment below with the deets and you could be featured on SHC in the near future!

Creamy Chicken Veggie and Rice Soup – Warm the Heart, Warm the Soul!

Don’t let the sunny picture fool you…well ok I’m not even going to go there. Living in California sure its fun in the sun. But when my favorite time of year comes, FALL, I am saddened that the weather is not cool enough to reflect that. I love making soup and bread and warm you up goodies, but when the temperature reaches 80 in November, well sometimes it just isn’t that easy to get my family to eat hot soup! Luckily in between these warm days are a few hit or miss cool and even rainy ones. Leaving me to explore the world of Fall cooking.

Today I made a creamy, warm, stick to your ribs with a hearty healthy kick soup. This soup is almost too hearty to have a second bowl…I did say ALMOST! Filled with vegetables for great nutrition and a little creaminess to round it out, you will surely want to accompany it with a carb filled side! For me I have been making this Focaccia Bread that is just delicious and pairs perfectly with any soup or is fabulous on its own. Take a weekend, get your ingredients together you will want to make both of these delights this weekend!

INGREDIENTS

  • 8 c. Low-Sodium Chicken Broth
  • 2 Stalks Celery, thinly sliced
  • 1 Red  Onion, diced
  • 1/2 c. Carrots, I used the shredded ones
  • 1 head of broccoli, washed and cut up in small pieces (reserve 1/2 of the florets)
  • 1 bunch of Asparagus, washed and trimmed; reserve the stems
  • 2 cloves Garlic, minced
  • 1 tsp. Dried Oregano
  • Extra Virgin Olive Oil
  • 2 tbsp. All Purpose Flour
  • 3/4 c. Cream of Chicken Soup (could substitute in heavy cream, I just had this left over so I wanted to use it)
  • 1/4 c. 2% Milk
  • 1/2 cup sharp cheddar cheese (optional)
  • Kosher Salt, to taste
  • 1/4 tsp. Fresh Ground Pepper
  • 3 cooked Chicken Breasts, diced

DIRECTIONS:

In a large stockpot, drizzle olive oil on the bottom and add your diced chicken. Season with salt/pepper and cook until browned and cooked through.

Remove from pot and add 1 tbs of olive oil, add; carrots, celery, onion, broccoli, stems of your asparagus and saute for 5 minutes.

*NOTE* Using the stems to the asparagus:

  1. Cut the very bottoms off, discard and do not use
  2. Bend the bottom of one the asparagus spears until it snaps, this will be your guide for cutting the rest of the bunch
  3. Cut the remaining spears and cut the stems into 1/2″ dices, add these to your stockpot.

Add flour and saute for 2 minutes to get the flour taste out of it.

Add chicken broth slowly stirring as you add to avoid clumps. Once all broth is incorporated, bring to a boil and then reduce heat to just at a boil for about 20 minutes, or until all veggies are super soft.

Remove from heat and using an immersion blender (these things ROCK!) start blending until you get the desired consistency you like.

Return pot to stove and reduce heat to low. Add rice stir to combine.

Take a microwave safe bowl and add your milk and cream of chicken soup and combine. Add cheese if using.

Add this to your stockpot along with your reserved chicken and simmer for about 30 minutes or until the rice is cooked through.

While simmering place your asparagus spears & broccoli florets in a microwave safe bowl and add about 2 tbs water. Cover with Saran wrap and cook for 1 minute. Immediately add to an ice bath to stop the cooking process.

When soup is finished garnish with a few of your steamed broccoli florets and asparagus spears.

Chicken Bacon Ranch Mac-N-Cheese – It’s not too late for dinner plans!

Nothing says comfort quite like home-made mac-n-cheese. I never could resist cheese nor the crunchy browned goodness on top of a casserole. Putting the two together is sheer bliss in my book. Besides the boxed mac-n-cheese is nowhere near what mac-n-cheese should be. I have never purchased powdered cheese so why would I use it in a meal for my kids? Last time I looked cheese was something that was fresh!

This is a great go to meal, it comes together quickly and the aroma of cheese and bacon fill your home with deliciousness. Once you bite into the crunchy bacon topped, oozy gooey cheesy pasta you will be digging in for more!

My kids ask for this at least once a week. I have to restrict them, so I make a second smaller batch that I freeze. Let me tell you the frozen one is almost better than the fresh. 

INGREDIENTS

  • 16  ounces  uncooked elbow macaroni
  • 1/2 lb sliced smoked bacon of your choice
  • 3 chicken breasts, skinned boned and diced into bite sized pieces
  • 3  tablespoon  butter
  • 3  tablespoon  all-purpose flour
  • 3 cups milk
  • 1/3  cup  condensed cream of chicken soup, undiluted
  • 2.5 cups shredded cheese, 1 cup jack, 1 cup pepper jack, 1/2 cup sharp cheddar (or whatever your favs are!)
  • 2 tbs powdered ranch
  • 1/2  teaspoon  salt
  • Cooking spray

DIRECTIONS

Cook pasta according to package directions until al dente.

Cook bacon in a large nonstick skillet over medium heat until crisp. I cut it up before cooking using my handy kitchen shears into bite sized pieces, then drain on paper towel and set aside. Reserving drippings in pan.

Add chicken to drippings in pan, sprinkle with pepper and a little salt (remember the bacon is salty) sauté for 10 minutes or until done.

Melt butter in a large saucepan over medium heat; sprinkle flour evenly into pan. Cook 2 minutes to get the flour taste out, stirring constantly with a whisk. Combine milk and soup in a bowl with a whisk; gradually add milk mixture to saucepan, stirring with a whisk, then add ranch powder.

Bring to a boil; cook 2 minutes or until thick. Remove from heat and add cheese. Once cheese is all melted into sauce, stir in pasta and most of the chicken and most of the bacon. (Reserve a little of each to sprinkle on top)

Preheat oven to 375 degrees F.

Spoon mixture into a greased 9 x 11″ glass baking dish, and an 8 x 8″ glass baking dish. (Or if you have a super large one use that. I freeze the small one for later.) Sprinkle evenly with reserved bacon and chicken.

Bake for 20-25 minutes or until heated through. DO NOT BROIL IN GLASS DISH, IT WILL BREAK ON YOU.

Serve with a side salad or vegetable to round out the meal.

My concoction of cheeses

Ready for the oven

Just out of the oven

Finished!

Cornbread Casserole – Easy Weeknight Dinner!

This recipe is being shown over at Thursday’s Treasures!

Just in time for Fall! I have been down with a cold that won’t quit! My kids enjoyed every moment as I lost my voice for the entire week! This is a quick throw together type of meal that is perfect when your fam is on the go, just like Halloween, no one wants to sit around eating “good” food, they want that dang candy! You can feel good about having this ready in the oven and the little gobblins can have something yummy in their tummy before trick-or-treating.

Dressing

  • 1/2 c ranch dressing ( I use the packet kind)
  • 1/2 cup verde salsa
  • 1 cup cilantro leaves

Topping

  • 2 tbs olive oil
  • 2 cloves garlic
  • 1.5 lb ground turkey meat
  • 1/4 cup taco seasoning
  • 3/4 cup hot water
  • 3 tbs cilantro, chopped
  • 1 can corn
  • 1 can diced roasted tomatoes and green chilies
  • 1/2 cup sharp cheddar cheese, grated
  • 1/2 cup pepper jack cheese, shredded

Crust

  • 7  to 16 oz size – 1 package cornbread mix, i used a 16 oz package, we love cornbread (make as directed on package)
  • 3/4 cup crushed corn tortilla chips (i used these colorful orange and black for Halloween)

DIRECTIONS:

  1. Pre-heat oven to 400 degrees F.
  2. Make ranch dressing and combine, ranch, verde salsa and cilantro in food processor until well combined. Cover and chill in refrigerator.
  3. Heat olive oil and garlic. Heat until garlic is just fragrant, then add ground turkey. Cook until browned.
  4. Combine taco seasoning and hot water, add to pan. Heat through on medium high for about 5-7 minutes.
  5. Add canned tomatoes & cilantro and cook for an additional 5 minutes.
  6. Drain all juices out of pan and set mixture aside.
  7. Combine cornbread mix as directed on package.
  8. Get a baking dish, should be around 9″ x 9″ size or use a pie dish will work. I used a circular baking dish. Spray with non stick cooking spray, crush up your chips and line the bottom of the dish with your chips. You can add more or less depending on the size of your dish.
  9. Then add 1/4 cup of your corn and sprinkle on top of chip layer.
  10. Pour your cornbread mixture over the top of that, and top the cornbread with your meat mixture.
  11. On the very top add your cheese.
  12. Bake for 25-30 minutes or until bubbly golden brown on top. Everything is cooked you are just heating through and browning the cheeses!
  13. Allow to sit for 5-7 minutes after removing from the oven. This gives the casserole a chance to pull back and tighten up so when you cut it, it is not falling apart all over the plate.
  14. Drizzle over the top, or if you are like me, drench the top with your ranch verde salsa dressing, top with more cilantro and avocado.