Krispy Sea Salt & Pepper Kale Chips

I am officially on the KALE bandwagon ya’ll. What took me so long? Well, the first bunch of Kale I purchased from the farmer’s market went bad before I had a chance to make it, so that went out the window. The next bunch of Kale I purchased from the Farmer’s market, was left in my vehicle and went bad. Let me just say in the hot California sun, rotting away in my 135 degree car, kale does not smell so good 😦 Ok, so after 2 times now I am thinking do I even attempt a third try? HECK YA! I went for it and am so happy. I am sad to say that I have NEVER used kale in anything. Nope! Not a smoothie, not a salad, not as a side dish. *sticks pouty lip out*  My kids see this huge big green bunch of veggies on the counter and immediately cringe, just because. They have no reason to…seriously, when is the last time you saw a food you didn’t know what it was and just cringed? I look at an unfamiliar food and am excited to see what potential is has! Anyway, I tell them to not worry about it and go about their business. After all was said and done there were mixed reviews. I of course LOVED them, 1 son age 10 who LOVED them as much as me. The other kids, said they were *eh*. Of course I made them eat them, but they certainly would not be asking for those again. Between my son and I we ate both cookie sheets! I’m dying for next Tuesday when I can get back to the farmer’s market and get more!

INGREDIENTS

1 bunch kale, washed and thoroughly dried
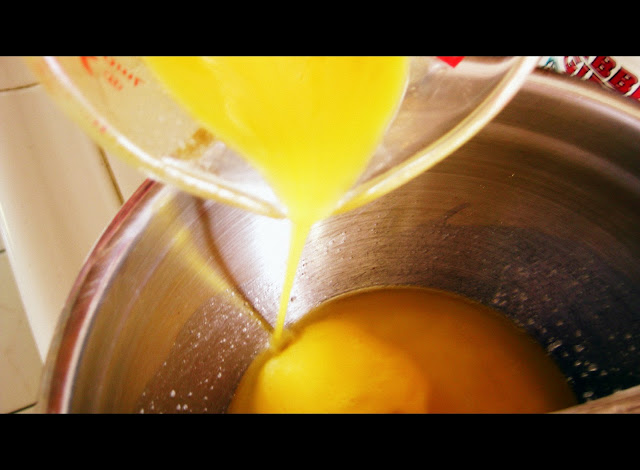
4 tablespoons olive oil
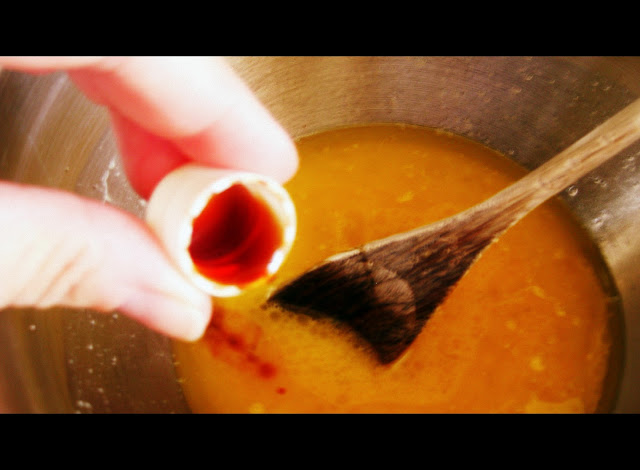
Sea salt, for sprinkling to taste
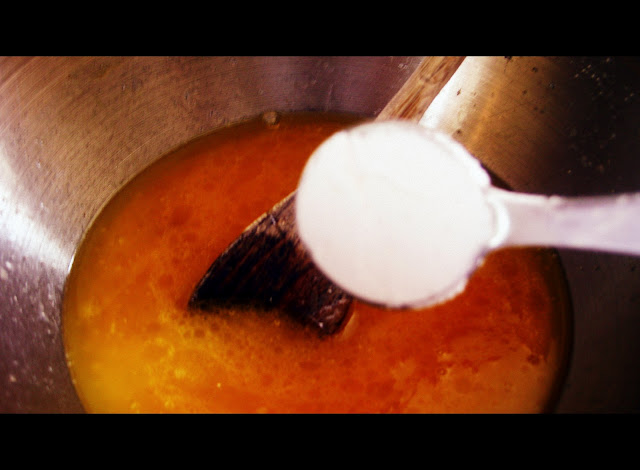
white pepper for sprinkling to taste

DIRECTIONS

Pre-heat oven to 300 degrees F.

Cut, wash, and dry kale. Make sure to remove the ribs and stems that are tough and woody. They do not soften and they are not good unless you like eating straw that is hard and sharp! NOTE: The veins of the leaf should remain in tact, if you tear the pieces too small they tend to burn quickly, so you need to watch your cooking time and adjust it accordingly.

Tear Kale into bite sized pieces and place on cookie sheet atop parchment paper. I end up with 2 cookie sheets full….drooling just remembering my bounty!

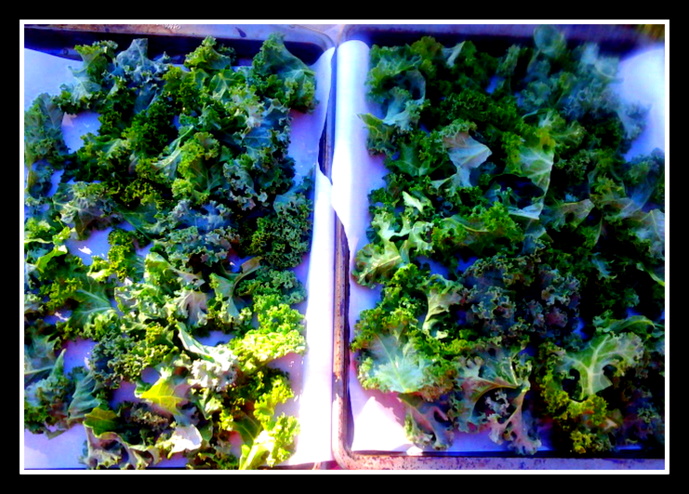
Toss both pans full of Kale with the olive oil,  sea salt and white pepper.

Bake for 12 minutes and turn over using a spatula. Keep kale spread out and as flat as possible. It “K”risps up really nice that way.

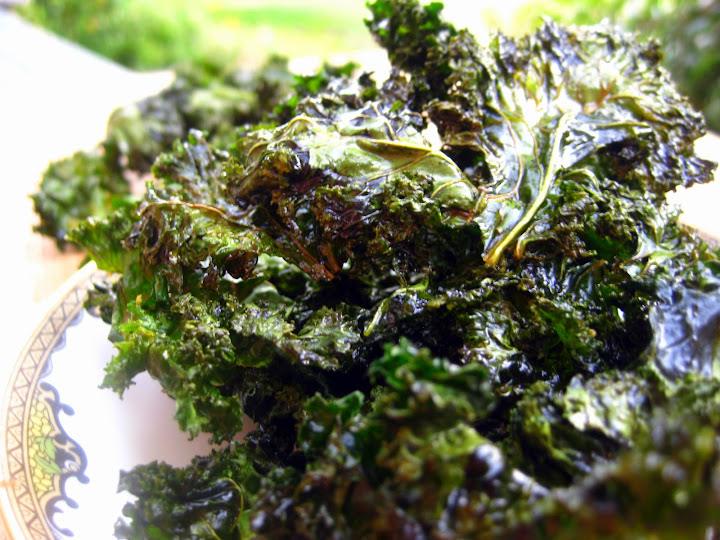
Bake for another 12 minutes or until crispy, being careful not to let the leaves burn. Remember if your pieces are too small they may burn, so check them frequently.

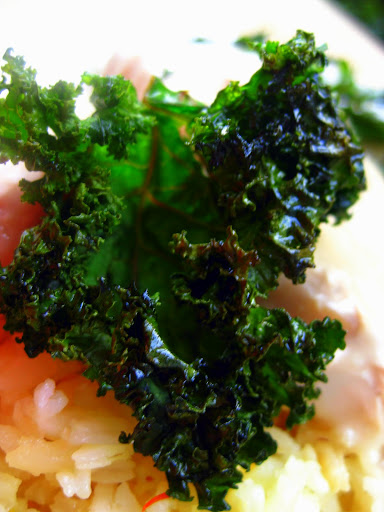
Eat…Eat…Eat until they are all gone, which is roughly 10 minutes!

Featured on Foodie Friends Friday!

Baked Cheesy Sweet Potato Cakes

INGREDIENTS

2 medium-sized sweet potatoes
1/2 cup liquid egg whites
1 cup grated Parmesan cheese
1 teaspoon rosemary, fresh and chopped
1/4 teaspoon pepper
1/4 teaspoon salt

If you are looking for a way t build muscle in your arm, try this recipe. NO JOKE grating these sweet potatoes with a grated is a great work out! I am always look for new ways to get my kiddos to eat veggies, if you follow my blog then you know this already, and if not then you probably are the same with your own kids unless you have UBER awesome kids that eat their veggies. I was blessed with 5 kids, but 5 kids that DON’T eat or like veggies! So….I came across this recipe that looked and sounded good. How can one go wrong with cheese anyway. Not just any cheese Parmesan cheese at that. Only 1 oz of this cheese and you are at 11 grams of protein and contain the bone building nutrients calcium and phosphorus. Combine that with the sweet potatoes Vitamin C content and I’ll take it! Now you aren’t going to tell the little kiddos how awesome this snack is, you just indulge them with the fact it is “cool” looking with the brightly orange color and tell them it is full of cheese. You can also talk them off the ledge by telling them this is a new Halloween recipe you are trying! That’s it, nothing more and they will be happy to try it and continue asking for more.

This baked sweet potato cake when you bite into it has a nice savory crisp to it, you immediately taste the nutty Parmesan cheese and then the rosemary hits your taste buds like a final explosion of flavor. I found this recipe from a sweet blog called Carrots and ‘N’ Cake. I didn’t really change the recipe too much it is that good! Here is all you need to know to get started!

Preheat oven to 425. Set a wire rack on top of a baking sheet. Spray rack with non-stick spray. Make sure you don’t skip this step or you will have this…

…and you will be trying to gnaw off the little bits of deliciousness while trying not to burn your mouth…wait what? No I didn’t do that! Ok, so back to our regularly scheduled programming, where was I…?

Peel sweet potatoes and shred them using a cheese grater.

Squeeze the moisture from the sweet potatoes. I used a kitchen towel and put 1 handful in the towel at a tie and gave it a twist until all potatoes were free of moisture.  The moisture keeps the crisps from getting crispy in the oven, so make sure you don’t skip this step.

Add Parmesan cheese

add egg whites

add rosemary, salt and pepper

Take a foil lined cookie sheet and spray with non stick cooking spray. Place 2 cooling racks on top (make sure they are sprayed unless you don’t mind gnawing). Take a scoop of the sweet potato mixture and create a pancake in the palm of your hand. Press firmly to create as flat of a pancake you can and place on rack. Repeat until  rack is full.

Top with a little pinch of shredded parmesan cheese and pop in the oven for 30 minutes or until crispy.

When you bite into the warm sweet potato crisp you immediately taste the rosemary and then the nutty flavor of the Parmesan hits you. It is a low-fat no guilt treat that is baked and you can feel good about eating more than one!

shown on Foodie Friends Friday!


Sweet Heat Grilled Chicken Tacos with Pineapple Salsa

Sweet Heat Grilled Chicken Tacos - sweetheatchefs.com

I don’t really care if it is winter, spring, summer or fall, I am down for the BBQ any time any day. That is what is nice about California where I live, I have the liberty to do so. So, now that fall is officially almost here I don’t let that deter me from que’ing 😀 Last night was Taco Tuesday at our house and instead of the traditional tacos we normally have, I switched it up…NOTE TO SELF: make more next time! I came across a yummy recipe from Elle’s New England Kitchen and tweaked it to our (my) liking. It came out great and everyone wanted more.

MARINADE

4 whole boneless, skinless chicken breasts, butterflied and pricked with fork several times all over breast
1/2 cup olive oil
juice of 2 limes + zest
2.5 tsp adobo sauce + 1 chipotle chili sliced
1.5 tsp cumin
2 pinches cinnamon (no one will ever know it is in there!)
1 tsp onion flakes
3 garlic cloves, minced
1/2 tsp pepper
3 tbsp honey

Add all marinade ingredients to a ziplock  bag except the chicken. Mix all ingredients until well blended. Add chicken breasts and close the bag really well. Mix everything together to get a nice even coat on the chicken. Place in refrigerator to marinate overnight or as long as possible to soak up all the flavors this sweet and spicy sauce offers. I started my marination in the early afternoon for an evening dinner it was very tasty! My only regret was I didn’t do it over night! A great tip from Elle’s New England Kitchen, which I absolutely LOVED was to make this and freeze it. When it is un-thawing it is soaking up all the marinade as well!! 

Remove chicken from refrigerator 30 minutes prior to barbecuing and allow it to come close to room temperature. While doing this you can prepare the salsa which is a…take your thumb and middle finger and…SNAP, SNAP, SNAP!

PINEAPPLE SALSA
1/2 fresh pineapple, diced 

1/4 cup fresh chopped cilantro
1/4 of a large red onion, diced
2 garlic cloves, minced
1 lime juiced + zest

Combine all ingredients well and let sit in refrigerator at least 30 minutes to chill and merry all ingredients.

Barbecue chicken until cooked thoroughly. I use the bag of marinate to coat chicken as I cook it to jeep it juicy! I just snip the tip off at the bottom corner and marinate while I cook. Discard any remaining marinade as it can not be re-used.

Remove from que and let sit on a platter covered with foil until ready to serve. This keeps it warm and keeps all yummy sweet heat juices inside.

Let’s talk tortillas. There are lots of tortillas out in the market. It is ultimately up to you what you choose. the while flour vs. corn debate is yours alone. All I can say is I am a CORN kinda girl when it comes to my tacos. To put a lower fat spin on mine, instead of frying them up (which I LOVE) I brush each side of one with extra virgin olive oil and brown for a few minutes on each side in a skillet.

Now, you are looking at this tortilla and saying…UM that is NOT corn! Well you would be wrong if you were gambling folks! This awesome tortilla is corn AND wheat. I can’t believe I haven’t seen these before, but this is a blue corn, wheat and flax-seed tortilla! YOUR WELCOME!

I heat the tortillas to order. In other words, I don’t cook them ahead of time and let sit. I think the best way to enjoy a taco is warm with a nice crispy tortilla at the base of the all goodies. You can serve these tacos with rice or beans or whatever Mexican side dish tickles your fancy. Assembly wise I just add some chicken in the tortilla, top with pineapple salsa, drench the whole thing with 1 slice of lime and a sprig of cilantro.

Featured on Foodie Friends Friday!


Easy Granola Bars – Gluten Free


Looking for a quick snack that will keep in the refrigerator and still be good in a few days…is also good for you…AND gluten free? I came across a Fruit and Nut Energy Bar from a good foodie friend of mine over at Mia’s Domain. This woman is like the queen of food. She makes the best stuff and is such an inspiration. I always look to her page for inspiration and ideas!
If you haven’t been to her page, I URGE you to go check it out, but not before you’ve read my recipe 😀 I used her recipe and turned her energy bar in to a granola bar.
Crisp oats and dried fruit make this such a delight to bite into. the sweetness of the maple syrup and the dark chocolate chips are a surprise for your taste buds as it hits them after the initial bite of the fruit. This is a great go to snack and for kids rushing out the door who don’t have time for breakfast…well this is good as any breakfast for them and it will keep them full longer with all the goodies inside! Hearty, healthy, and gluten-free, can’t go wrong!
INGREDIENTS
1 cup ground flax seeds (1/2 cup whole)
1 cup chia seeds (1/2 cup)
2 cups apple cinnamon quick cooking oats
1 cup chopped dried apricots
1 cup dried cranberries/blueberries/cherries
1 cup diced almonds
1 cup dark chocolate chips
1 cup crunchy salted peanut butter
1 cup pure maple syrup or honey (used 1/2 & 1/2)
zest of 1 orange
Sea salt
Preheat oven to 350 F
Combine all dry ingredients
Melt peanut butter and add maple syrup or honey  to it and add to dry ingredients. Mix well until no dry ingredients remain.
Pour into a non-stick 16 by 12 inch cookie sheet pan. Use a rolling-pin to spread the mixture into an even layer. (See Mia is a genius!)
Grind sea salt over the top. Bake for 25-30 minutes. Leave to cool completely before cutting into bars.
Store in an airtight container in the refrigerator.


Dark Chocolate Covered Pumpkin Truffles

Kicking off Day #1 of All things pumpkin at Sweet Heat Chefs

Fall is officially here…YAY! I love this time of year, the weather, the brightly colored trees, the crispness of the morning air, and all the pumpkins and colors around the city. Pumpkin recipes are in full swing out on the internet and int he culinary world. I am happy to contribute to the “madness”.

I feel like I repeat myself a lot when I say this recipe is quick and easy! But I guess that is because I am always looking for quick ways to get food finished for the fam. Sure some of my recipes are more complex, but for the most part they are everyday recipes anyone can do and quick for everyone who is short on time, there are a lot of us out there after all!

Foodie Friends Friday

INGREDIENTS

1/4 cup pumpkin puree
1/4 cup powdered sugar
1/2 cup cream cheese, softened
1/2 teaspoon pumpkin pie spice
1/2 teaspoon vanilla extract
1 cup graham crackers, crushed

1 bag dark chocolate chips, melted

Beat first 5 ingredients in a bowl until well combined. 

Add graham crackers and stir well.

Chill for 30-40 minutes and roll into balls.

Place in the freezer for about 30 minutes and cover with melted dark chocolate.

Store in refrigerator or freezer until ready to eat! they only take about 5 minutes to un-thaw enough to eat. Or if you are like me, I just eat it frozen. The creaminess of the pumpkin melts in your mouth while the cold dark chocolate is frozen and has that deep sweetness to balance it all out.

shown on Foodie Friends Friday!

Cornbread Toaster Bites

This is it…all the ingredients needed for this recipe, only 9 of them! Love easy, love convenient, love quick & YUMMY!

Do you remember the days when your mom was making homemade cornbread and as it was baking away in the oven and the odor of that sweet corn traveled through the house and made its way to your room? You emerge from under a pile of clothes that has been strewn about your room for weeks even though your mom has asked you to pick it up every time she walks by, to see what was for dinner. I love cornbread in many things and with many things. Now that the weather is getting cooler I can’t think of anything better than to get cooking on finding a new use for them.

I have had cornbread for lunch and dinner…how about breakfast? I can’t remember a breakfast that I have had that included fresh-baked cornbread. The vest part about this recipe is it is quick to assemble and a quick bake for the morning. You can get up throw everything together and bake. When you make you can eat it right as it is out of the oven with melting butter and drizzled honey and a few sprigs of freshly toasted rosemary leaves! You will not be able to stop at 1 piece!

Since this makes an entire sheet pan, you most likely will have left overs. Pop these in the toaster in the morning and repeat the process of butter, honey and rosemary. Enjoy with a hot cup of coffee or tea and you are in sweet cornbread bliss.

NOTE TO SELF: If possible get a plate, put your feet up and zen out!

INGREDIENT LIST

1 stick butter, melted
1/2 c + 2 T sugar
2 eggs
1.5 t vanilla
1 1/2 t baking powder
3/4 c + 2 T cornmeal
1 1/4 c all-purpose flour
1/2 t salt
1 c milk

Preheat oven to 350 F. and
In a medium-sized bowl mix together the melted butter & sugar.

Stir in the eggs and vanilla.

Add the baking powder, cornmeal, flour & salt. Mix until everything is moistened. 

Add milk & mix until smooth

Line a 10″ x 15″ baking sheet with 1/2″ sides with foils and a piece of parchment paper. Spray a little non stick cooking spray on the parchment and throw a small handful of cornmeal over the top (this is optional) Pour your batter onto the parchment paper and spread it out over the entire sheet, getting it in each corner. If the mixture is uneven just give the cookie sheet a couple shakes to even it out.

Bake for about 25 minutes. The edges should be brown & pulling away from the side of the pan & the top should be set and not jiggly.

Allow to rest in the pan 5 to 10 minutes before cutting into. This helps keep the shape you want for making the taster bites. Using a sharp knife cut into individual pieces. 

Store the toaster bites in plastic wrap or in a re-sealable bag in the refrigerator. For longer storage keep them in freezer bags in the freezer.


Shown on Foodie Friends Friday!

Fake Out Parmesan & Rosemary Biscuits

These are the best quick go to fake out biscuits you can have. You have a dinner for some guests and you’re in a hurry, these taste like you made them home-made and they are super quick. TIP: Get rid of the packaging and you can claim them as your own! the crunchy rosemary and its earthy flavor mixed with the freshly grated parmesan with its nutty sharp flavor all go together so well. You won’t even need butter on these!

INGREDIENTS

1 can Pillsbury biscuit dough (any kind)
2-3 sprigs rosemary
1/2 cup fresh grates Parmesan cheese
1 teaspoon garlic powder

Pre-heat oven to 325 degrees F. and cook biscuits for 15-18 minutes or until golden brown. Place biscuits on a foil lined cookie sheet. Sprinkle with parmesan cheese, and cut 1 leaf of the rosemary on top. Sprinkle with garlic powder. Take 1 whole leaf of rosemary and place in the middle of biscuit. Repeat until all biscuits are done.

Inside Out Pizza

Again, another way to turn an ordinary pizza into something spectacular. Ok, maybe not knock your socks off, but a really fun and cool way to eat pizza. By starting with a loaf of frozen bread dough and thawing, or you could make your own.


Roll out pizza dough to form a rectangle. Find your favorite sauce, either marinara or pizza. You can use tomato sauce with oregano too. Spread that onto your rolled out pizza dough and top with some grated Parmesan cheese.


Add your favorite toppings. This was the kids pizza so it is really boring on the ingredient list.

Add shredded mozzarella cheese to your hearts desire.

Roll this puppy up from the short end to the opposite short end side. I line my cookie sheet with foil and spray with cooking spray and then add cornmeal. I LOVE cornmeal on my pizza crust.

Bake at 425 degrees F until golden brown, approximately 20-25 minutes.

Tzatziki

My daughter, Jasmine, had to make something for her class as they studied Greece in 6’th grade. They had many options to choose from, and ultimately she ended up choosing a food to make (of course). While in her Chiton, she had to present to the class how to make it and all describe the history and how the ingredients were used behind the ingredients. This was fun for us to do together. It was an easy recipe because we had to use original ingredients that were around back during the Roman Empire. This is a great low fat recipe great for game day to dip pita chips in or cut up your favorite veggies and dip away. I even use it in a pita pocket and make a nummy sandwich instead of mayo!!

      Jasmine

INGREDIENTS

1 cup grated seeded peeled cucumber
1/2 teaspoon salt
1 cup plain fat-free yogurt (can use whole yogurt too)
2 teaspoons chopped fresh dill
2 teaspoons fresh lemon juice + zest of lemon
2 garlic cloves, minced

DIRECTIONS

  1. Clean, slice open and seed your cucumber. I grate 1/2 of the cucumber and cube the other half, giving a texture to the tzatziki.
  2. Combine all wet ingredients and add cucumber, stirring until well blended. Refrigerate at least 1 hour before serving.

Pizza Rolls

Pizza dough un-thawing. This one is a garlic seasoned dough I bought from Safeway (yes I cheated!)

Braut sausages. I am NOT a sausage fan and these puppies are super good and flavorful, they brown up really nicely and have a nice crunch to them when you bite into the pizza roll.

Of course, I can’t, no really I can’t, go hardly ever cooking without my VINO!

The first pizza roll I did not use spinach, God forbid someone in my house eat something GREEN!

I am always looking for different ways to do pizza, and this is a great new easy less messy version. I stumbled upon a blog that made a something called Twirly Whirly Pizza, such a cute name. I knew I had to give it a go after seeing the ease of making them. The kids LOVED them and I enjoyed eating them. Unlike traditional pizza, it is all rolled up in a crispy cinnamon like roll with gooey cheese and crispy sausage and ham and sweet pineapple in the middle. When you cut open into this pizza roll, it is light and each bite is a little piece of heaven!

INGREDIENTS

1/2 cup tomato sauce
1 teaspoon oregano
4 braut sausages, casing removed, diced and cooked until browned
1/2 cup baby spinach leaves, cleaned and dried
3/4 cup shredded cheese of your choice, I used mozzarella and sharp cheddar mixed
1 can diced pineapple
1/2 cup diced cooked ham

2 balls of pizza dough, I purchase my already made (Safeway)

DIRECTIONS

  1. Preheat the oven to 450 F.
  2. Mix the sauce and oregano together. You can use a pizza sauce instead of this sauce for convenience. I like spicy so I added a few shakes of red pepper flakes in it as well.
  3. Take the un-thawed pizza crust on a cutting board and roll out or stretch until desired thinness. I coat the cutting board with a handful of cornmeal first.
  4. Spread sauce over crust
  5. Add cheese on top of sauce
  6. Add sausage, ham, and pineapple
  7. Top everything with the spinach leaves.
  8. Roll the dough from one end to the other forming a tube.
  9. Cut into 8 pieces
  10. In a greased pie dish layer the cut pieces around the pie dish. Repeat processes as above with second pizza dough. top with a layer of more cheese and bake for 15 minutes until bubbly golden brown.