
Using leftovers in my house is ALWAYS a chore. 1: My kids and hubby hate leftovers, 2: it is hard to make only myself leftovers while they eat crap (aka boxed mac-n-cheese or cup of soups which my kids would live on if I’d let them) So today I decided I wouldn’t tell them I was using leftovers to create this dish, and see how that went over.

I had leftover ground turkey and some sweet peppers. I am rummaging through my fridge to see what I can make to go along with it. I always turn everything into a Mexican type meal so I was determined NOT to make this dish that way. Now I see your brow furrowing and your mind racing saying…wait the name of the dish begins with Mexican.

And…You are right, because there is simply no way for me to NOT make a Mexican based dish, I simply love it way too much. My favorite quote of the night was from my daughter, who upon returning home from the mall, ate dinner and stated: “It tastes like a party in my mouth” I do not know 1 chef who would not like that type of review! #missionaccomplished!
Now, this dish is packed full of flavor and guess what? FULL of nutrients too! How awesome is that?! Common, get your shopping list ready and get this dish done!
INGREDIENTS
- 18 sweet peppers, cleaned, top off and de-seeded
- 1/2 lb. ground turkey
- 1 can diced green chilis
- 1 clove garlic, minced (I use microplane)
- juice of 1 lime
- 2 tsp onion powder
- salt/pepper, to taste
- olive oil, as needed
- 2 tbs fresh cilantro chopped & washed
- 1/2 cup Red Quinoa
- 1 cup beef broth
- 1/2 cup jack cheese, shredded

DIRECTIONS
- Line a sheet pan with foil and drizzle olive oil over it, about 2 tsp.
- In a skillet brown ground turkey
- Add garlic, onion powder, and salt/pepper.
- Once almost browned, add lime juice and green chilis.
- Continue to cook over medium high until thoroughly cooked.
- While cooking stuffing mixture, rinse 1/2 cup red quinoa in a strainer
- Add to pot with beef broth.
- Bring to boil and reduce heat cooking on low simmer for about 15 minutes or until all liquid is absorbed.
- Once stuffing mixture is finished remove from heat and let cool.
- Once quinoa is finished add 1/4 cup to stuffing mix, combine well and add 1 tbs chopped cilantro.
- Using a teaspoon measure stuff the peppers until filled to the top.
- Roll in olive oil on sheet pan and continue until all peppers are stuffed.
- Top all peppers with shredded jack cheese evenly. (I push them all together to cheese is not wasted on pan, but ooey gooey goodness all over peppers)
- Bake for 10 minutes on 375 degrees, then broil for 5-7 minutes.
- Let cool for about 5 minutes. Serve peppers on top of remaining red quinoa and remaining cilantro, and prepare to lick your plate clean!


Additional Hint:
IF your kids are anti-peppers (I have 2) whether they are sweet or otherwise, wrap the filling into a corn or flour tortilla and heat up and roll like a burrito. They will be just as pleased with the dish as you. You still are getting that quinoa in them and a healthy meal!

Carnitas & Cheese Tamales

**FIRST OFF, please bear with me on the formatting of this post, I have tried everything I know to get it to look right, but it is not working. This post should have been published a week ago! Sorry The Mystic Blue Spice Co.
I took the past week of my life to try new adventures in the kitchen, keyword adventure. From crying, laughing, cursing, to smiling; it took place here. I never knew how much was at stake when I started this blog. I want to please my readers with quality food and ingredients along with perfect pictures to match what goes on in my kitchen. This week has been all but forgiving on my sanity, from losing the cotton twine to tying my tamales (subsequently finding it a few weeks later!) to losing 58 of the pictures for all my recipes and to put the whip cream on top, my blog formatting has all gone haywire! *insert BIG SIGH*! What technology can not take from me, is my recollection of my experience and the tricks and tips I can pass on to you, which I do wholeheartedly LOVE to do.
I thought the idea of making tamales sounded not only fun, but accomplishing. I read reviews and tips and ideas on how and what to do. I got advice from my mom who had made them for my son. I personally didn’t care for them. I have had a few in my day that were ok but nothing like knocking the ball out of the park delicious. So as with anything if it isn’t really that good why bother to eat it. Well my son and daughter both love them, so I decided I should probably figure out this feat.
After researching I compiled my list of ingredients, planned the day to do it, because after all it takes all day unless you break it into 2 – 1/2 days. I got all my equipment sorted, cleaned laid out and ready. I am telling you I could not be more ready for this than I was…or so I thought. I started at 11:30 cooking the meat, and all the sauces. By 7:00 pm that night I was still…steaming…tamales! Keep in mind, in between I am running to and from school picking kids up and dealing with a 2-year old with a short attention span!
I suppose if you grow up in a household which makes these all the time or if you do this enough times you will be a pro. A beginner, will feel like it’s your first time writing your own name…remember that? I don’t want to deter you from trying to do this, I am just forewarning you it is tedious, time-consuming, rewarding, messy, frustrating and FUN!
If you have leftover sauce, meat and or masa, freeze it and the next go round won’t be as time-consuming. The goods will keep int he freezer for about 2-3 months!!
Now for the lowdown…
Things to know about making tamales, for tamale making dummies, aka beginners!
- Get all your ingredients laid out before you begin.
- Have your meat prepared ahead of time, this will save you time when taking on this project. Make the night before and refrigerate. Then you only have sauce to make and assemble day 2.
- Organize a large work space for assembling the tamales and a place to put them before steaming begins.
- Get yourself some type of cotton ties to secure the tamales. If you are not using cheese or a sauce, you won’t need this. If you are using cheese or a sauce you will WANT these!
- If you are making more than 1 type; meat & cheese, green sauce meat & cheese, red sauce meat & cheese, then be sure to label them or keep them grouped together, so you know what is what when you are done.
- Buy the largest corn husks you can find. The small ones are useless, unless you use 2 together but when using sauce, it creates more of a mess (in my opinion!)
- Keep unused corn husks soaking in water the entire tamale making adventure.

INGREDIENTS
- 2# pork picnic roast
- 1 medium red onion large chopped
- 2 cloves garlic, sliced in half
- 2 tbs oregano
- 1 tbs The Mystic Blue Spice Co. tamale seasoning

- 3 1/2 cups dried masa harina for tamales
- 3 3/4 cups hot reserved pork broth or hot water
- 10 ounces or 1 1/3 cups vegetable shortening softened
- 2 teaspoons salt
- 1 1/2 teaspoons baking powder
- 1 package dried corn husk leaves
- 4 Poblano Peppers
- 4 Anaheim Peppers
- 4 tomatillos
- 12 ounces Monterey Jack Cheese, shredded
- 19 oz verde enchilada sauce (mild) Las Palmas
- 2 tbs olive oil
- 2 cloves garlic
- 2 tbs. vegetable shortening
- 1 medium white onion, roughly chopped
- 6 cloves garlic chopped
- 2 ancho chiles, toasted, stemmed, seeded, soaked in very hot water for 15 minutes, and drained
- 2 guajillo chiles, toasted, stemmed, seeded, soaked in very hot water for 15 minutes, and drained
- 1 cups canned enchilada sauce Las Palmas
- 1 1/2 cups (approximately) reserved pork cooking broth or lower-salt chicken broth
- 1 tbs. masa harina
- 1 tbs. brown sugar or honey; more as needed
- 1/2 tsp. dried Mexican oregano
- 1 tsp The Mystic Blue Spice Co. tamale seasoning
- 12 oz Monterrey jack shredded cheese
- In stock pot, add 8 cups water plus all ingredients.
- Bring to boil and continue to cook for 2 hours covered.
- KEEP ALL COOKING LIQUID
- Add meat to baking pan add 2 cups liquid and place in oven on 275 F. degrees for 1-2 hours. Check to make sure liquid does not evaporate and add more if so.
- When done remove from oven allow to cool and shred with fork.
- Roast the peppers under a broiler, turning occasionally until all sides are charred really well nice and dark.
- Place the charred peppers into a bowl covered with plastic wrap for 15 minutes to sweat and make the skin peel.
- In a medium stock pot, add olive oil and garlic, heat on medium heat until aromatic; about 2-3 minutes. keep heat low, do not burn garlic.
- Add verde enchilada sauce and bring to a boil, then simmer covered on low.
- While the sauce is simmering, peel the skins off the peppers and tomatillos. For the peppers remove all seeds, then roughly chop and add to verde sauce, for tomatillos, peel skin and rough chop. Add peppers and tomatillos in food processor and blend until smooth. Add to simmering sauce, cover and continue to simmer for 20-25 minutes.
- When done, take off heat and set aside to cool.
- Place dried chilies in a bowl of hot pork broth or hot water for 15 minutes.
- When chilies are done, heat 1-1/2 tbs. of the shortening in a 4-quart saucepan over medium heat. Add the onion and garlic and cook until beginning to brown, about 3-5 minutes.
- Add the masa and stir creating a thick paste.
- Add in soaked chiles & broth they soaked in, enchilada sauce, sugar, oregano, tamale seasoning, and the broth.
- Continue simmering on medium low until the sauce has darkened in color, 10-20 minutes, stirring occasionally (The sauce may be made up to 2 days ahead; keep refrigerated.)
- Set aside and let cool.
- Once cool place in batches in the food processor until a smooth consistency. Replace in stockpot and set aside to cool.
- Combine the masa harina and 1.5 cups hot broth or hot water stir until mixed well.
- Using an electric mixer on medium-high speed, beat the lard or shortening with the salt and baking powder until light in texture, about 1 minute.
- Continue beating as you add the masa mixture in three additions.
- Reduce the speed to medium-low and add additional broth or water 1/4 cup at a time and continue beating for another minute or so, until a 1/2-teaspoon dollop of the batter floats in a cup of cold water (if it floats you can be sure the tamales will be tender and light).
- Beat in enough additional broth to give the mixture the consistency of soft, but not runny cake batter; it should hold its shape in a spoon.
- Taste the dough and season with additional salt if you think necessary.
- Refrigerate the batter for an hour, then use an electric mixer to beat enough additional broth to bring the mixture to the soft consistency it had before. About 1/2 – 3/4 cups worth.
- Unfold the husks and place in a baking dish full of hot water, for approx 1 hr before ready to roll tamales. I placed a second dish on top to hold water and husks under water.
- Remove husks, a few at a time from the water, dry completely before use and set aside.
- Place 2-4 tbs of masa dough on the husk and work into a square or rectangular shape to lay the base for the meat and sauce mixture.
- Work in batches; Use a large steamer or collapsible vegetable steamer set into a large, deep saucepan
- Line the steamer with leftover scraps of corn husks to protect the tamales from direct contact with the steam and to add more flavor, but make sure to leave small spaces between leaves so condensing steam can drain off.
- Lay out a corn husk
- Spread 2-4 tbs of masa dough over it creating a rectangle or square depending on size of husk.
- Spoon 2 tablespoons of the meat, 1 tbs cheese, and 1 tbs sauce over the dough
- Roll the corn husk away from you starting with the long end and work away from you.
- Tuck the left skinny side of the husk under and set aside. This leaves the top open and exposed. If you have cotton or corn ties, use these to tie each end instead of tucking under. (The tie is an optional step and the tamale will cook and be perfectly fine if this step is skipped)
- Place as many tamales as you can fit into the steamer. Stand them upright so the open end is up. (If using ties the placement of ends will not apply) Once in the steamer, set the lid in place and steam over a constant medium heat for about 1 1/4 hours. (Watch carefully that all the water doesn’t boil away, add more water if necessary)
- The tamales are done when pressed are a firm consistency. If mushy, they are not done.
- Let tamales stand in the steamer off the heat for a few minutes to firm up.


Cornbread Gone Wild…

I am convinced I was either Hispanic in my previous life or a poblano pepper. I just can’t get enough Mexican food and the spiciness that goes with it! This recipe is an adaptation from another recipe I have. If you want to make it vegetarian omit the turkey meat, it is just as tasty! I love cornbread but also like nontraditional such as with butter and honey. So baking it this way makes it seem like you are having it an entirely new way, which essentially you are. You could add black beans in this recipe instead of corn or along with the corn to make it more tex mex. This is a spicy dish, if you want it less spicy omit the jalepeno and make sure all seeds are removed. I left some seeds in and used the jalepeno, 1 of my kids was in tears it was so spicy for them 😦 I also served this over my Chipotle Lime Refried Beans. Be prepared for >hotness<
INGREDIENTS
1 lb ground turkey meat
2 cloves garlic, minced
salt/pepper to taste (for ground turkey)
2 tablespoons butter
6 large, fresh green chilies; such as Anaheim or poblano, roasted, peeled and seeded
1 jalepeno pepper; roasted, peeled and seeded
1/2 cup grated Pepper Jack cheese
1/2 cup grated sharp cheddar cheese
1/4 cup grated Monterrey jack cheese
4 eggs, yolks and whites separated
1 can corn, drained
3 tablespoons yellow cornmeal
3 tablespoons flour
1/2 cup milk
3 tablespoons sour cream
1/2 teaspoon salt (for cornbread batter)
DIRECTIONS
- Preheat oven to Broil
- Char peppers until bubbly, brown and aromatic; about 10-15 minutes.
- Place in bowl and cover with saran wrap to “sweat” the peppers to be able to easily remove the skins.
- Once skins removed, carefully slice open and remove seeds.
- Butter an 8-inch-square baking pan with 1 tablespoon of the butter.
- Cook turkey meat with garlic and salt/pepper until cooked thoroughly.
- Place the chiles in a layer on the bottom of the pan, sprinkle 1/2 the turkey meat, top with 1/2 half the cheese, add remaining turkey meat.
- Beat the egg whites until fluffy, almost stiff.
- In another bowl, mix together the egg yolks, corn, cornmeal, flour, milk, sour cream and salt.
- Fold egg whites gently into the cornbread mixture and spoon over the cheese and peppers.
- Top with butter pats and add all remaining cheese on top
- Bake for 25 minutes.
- Let set for about 5 minutes and cut into sections to serve.
- Serve on top of my Chipotle Lime Refried Beans.
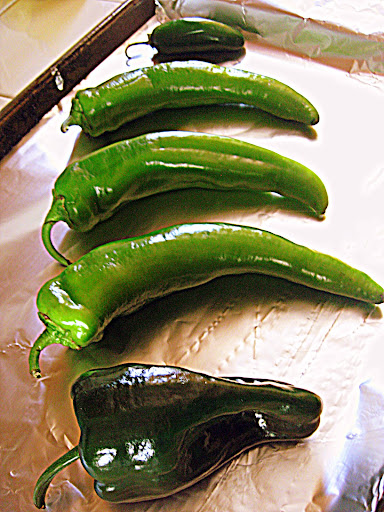
Prepping the peppers for charring
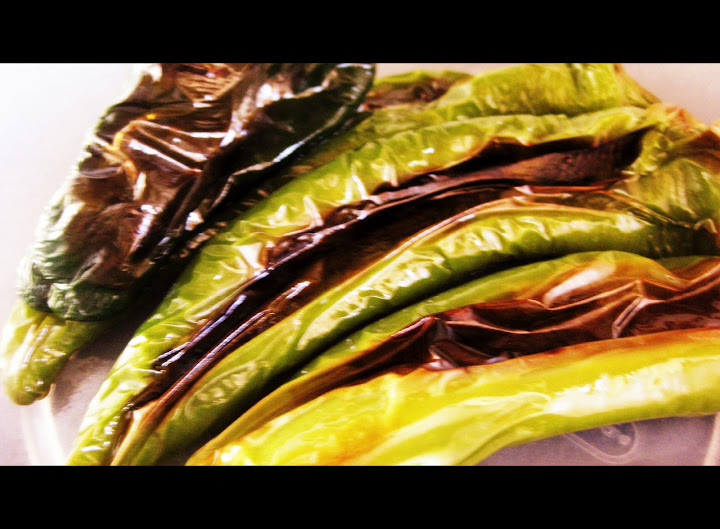
Peppers after sweating

Make sure your 2 year old has something to play with while you get hot pepper seeds on your hands!

Shredded cheeses
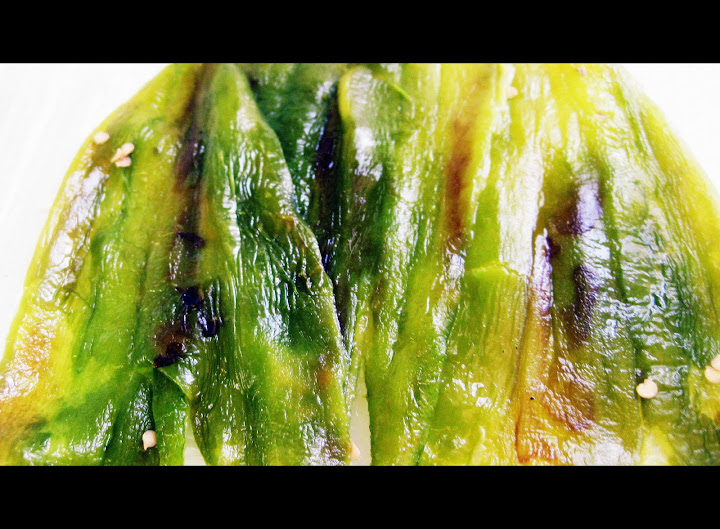
De-skinned & de-seeded peppers in baking dish
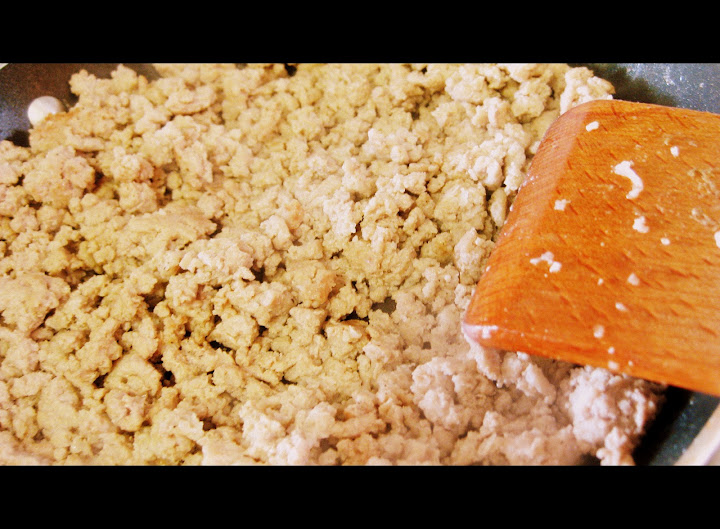


on top of peppers goes the turkey meat
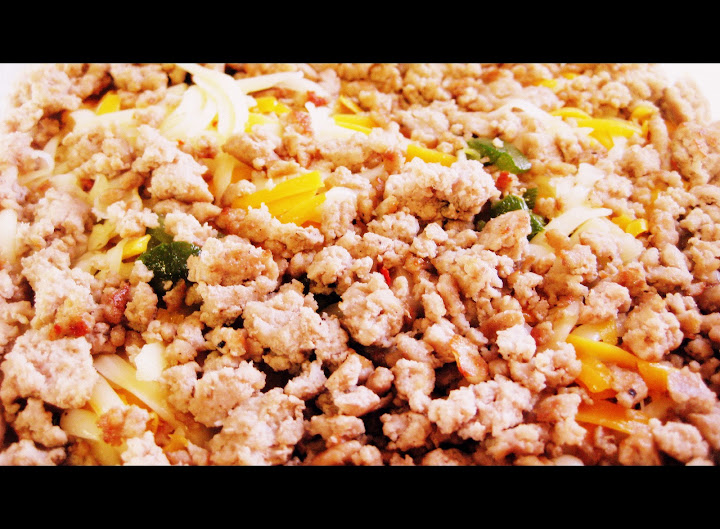
on top of turkey meat goes cheese, then the rest of the turkey
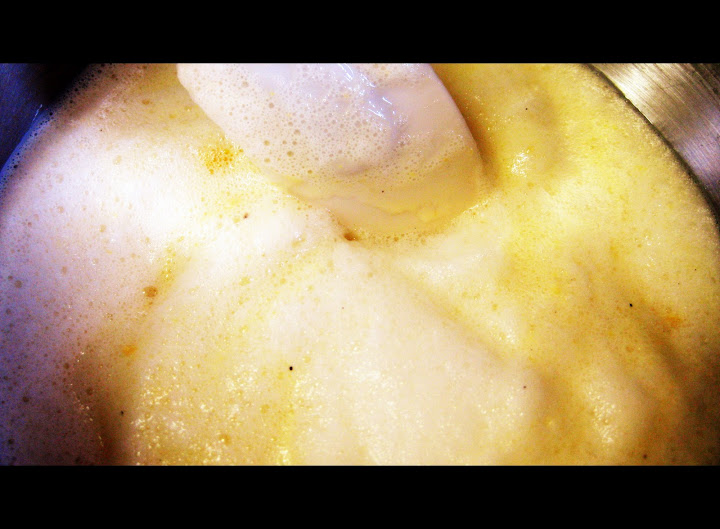
fluffy egg whites
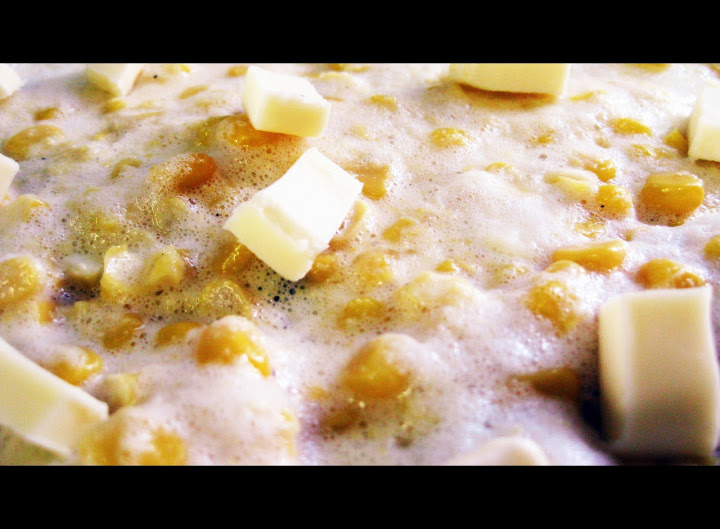
egg whites and cornbread mixture added to pan, topped with butter pats
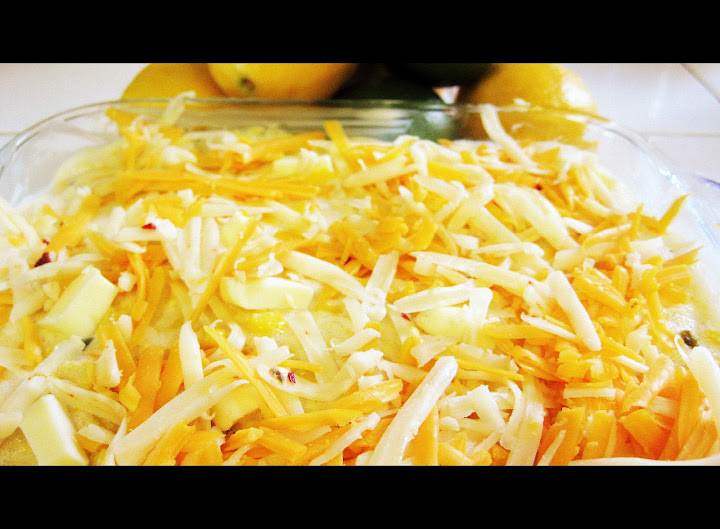
top with remaining cheese and bake, bake, bake. Enjoy the wonderful aromas that arise from your oven.

