Using leftovers in my house is ALWAYS a chore. 1: My kids and hubby hate leftovers, 2: it is hard to make only myself leftovers while they eat crap (aka boxed mac-n-cheese or cup of soups which my kids would live on if I’d let them) So today I decided I wouldn’t tell them I was using leftovers to create this dish, and see how that went over.

I had leftover ground turkey and some sweet peppers. I am rummaging through my fridge to see what I can make to go along with it. I always turn everything into a Mexican type meal so I was determined NOT to make this dish that way. Now I see your brow furrowing and your mind racing saying…wait the name of the dish begins with Mexican.

And…You are right, because there is simply no way for me to NOT make a Mexican based dish, I simply love it way too much. My favorite quote of the night was from my daughter, who upon returning home from the mall, ate dinner and stated: “It tastes like a party in my mouth” I do not know 1 chef who would not like that type of review! #missionaccomplished!
Now, this dish is packed full of flavor and guess what? FULL of nutrients too! How awesome is that?! Common, get your shopping list ready and get this dish done!
INGREDIENTS
- 18 sweet peppers, cleaned, top off and de-seeded
- 1/2 lb. ground turkey
- 1 can diced green chilis
- 1 clove garlic, minced (I use microplane)
- juice of 1 lime
- 2 tsp onion powder
- salt/pepper, to taste
- olive oil, as needed
- 2 tbs fresh cilantro chopped & washed
- 1/2 cup Red Quinoa
- 1 cup beef broth
- 1/2 cup jack cheese, shredded

DIRECTIONS
- Line a sheet pan with foil and drizzle olive oil over it, about 2 tsp.
- In a skillet brown ground turkey
- Add garlic, onion powder, and salt/pepper.
- Once almost browned, add lime juice and green chilis.
- Continue to cook over medium high until thoroughly cooked.
- While cooking stuffing mixture, rinse 1/2 cup red quinoa in a strainer
- Add to pot with beef broth.
- Bring to boil and reduce heat cooking on low simmer for about 15 minutes or until all liquid is absorbed.
- Once stuffing mixture is finished remove from heat and let cool.
- Once quinoa is finished add 1/4 cup to stuffing mix, combine well and add 1 tbs chopped cilantro.
- Using a teaspoon measure stuff the peppers until filled to the top.
- Roll in olive oil on sheet pan and continue until all peppers are stuffed.
- Top all peppers with shredded jack cheese evenly. (I push them all together to cheese is not wasted on pan, but ooey gooey goodness all over peppers)
- Bake for 10 minutes on 375 degrees, then broil for 5-7 minutes.
- Let cool for about 5 minutes. Serve peppers on top of remaining red quinoa and remaining cilantro, and prepare to lick your plate clean!


Additional Hint:
IF your kids are anti-peppers (I have 2) whether they are sweet or otherwise, wrap the filling into a corn or flour tortilla and heat up and roll like a burrito. They will be just as pleased with the dish as you. You still are getting that quinoa in them and a healthy meal!

Carnitas & Cheese Tamales

**FIRST OFF, please bear with me on the formatting of this post, I have tried everything I know to get it to look right, but it is not working. This post should have been published a week ago! Sorry The Mystic Blue Spice Co.
I took the past week of my life to try new adventures in the kitchen, keyword adventure. From crying, laughing, cursing, to smiling; it took place here. I never knew how much was at stake when I started this blog. I want to please my readers with quality food and ingredients along with perfect pictures to match what goes on in my kitchen. This week has been all but forgiving on my sanity, from losing the cotton twine to tying my tamales (subsequently finding it a few weeks later!) to losing 58 of the pictures for all my recipes and to put the whip cream on top, my blog formatting has all gone haywire! *insert BIG SIGH*! What technology can not take from me, is my recollection of my experience and the tricks and tips I can pass on to you, which I do wholeheartedly LOVE to do.
I thought the idea of making tamales sounded not only fun, but accomplishing. I read reviews and tips and ideas on how and what to do. I got advice from my mom who had made them for my son. I personally didn’t care for them. I have had a few in my day that were ok but nothing like knocking the ball out of the park delicious. So as with anything if it isn’t really that good why bother to eat it. Well my son and daughter both love them, so I decided I should probably figure out this feat.
After researching I compiled my list of ingredients, planned the day to do it, because after all it takes all day unless you break it into 2 – 1/2 days. I got all my equipment sorted, cleaned laid out and ready. I am telling you I could not be more ready for this than I was…or so I thought. I started at 11:30 cooking the meat, and all the sauces. By 7:00 pm that night I was still…steaming…tamales! Keep in mind, in between I am running to and from school picking kids up and dealing with a 2-year old with a short attention span!
I suppose if you grow up in a household which makes these all the time or if you do this enough times you will be a pro. A beginner, will feel like it’s your first time writing your own name…remember that? I don’t want to deter you from trying to do this, I am just forewarning you it is tedious, time-consuming, rewarding, messy, frustrating and FUN!
If you have leftover sauce, meat and or masa, freeze it and the next go round won’t be as time-consuming. The goods will keep int he freezer for about 2-3 months!!
Now for the lowdown…
Things to know about making tamales, for tamale making dummies, aka beginners!
- Get all your ingredients laid out before you begin.
- Have your meat prepared ahead of time, this will save you time when taking on this project. Make the night before and refrigerate. Then you only have sauce to make and assemble day 2.
- Organize a large work space for assembling the tamales and a place to put them before steaming begins.
- Get yourself some type of cotton ties to secure the tamales. If you are not using cheese or a sauce, you won’t need this. If you are using cheese or a sauce you will WANT these!
- If you are making more than 1 type; meat & cheese, green sauce meat & cheese, red sauce meat & cheese, then be sure to label them or keep them grouped together, so you know what is what when you are done.
- Buy the largest corn husks you can find. The small ones are useless, unless you use 2 together but when using sauce, it creates more of a mess (in my opinion!)
- Keep unused corn husks soaking in water the entire tamale making adventure.

INGREDIENTS
- 2# pork picnic roast
- 1 medium red onion large chopped
- 2 cloves garlic, sliced in half
- 2 tbs oregano
- 1 tbs The Mystic Blue Spice Co. tamale seasoning

- 3 1/2 cups dried masa harina for tamales
- 3 3/4 cups hot reserved pork broth or hot water
- 10 ounces or 1 1/3 cups vegetable shortening softened
- 2 teaspoons salt
- 1 1/2 teaspoons baking powder
- 1 package dried corn husk leaves
- 4 Poblano Peppers
- 4 Anaheim Peppers
- 4 tomatillos
- 12 ounces Monterey Jack Cheese, shredded
- 19 oz verde enchilada sauce (mild) Las Palmas
- 2 tbs olive oil
- 2 cloves garlic
- 2 tbs. vegetable shortening
- 1 medium white onion, roughly chopped
- 6 cloves garlic chopped
- 2 ancho chiles, toasted, stemmed, seeded, soaked in very hot water for 15 minutes, and drained
- 2 guajillo chiles, toasted, stemmed, seeded, soaked in very hot water for 15 minutes, and drained
- 1 cups canned enchilada sauce Las Palmas
- 1 1/2 cups (approximately) reserved pork cooking broth or lower-salt chicken broth
- 1 tbs. masa harina
- 1 tbs. brown sugar or honey; more as needed
- 1/2 tsp. dried Mexican oregano
- 1 tsp The Mystic Blue Spice Co. tamale seasoning
- 12 oz Monterrey jack shredded cheese
- In stock pot, add 8 cups water plus all ingredients.
- Bring to boil and continue to cook for 2 hours covered.
- KEEP ALL COOKING LIQUID
- Add meat to baking pan add 2 cups liquid and place in oven on 275 F. degrees for 1-2 hours. Check to make sure liquid does not evaporate and add more if so.
- When done remove from oven allow to cool and shred with fork.
- Roast the peppers under a broiler, turning occasionally until all sides are charred really well nice and dark.
- Place the charred peppers into a bowl covered with plastic wrap for 15 minutes to sweat and make the skin peel.
- In a medium stock pot, add olive oil and garlic, heat on medium heat until aromatic; about 2-3 minutes. keep heat low, do not burn garlic.
- Add verde enchilada sauce and bring to a boil, then simmer covered on low.
- While the sauce is simmering, peel the skins off the peppers and tomatillos. For the peppers remove all seeds, then roughly chop and add to verde sauce, for tomatillos, peel skin and rough chop. Add peppers and tomatillos in food processor and blend until smooth. Add to simmering sauce, cover and continue to simmer for 20-25 minutes.
- When done, take off heat and set aside to cool.
- Place dried chilies in a bowl of hot pork broth or hot water for 15 minutes.
- When chilies are done, heat 1-1/2 tbs. of the shortening in a 4-quart saucepan over medium heat. Add the onion and garlic and cook until beginning to brown, about 3-5 minutes.
- Add the masa and stir creating a thick paste.
- Add in soaked chiles & broth they soaked in, enchilada sauce, sugar, oregano, tamale seasoning, and the broth.
- Continue simmering on medium low until the sauce has darkened in color, 10-20 minutes, stirring occasionally (The sauce may be made up to 2 days ahead; keep refrigerated.)
- Set aside and let cool.
- Once cool place in batches in the food processor until a smooth consistency. Replace in stockpot and set aside to cool.
- Combine the masa harina and 1.5 cups hot broth or hot water stir until mixed well.
- Using an electric mixer on medium-high speed, beat the lard or shortening with the salt and baking powder until light in texture, about 1 minute.
- Continue beating as you add the masa mixture in three additions.
- Reduce the speed to medium-low and add additional broth or water 1/4 cup at a time and continue beating for another minute or so, until a 1/2-teaspoon dollop of the batter floats in a cup of cold water (if it floats you can be sure the tamales will be tender and light).
- Beat in enough additional broth to give the mixture the consistency of soft, but not runny cake batter; it should hold its shape in a spoon.
- Taste the dough and season with additional salt if you think necessary.
- Refrigerate the batter for an hour, then use an electric mixer to beat enough additional broth to bring the mixture to the soft consistency it had before. About 1/2 – 3/4 cups worth.
- Unfold the husks and place in a baking dish full of hot water, for approx 1 hr before ready to roll tamales. I placed a second dish on top to hold water and husks under water.
- Remove husks, a few at a time from the water, dry completely before use and set aside.
- Place 2-4 tbs of masa dough on the husk and work into a square or rectangular shape to lay the base for the meat and sauce mixture.
- Work in batches; Use a large steamer or collapsible vegetable steamer set into a large, deep saucepan
- Line the steamer with leftover scraps of corn husks to protect the tamales from direct contact with the steam and to add more flavor, but make sure to leave small spaces between leaves so condensing steam can drain off.
- Lay out a corn husk
- Spread 2-4 tbs of masa dough over it creating a rectangle or square depending on size of husk.
- Spoon 2 tablespoons of the meat, 1 tbs cheese, and 1 tbs sauce over the dough
- Roll the corn husk away from you starting with the long end and work away from you.
- Tuck the left skinny side of the husk under and set aside. This leaves the top open and exposed. If you have cotton or corn ties, use these to tie each end instead of tucking under. (The tie is an optional step and the tamale will cook and be perfectly fine if this step is skipped)
- Place as many tamales as you can fit into the steamer. Stand them upright so the open end is up. (If using ties the placement of ends will not apply) Once in the steamer, set the lid in place and steam over a constant medium heat for about 1 1/4 hours. (Watch carefully that all the water doesn’t boil away, add more water if necessary)
- The tamales are done when pressed are a firm consistency. If mushy, they are not done.
- Let tamales stand in the steamer off the heat for a few minutes to firm up.


Turkey Skewered Meatballs with Pomegranate Sauce

sweetheatchefs.com
This week in my kitchen has been a trial and tribulation week. Trial, error, success, mess, crying, laughing and doing it all over again. This recipe was no exception, including all the pictures that went with it that got erased! All I can say is if you don’t try you won’t succeed, AND make sure you read a recipe in its entirety before buying ingredients AND proceeding to make it. This recipe was adapted from one I saw recently on a blog, click here for the original version. I adapted it to fit our household and you can too. This is a healthy meal and pretty filling with just 2 meatballs served with the rice and a salad.
INGREDIENTS
- 2 pomegranates (do not use pomegranate juice as it will not reduce)
- 1 clove garlic, slightly pressed
- 3/4 cup dry white wine
- 1 sprig rosemary
- 2 lb ground turkey
- 1 large shallot, finely diced
- 1/2 cup shredded Pecorino Romano cheese (divided)
- 2 slices of whole wheat bread
- 1 egg, beaten
- ½ cup plain breadcrumbs or panko crumbs (divided)
- 1 cup stock (chicken or vegetable)
- 1 cup chopped hazelnuts (can use pecans or walnuts instead)
- 1/4 tsp nutmeg or to taste
- 1/2 tsp salt or to taste
- 1/2 tsp black pepper
- 1/4 cup freshly chopped baby spinach, fine chop
- 2 tbsp extra-virgin olive oil
DIRECTIONS – Preheat oven to 400 degrees F. Cooks for 30 minutes (or see alternate cooking method at the end)
- Halve the pomegranates and over a fine mesh strainer squeeze the juice into it until you get 1 cup.
- In a heavy (or non-stick) saucepan or skillet, heat 1 tbsp olive oil and add a sprig of rosemary and 1 clove of garlic.When the garlic is golden brown, discard it and add wine and the pomegranate juice to the pan. Season with salt and pepper and allow to reduce over medium heat, stirring occasionally.
- Chop the hazelnuts and add 2 tbs bread crumbs and 1/4 cup pecorino romano cheese and set aside.
- Heat a tablespoon of olive oil in a small skillet, add the shallots and garlic and cook until translucent over low and make sure not to brown. Dump the shallot and garlic mixture into the fine mesh strainer and let set aside to let drain and cool.
- Soak the bread in broth until soft, then drain by squeezing all the liquid out, and set aside.
- In a bowl, combine the ground turkey with the cooked shallots and garlic, the salt and pepper, spinach, drained bread, nutmeg, egg and additional breadcrumbs as needed to firm up the mixture. Mix everything together really well.
- Allow to rest for two minutes until it firms up, making the mixture easier to shape. The consistency of the mixture should be soft and wet and hold together in a ball.
- Shape into 1″ to 1 ½” sized meatballs.
- Roll the meatballs into the hazelnuts and bread crumb mixture.
- Line a baking tray with a sheet of foil and brush with a small amount of olive oil.
- Thread the meatballs onto skewers (If you’re using wooden skewers, soak them in water for 30 minutes before cooking)
- Arrange the meatballs on the foil in one layer and lightly drizzle the top with a little more olive oil.
- Bake until golden brown about 30 minutes. Drizzle pomegranate sauce over the top and serve over my coconut rice and side of salad greens.
Alternate Cooking Method
You can skewer the meatballs and place over indirect heat on the BBQ. Using a medium heat cook the meatballs for approx 25 minutes, checking frequently to make sure they don’t burn. I placed them on an old cookie sheet lined with foil and oiled generously. I turned them every 5-10 minutes to avoid one side from getting too done at a time. Mine took about 30 minutes but remember all ovens & BBQ’s vary in temperature, so your cooking time might not be the same as mine. The flavor you will get from grilling these will add that much extra to the lean protein you are working with here.
This recipe is being shown at Bobbi’s Cozy Kitchen, Manic Monday Party!
Taco Wreath

This recipe was inspired by Spice Gals version. Click here to see their version CHUCK full of yumminess!!
INGREDIENTS
1 roll Pillsbury crescent rolls ( 8 count)
1/2 lb ground beef, turkey or pork
2 tbs. olive oil
taco seasoning
1 cup cheese (I used shredded mozzarella and provolone)
1/4 cup queso fresco
parmesan cheese for dusting
1 egg for brushing tops with

DIRECTIONS
- Pre-heat the oven to 375 degrees F.
- Heat olive oil in skillet over medium high heat and brown meat through.
- Add taco seasoning and a little water and let evaporate
- Line a cookie sheet with foil and spray with non stick cooking spray
- Line up crescent rolls in a circle pattern creating a wreath, placing the wide end toward the middle. You will overlap the edges and press to connect them.
- Add shredded cheese mixture across the wreath without a break for each roll, just keep it going in circle fashion
- Next add meat in the same manner, also spreading meat up the crescent roll toward the thin end
- Top with a little of the queso fresco.
- Fold the narrow end of the crescent roll toward the center of the wreath until all are done. I connected them together, you can tuck them under each roll too.
- Brush top with egg and dust with parmesan cheese
- Bake for 15-18 minutes (mine took 18)
- Remove from oven and immediately top with remaining queso fresco and let sit for 2-3 minutes.
- Top with sour cream, hot sauce, sliced olives and avocado!

Related articles
- Taco Braid (sweetheatchefs.com)
- Taco Roll-Ups (spoonful.com)
Rosemary & Garlic Infused Oil

THINGS YOU NEED
Vegetable Oil or Olive Oil
Rosemary Sprigs, washed and thoroughly dried
Garlic Cloves, peeled and sliced in half lengthwise
Cleaned and thoroughly dried glass bottles in various sizes shapes and designs
Stoppers; corks, wine bottle stoppers etc.

DIRECTIONS:
Process takes 1 week to infuse, keep that in mind when planning for your gift or for yourself.
- In a glass bottle, place 1 Rosemary sprig and 1 half of garlic clove.
- Using a funnel add oil until almost to the top so as not to overflow.
- Add cork on top.
- Place in a safe, cool environment for 1 week. Everyday swirl the bottle around to mix up the contents. Do not tip upside down it might leak.
- After 1 week, dump oil into a bowl to remove Rosemary and garlic.
- Replace back in bottle with stopper.
- Refrigerate for longevity. Lasts 2 weeks, if you opt to keep in rosemary and garlic, 1 week.

You can change up the ingredients to your tastes. I use these two ingredients all the time so this is my favorite. This makes a nice gift for Grandparents, Parents, Bosses, Mother’s Day, Father’s Day, Christmas, Hostess Gift, & Housewarming. Use for making salad dressings, pan frying chicken, fish, shrimp, beef, pork, & lamb.

OTHER HERBS TO USE:
- Thyme
- Oregano
- Whole Dried Chili Peppers
- Dried Chili Pepper Flakes
- Fresh Sage Leaves (another fav!!)
- Lemon Peelings + zest
- Lime Peelings + zest
- Whole Peppercorns
When choosing herbs and combinations of them, (especially the spicy ones) make sure to start off with small quantities and add to it from there. As you can see in the original recipe I only use small quantities. Fresh herbs are very powerful and infuse the oil very well.
This recipe is beign shared over at Foodie Friends Friday
Related articles
- Cranberry Rosemary Dip – EASY & QUICK (sweetheatchefs.com)
- Spaghetti with olive oil, garlic, rosemary and lemon zest (robin-ellis.net)
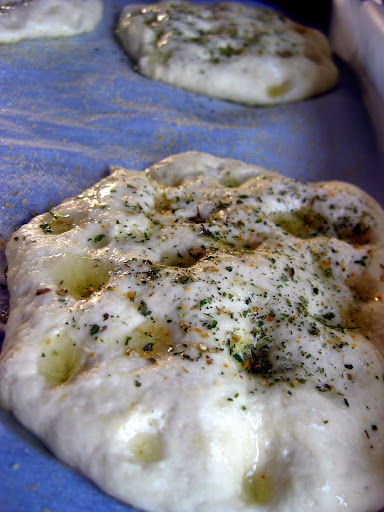
Focaccia – Don’t miss this!
I have made this recipe a few times now and each time it just gets better since I get more comfortable with the whole dough making business. A baker, I AM NOT, N-K?! So..if I can do this ANYONE, can do this. I follow this dough recipe to the “T” and then add the other stuff to suit mine and my families taste. I found this recipe at this amazing blog…ready for the name?….The Barefoot Kitchen Witch! Love her name, love her blog, check her out and you’ll see why. While you are there tell her we sent ya over 😀
Ok, back to the Focaccia yumminess. I could eat these things as a meal in-and-of-itself, however to save face and not look like a total carb overload eater, I make this with either a veggie packed salad or delicious soup, like my Creamy Chicken Veggie & Rice Soup.
Let your heart and tummy guide you through this process of what to top it with. Your options are as vast as your imagination on this one, that is half the fun coming up with toppings and combinations. Just imagine yourself biting into a light warm crispy and soft doughy bite filled with your favorite toppings….now your talking!
Take your time with the recipe, nurture it, follow it and enjoy the outcome when finished. I will guide you through a step by step process that will ensure complete success!
Things to know about this recipe:
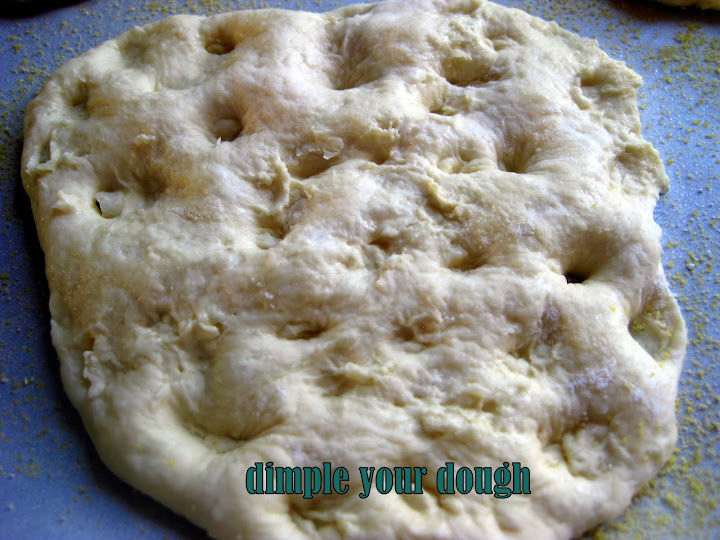
- Kids love helping with this; let them dimple the dough, let them pick their own ingredients and let them top their own with what they picked!
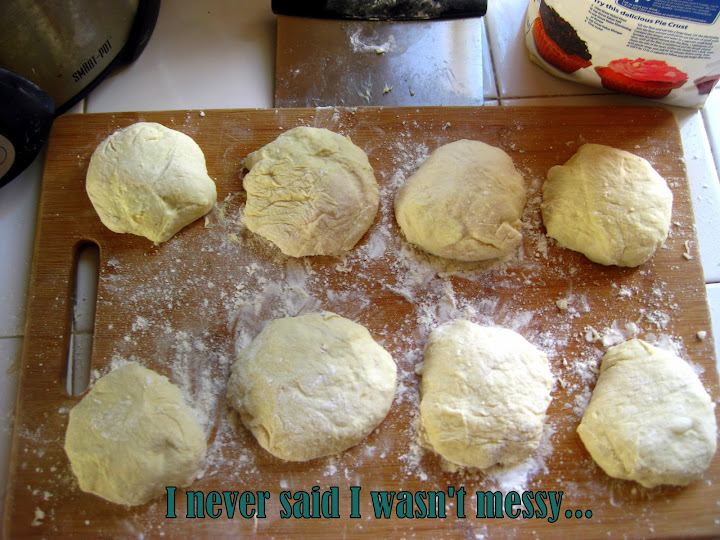
- The dough is sticky; keep flour out until you are done with all the handling of it
- Small kitchen? Make sure you have room for 2 sheet pans and a cutting board and a floured surface all at once.
- Use a kitchen aid (or whatever brand) stand up mixer for this, a hand held mixer will not work.
- If you want smaller portions, I have made this recipe into 18 focaccias, it is possible.
- Pre cut your parchment paper and set out on sheet pans ahead of time or during the rising process.
INGREDIENTS:
- 2 1/2 tsp (1 pkg) active dry yeast or 1 small cake (18 grams) fresh yeast
- 1 cup warm water
- 1/2 cup milk (warmed in microwave for about 1 minute)
- 2 T olive oil
- 2 1/2 T lard, at room temperature (I used vegetable shortening)
- 3 1/4 cups unbleached all-purpose flour
- 1 1/2 tsp salt
- Olive oil for brushing the tops
- Salt for sprinkling the tops
- Cornmeal for dusting the bottoms before baking
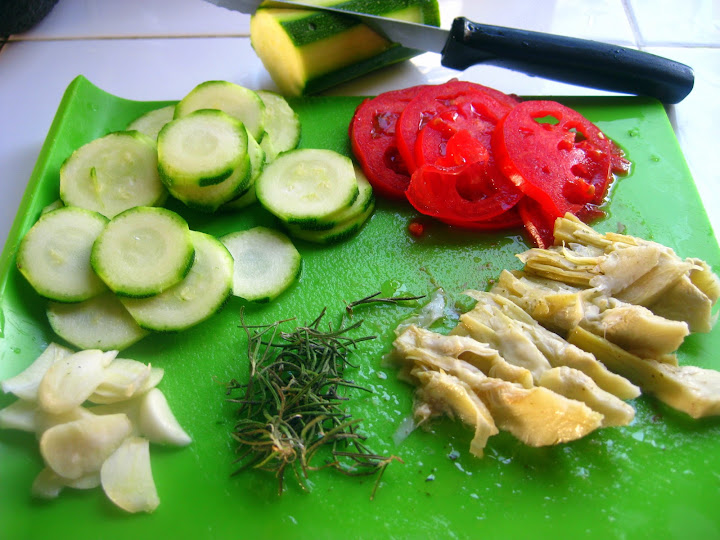
- Toppings – thinly sliced vegetables, grilled or sautéed to intensify the flavor. Garlic, Cheeses, Whatever sounds good.
DIRECTIONS:
Stir the yeast, water and milk in the bowl of a stand mixer; let stand until creamy, 10 minutes.
Stir in the oil, and lard with the paddle.
Add the flour and mix at low speed about 2 minutes.
Change to the dough hook and knead 4 to 5 minutes.
Add the salt and knead another 1 to 2 minutes. The dough will climb up the collar of the hook, and you will have to stop several times to push it down. The dough should be smooth, velvety, and softer than bread dough but firmer than croissant dough.
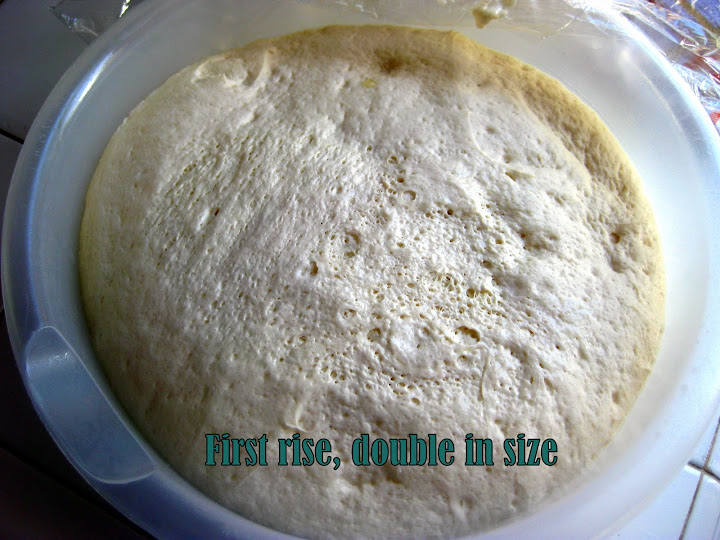
First Rise:
Place the dough in a lightly oiled bowl, cover tightly with plastic wrap (don’t forget to spray the plastic wrap), and let rise until doubled, 2 hours.
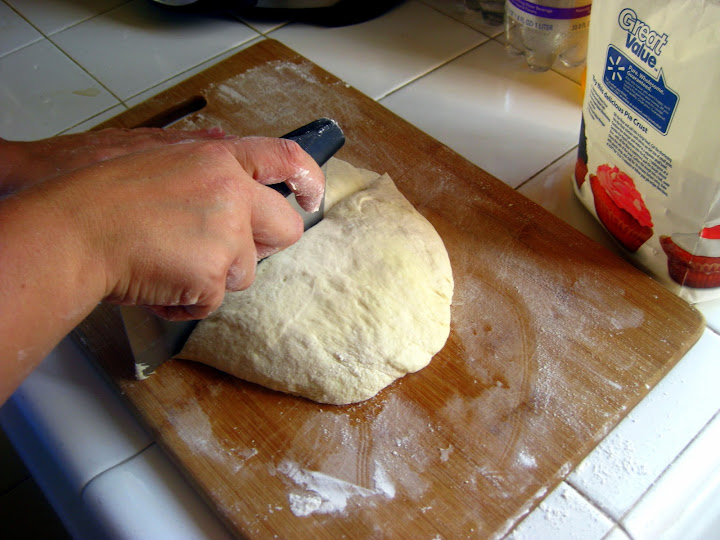
Cut the dough into 6 pieces (or however many you want to make, remember I made mine into 18 once) on a lightly floured surface and shape into balls. Let rest under a towel for 15 minutes.
Dimple the dough balls (remember kids love this part, no matter what age!), spreading each into a circle, and let rest under a towel another 15 minutes.
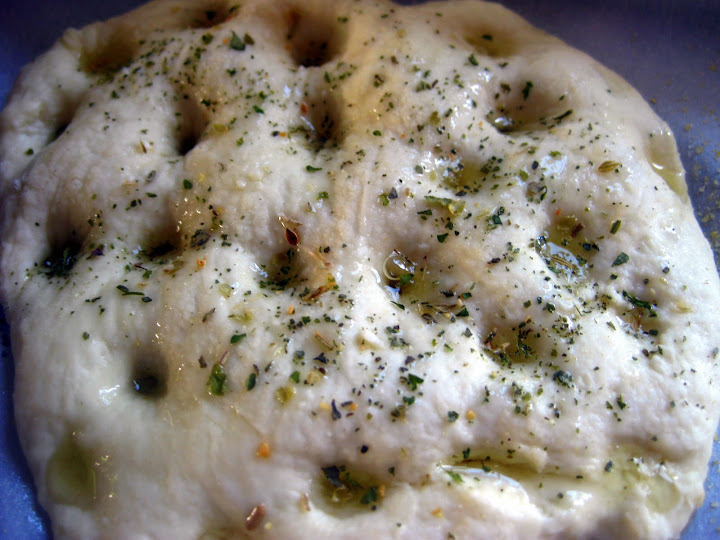
Dimple tops with oil and sprinkle lightly with salt alone or your seasoning. (Here I used basil and salt) Place the dough circles on parchment-lined or oiled baking sheets or baker’s peels sprinkled with cornmeal.
Second Rise:
Cover with a towel and let rise until doubled, about 1 hour.
Dimple the dough again with your fingertips, stretching it as you go. Sprinkle with salt and brush with oil.
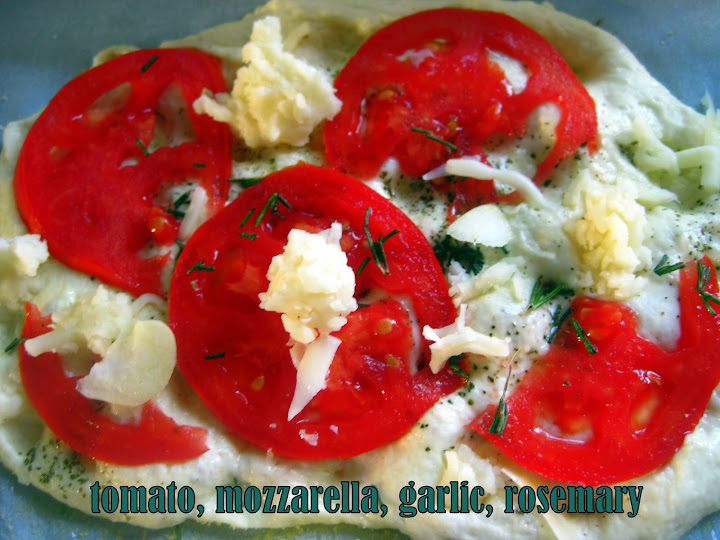
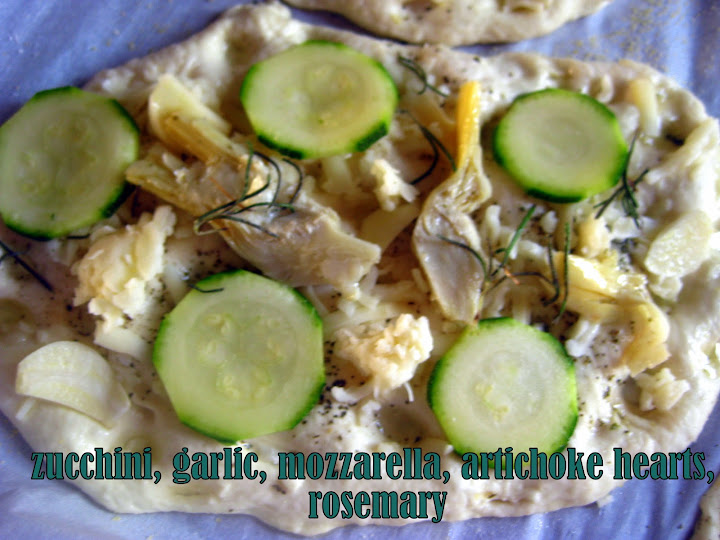
Mist water very lightly over the top to cover and trap the oil and then cover with the toppings of your choice.
Preheat the oven to 425 degrees F. at least 20 minutes before you plan to bake. Bake 18 to 20 minutes. Immediately brush the surfaces with oil. Serve hot, or cool on racks to room temperature.


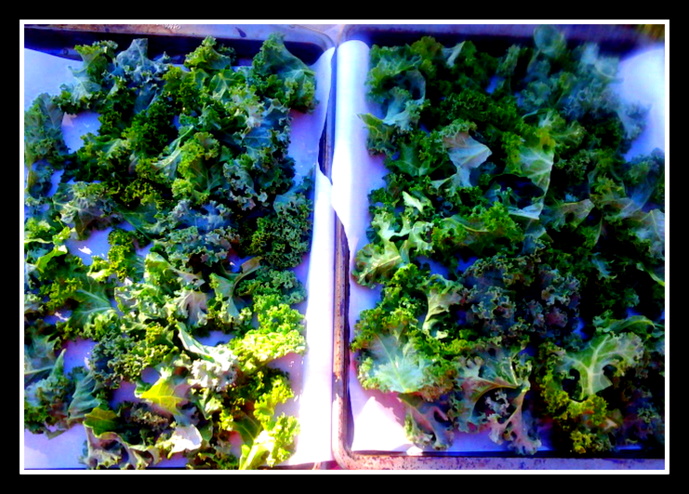
Krispy Sea Salt & Pepper Kale Chips
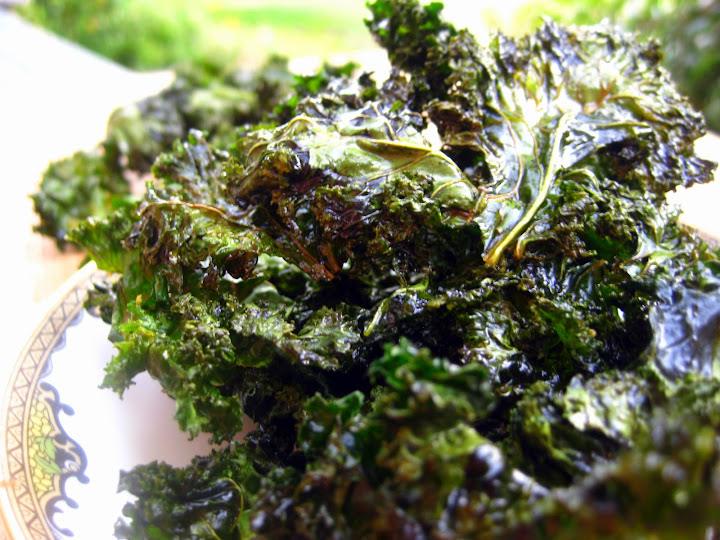
I am officially on the KALE bandwagon ya’ll. What took me so long? Well, the first bunch of Kale I purchased from the farmer’s market went bad before I had a chance to make it, so that went out the window. The next bunch of Kale I purchased from the Farmer’s market, was left in my vehicle and went bad. Let me just say in the hot California sun, rotting away in my 135 degree car, kale does not smell so good 😦 Ok, so after 2 times now I am thinking do I even attempt a third try? HECK YA! I went for it and am so happy. I am sad to say that I have NEVER used kale in anything. Nope! Not a smoothie, not a salad, not as a side dish. *sticks pouty lip out* My kids see this huge big green bunch of veggies on the counter and immediately cringe, just because. They have no reason to…seriously, when is the last time you saw a food you didn’t know what it was and just cringed? I look at an unfamiliar food and am excited to see what potential is has! Anyway, I tell them to not worry about it and go about their business. After all was said and done there were mixed reviews. I of course LOVED them, 1 son age 10 who LOVED them as much as me. The other kids, said they were *eh*. Of course I made them eat them, but they certainly would not be asking for those again. Between my son and I we ate both cookie sheets! I’m dying for next Tuesday when I can get back to the farmer’s market and get more!
INGREDIENTS
1 bunch kale, washed and thoroughly dried
4 tablespoons olive oil
Sea salt, for sprinkling to taste
white pepper for sprinkling to taste
DIRECTIONS
Pre-heat oven to 300 degrees F.
Cut, wash, and dry kale. Make sure to remove the ribs and stems that are tough and woody. They do not soften and they are not good unless you like eating straw that is hard and sharp! NOTE: The veins of the leaf should remain in tact, if you tear the pieces too small they tend to burn quickly, so you need to watch your cooking time and adjust it accordingly.
Tear Kale into bite sized pieces and place on cookie sheet atop parchment paper. I end up with 2 cookie sheets full….drooling just remembering my bounty!
Toss both pans full of Kale with the olive oil, sea salt and white pepper.
Bake for 12 minutes and turn over using a spatula. Keep kale spread out and as flat as possible. It “K”risps up really nice that way.

Bake for another 12 minutes or until crispy, being careful not to let the leaves burn. Remember if your pieces are too small they may burn, so check them frequently.
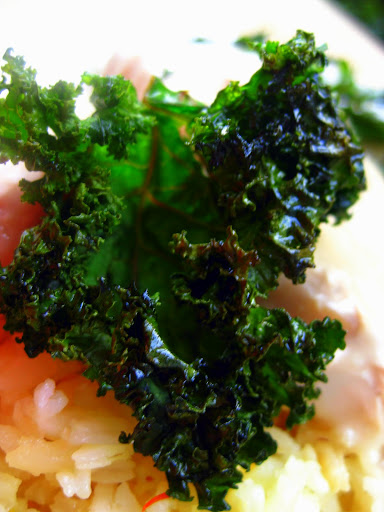
Eat…Eat…Eat until they are all gone, which is roughly 10 minutes!

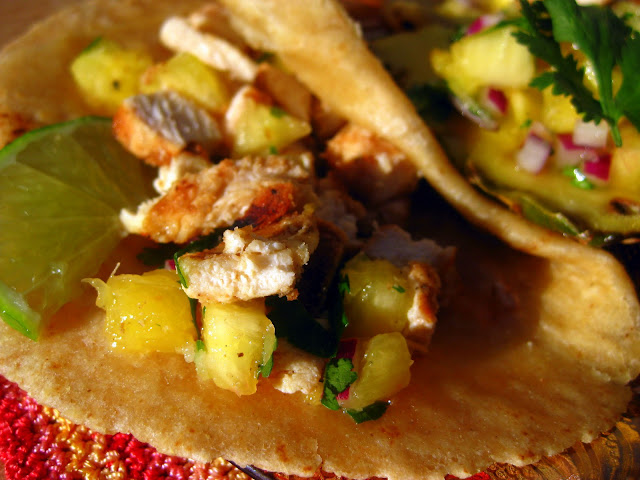
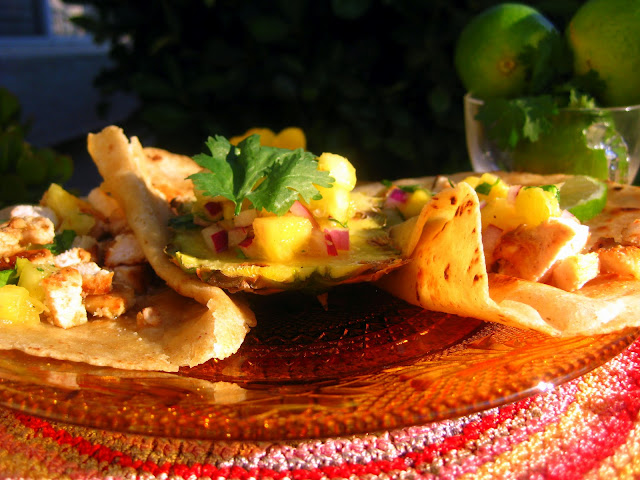
Sweet Heat Grilled Chicken Tacos with Pineapple Salsa

I don’t really care if it is winter, spring, summer or fall, I am down for the BBQ any time any day. That is what is nice about California where I live, I have the liberty to do so. So, now that fall is officially almost here I don’t let that deter me from que’ing 😀 Last night was Taco Tuesday at our house and instead of the traditional tacos we normally have, I switched it up…NOTE TO SELF: make more next time! I came across a yummy recipe from Elle’s New England Kitchen and tweaked it to our (my) liking. It came out great and everyone wanted more.
MARINADE
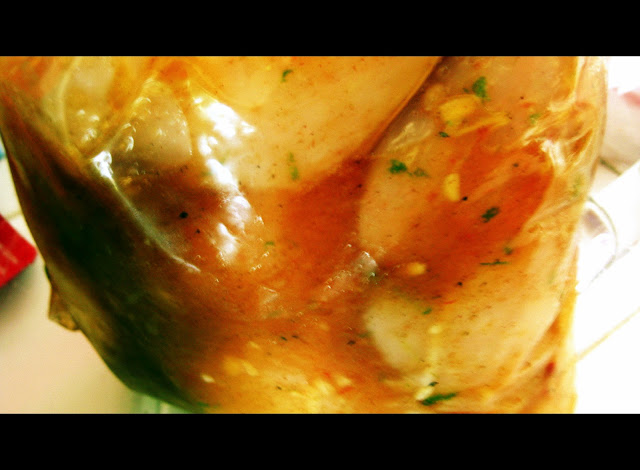
4 whole boneless, skinless chicken breasts, butterflied and pricked with fork several times all over breast
1/2 cup olive oil
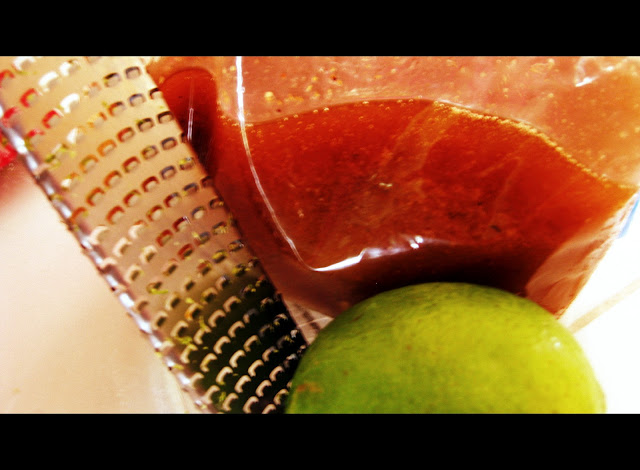
juice of 2 limes + zest
2.5 tsp adobo sauce + 1 chipotle chili sliced
1.5 tsp cumin
2 pinches cinnamon (no one will ever know it is in there!)
1 tsp onion flakes
3 garlic cloves, minced
1/2 tsp pepper
3 tbsp honey
Add all marinade ingredients to a ziplock bag except the chicken. Mix all ingredients until well blended. Add chicken breasts and close the bag really well. Mix everything together to get a nice even coat on the chicken. Place in refrigerator to marinate overnight or as long as possible to soak up all the flavors this sweet and spicy sauce offers. I started my marination in the early afternoon for an evening dinner it was very tasty! My only regret was I didn’t do it over night! A great tip from Elle’s New England Kitchen, which I absolutely LOVED was to make this and freeze it. When it is un-thawing it is soaking up all the marinade as well!!
Remove chicken from refrigerator 30 minutes prior to barbecuing and allow it to come close to room temperature. While doing this you can prepare the salsa which is a…take your thumb and middle finger and…SNAP, SNAP, SNAP!
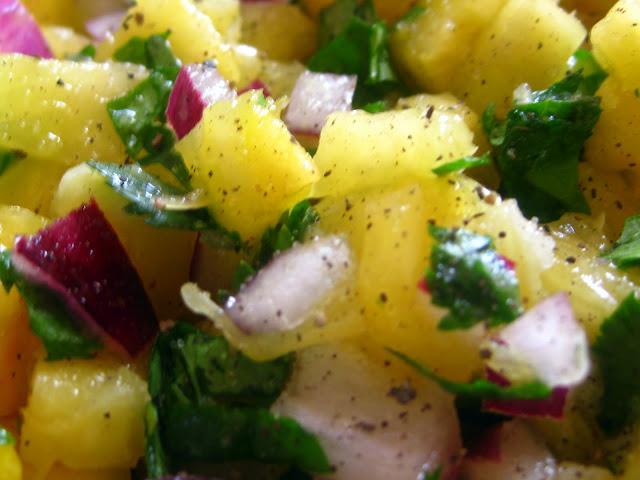
PINEAPPLE SALSA
1/2 fresh pineapple, diced
1/4 cup fresh chopped cilantro
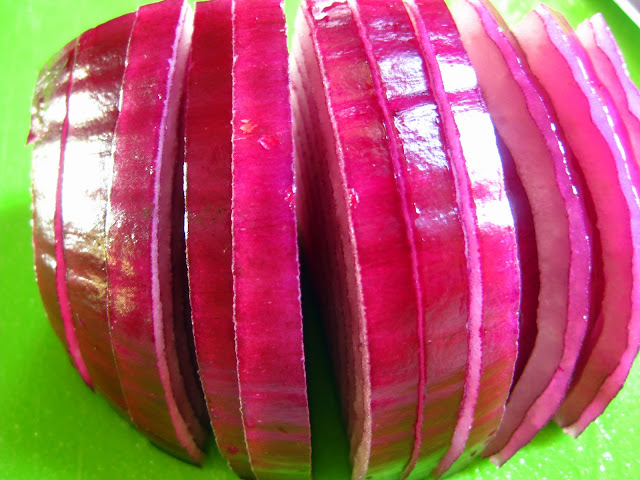
1/4 of a large red onion, diced
2 garlic cloves, minced
1 lime juiced + zest
Combine all ingredients well and let sit in refrigerator at least 30 minutes to chill and merry all ingredients.
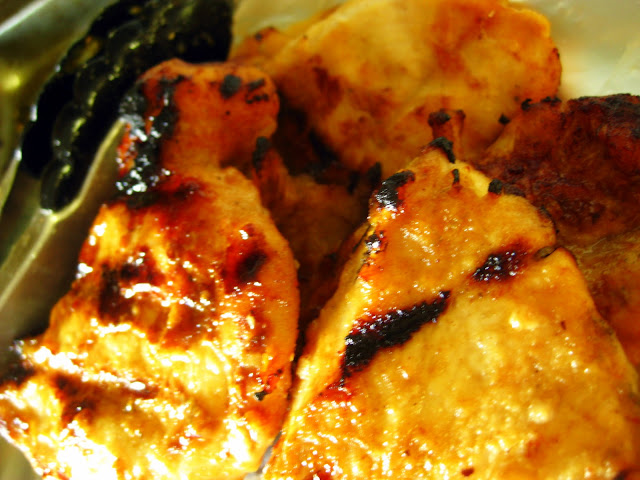
Barbecue chicken until cooked thoroughly. I use the bag of marinate to coat chicken as I cook it to jeep it juicy! I just snip the tip off at the bottom corner and marinate while I cook. Discard any remaining marinade as it can not be re-used.
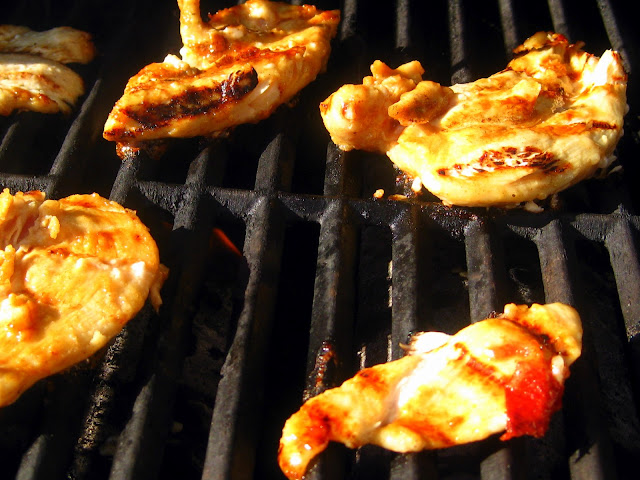
Remove from que and let sit on a platter covered with foil until ready to serve. This keeps it warm and keeps all yummy sweet heat juices inside.
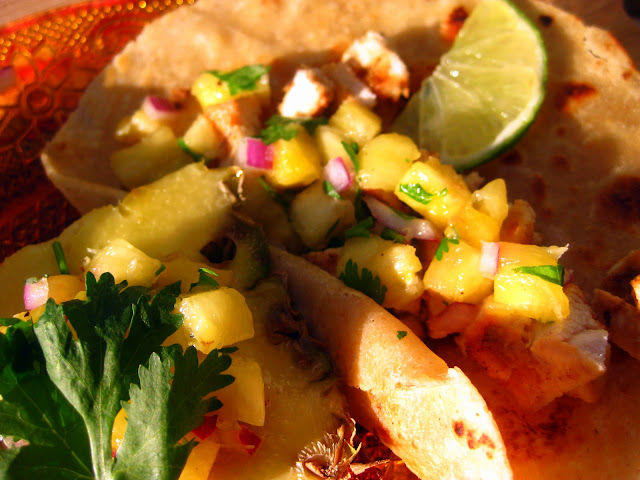
Let’s talk tortillas. There are lots of tortillas out in the market. It is ultimately up to you what you choose. the while flour vs. corn debate is yours alone. All I can say is I am a CORN kinda girl when it comes to my tacos. To put a lower fat spin on mine, instead of frying them up (which I LOVE) I brush each side of one with extra virgin olive oil and brown for a few minutes on each side in a skillet.
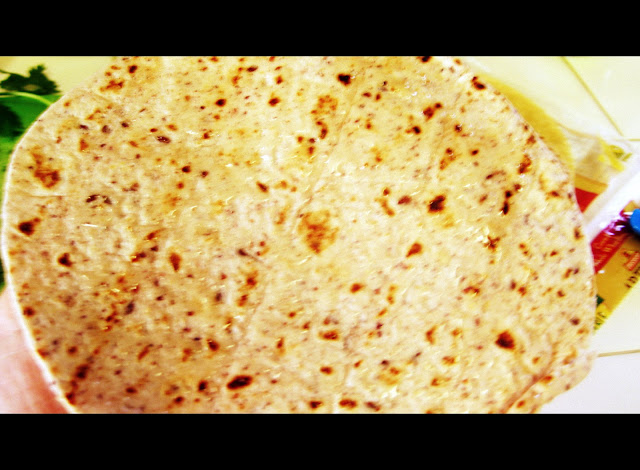
Now, you are looking at this tortilla and saying…UM that is NOT corn! Well you would be wrong if you were gambling folks! This awesome tortilla is corn AND wheat. I can’t believe I haven’t seen these before, but this is a blue corn, wheat and flax-seed tortilla! YOUR WELCOME!
I heat the tortillas to order. In other words, I don’t cook them ahead of time and let sit. I think the best way to enjoy a taco is warm with a nice crispy tortilla at the base of the all goodies. You can serve these tacos with rice or beans or whatever Mexican side dish tickles your fancy. Assembly wise I just add some chicken in the tortilla, top with pineapple salsa, drench the whole thing with 1 slice of lime and a sprig of cilantro.
Inside Out Pizza
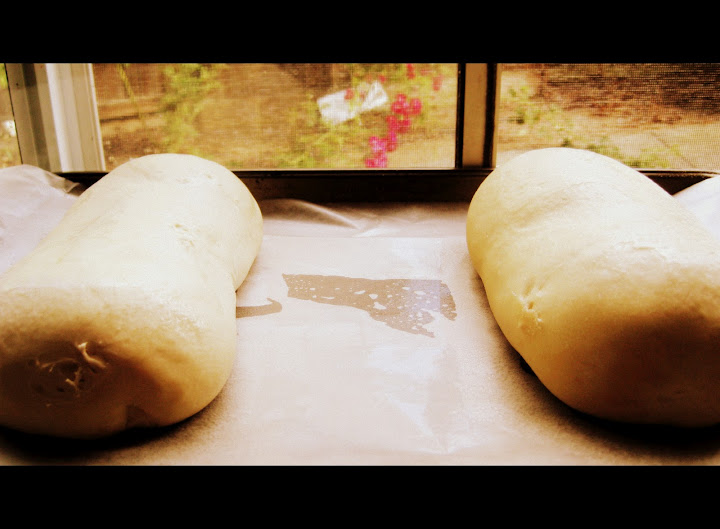
Again, another way to turn an ordinary pizza into something spectacular. Ok, maybe not knock your socks off, but a really fun and cool way to eat pizza. By starting with a loaf of frozen bread dough and thawing, or you could make your own.

Roll out pizza dough to form a rectangle. Find your favorite sauce, either marinara or pizza. You can use tomato sauce with oregano too. Spread that onto your rolled out pizza dough and top with some grated Parmesan cheese.

Add your favorite toppings. This was the kids pizza so it is really boring on the ingredient list.

Add shredded mozzarella cheese to your hearts desire.
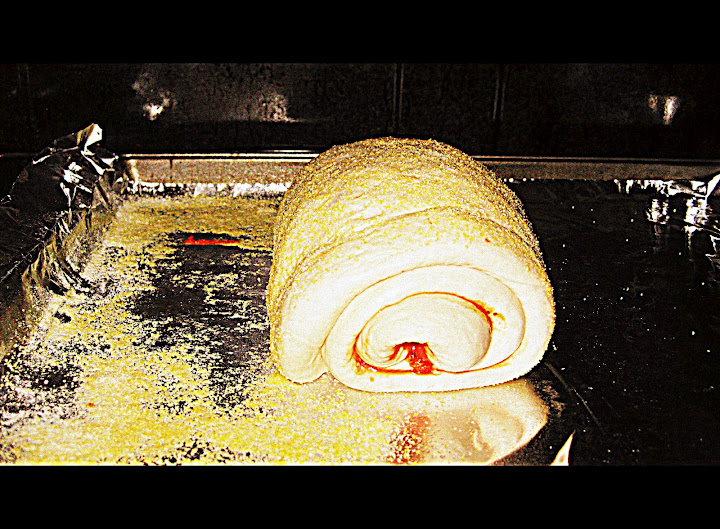
Roll this puppy up from the short end to the opposite short end side. I line my cookie sheet with foil and spray with cooking spray and then add cornmeal. I LOVE cornmeal on my pizza crust.
Bake at 425 degrees F until golden brown, approximately 20-25 minutes.

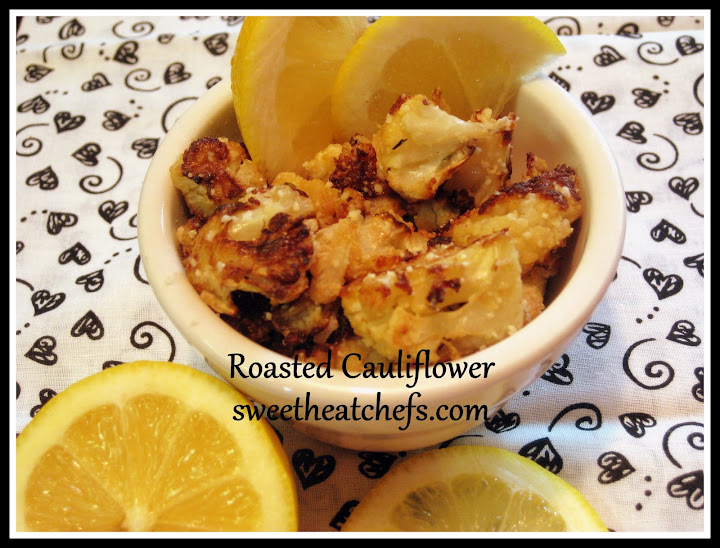
Roasted Cauliflower
First off, I can’t take credit for this recipe. I got it from Rachael Ray. It is the BEST cauliflower recipe ever! My kids don’t eat or like cauliflower for that matter or any veggies really and we eat the entire head of cauliflower with this recipe! I am at the point now that I automatically get 2 heads of cauliflower when I make this. (YES it’s that good!)
INGREDIENTS
4 cloves garlic, halved
About 1/3 cup extra virgin olive oil (EVOO)
1 head cauliflower, cut into florets (the smaller the better)
Juice of 1/2 lemon
2 tablespoons fresh thyme
Salt and pepper
1/2 cup grated Parmigiano Reggiano cheese (must get this cheese, you can substitute, but this is the best!)

Parmigiano-Reggiano cheese, the true “parmesan” (Photo credit: Wikipedia)
DIRECTIONS
- Pre-heat the oven to 400°F.
- In a small pot, combine the garlic and EVOO; heat over a low flame and gently simmer until the garlic is light golden brown in color and very fragrant, about 10-15 minutes. Remove the garlic cloves and reserve.
- Pile the cauliflower on a baking sheet and dress with the lemon juice, about 3-4 tablespoons of the garlic-infused oil, thyme, and salt/pepper.
- Toss to combine and spread the florets out in a single layer. Roast to brown at the edges and until tender, 20-25 minutes.
- Cover with the grated Parmigiano Reggiano and roast for 5 minutes more.
- Serve warm if you can manage to keep from eating straight off the pan (this is what m and my hubby end up doing!)
- Those garlic cloves you used to season the olive oil are great in mashed potatoes, potato salad, or mixed up in anything you can think of!