BBQ Beef Cups

2012-12-17 17.29.42

This is a quick and easy dinner or appetizer for the family or the family get together, it would be great for a party too. You could halve the biscuits and use mini muffin tins!!

My kids are always helping in the kitchen, and this is a great way to get them in there where they can do little damage if something goes wrong. I have 1 kid roll the biscuits and 1 scoop the meat mixture in the muffin tins. They are happy as clams!

This dish comes out as a nice savory dense biscuit, when you bite into it you get a sweet tangy bite on the tongue. After 2 biscuits, the kids have full bellies!

In about 30-40 minutes you are done with the entire meal (except clean up) but the kids can do that while you put your feet up and relax with a glass of wine! After all, all you had was a itty bitty muffin for dinner 😀

Can you believe my grandma sent me this recipe??!! LOVE YOU GRANDMA!!!

INGREDIENTS:

2 tubes (10 oz.) Pillsbury buttermilk biscuits 
1.5 lb lean ground beef or ground turkey
1/2 lb thin lean cut bacon
3/4 cup ketchup
5 tbsp brown sugar pressed firmly into spoon
2 tbsp cider vinegar
1 tsp chili powder
4 oz sharp cheddar cheese + 1 tsp per cup

DIRECTIONS:

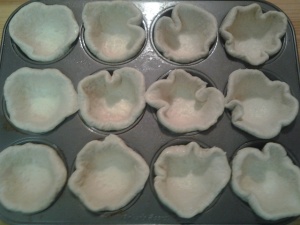
Roll each biscuit into a flat circle twice its normal size and place in greased muffin tins and set aside.

2012-12-17 16.55.21

In a skillet brown ground beef or turkey. When done set aside.

Cook bacon until crispy. Drain on paper towels and cut into bite sized pieces. Combine with reserved meat.

In a medium-sized bowl combine; ketchup, brown sugar, cider vinegar, and chili powder. Stir until well combined.

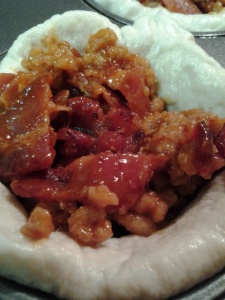
Add meat mixture to BBQ sauce mixture and stir well.

2012-12-17 17.05.44

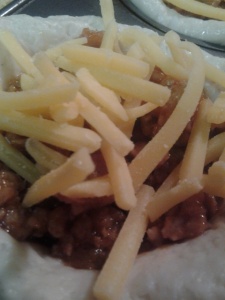
Add 2-3 tbsp of mixture to each biscuit and top with 1 tsp cheese.

2012-12-17 17.07.06

Bake in 375 degree F. oven for 15-18 minutes.

2012-12-17 17.29.16

You might also like:

Rosemary & Garlic Infused Oil (sweetheatchefs)

Browned Butter Strawberry Eggnog Pancakes (sweetheatchefs)

Stuffed Poblano Pepper (sweetheatchefs)

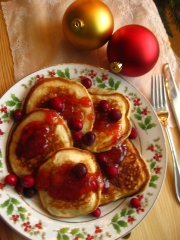
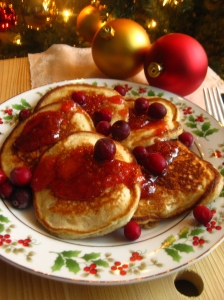
Gingerbread Pancakes with Molasses Butter

gingerbread pancakes

gingerbread pancakes (Photo credit: emdot)

INGREDIENTS:

2 cups pancake mix
1.25 cups (10-oz bottle) sparkling apple cider
1/4 cup dark molasses
2 tsp Gingerbread Spice Mix

DIRECTIONS:

  1. In a large bowl Pour 1/4 cup batter per pancake into a lightly buttered skillet.
  2. Cook over medium heat for about 2 minutes, flip and cook for 1-2 more minutes.
  3. Serve warm with Molasses Butter.

Molasses Butter

Stir all ingredients together in a bowl until well combined and dollop on top of pancakes.


Rosemary & Garlic Infused Oil

Rosemary & Garlic Infused Oil - sweetheatchefs.com

THINGS YOU NEED

Vegetable Oil or Olive Oil

Rosemary Sprigs, washed and thoroughly dried

Garlic Cloves, peeled and sliced in half lengthwise

Cleaned and thoroughly dried glass bottles in various sizes shapes and designs

Stoppers; corks, wine bottle stoppers etc.

IMG_4125

DIRECTIONS:

Process takes 1 week to infuse, keep that in mind when planning for your gift or for yourself.

  1. In a glass bottle, place 1 Rosemary sprig and 1 half of garlic clove.
  2. Using a funnel add oil until almost to the top so as not to overflow.
  3. Add cork on top.
  4. Place in a safe, cool environment for 1 week. Everyday swirl the bottle around to mix up the contents. Do not tip upside down it might leak.
  5. After 1 week, dump oil into a bowl to remove Rosemary and garlic.
  6. Replace back in bottle with stopper. 
  7. Refrigerate for longevity. Lasts 2 weeks, if you opt to keep in rosemary and garlic, 1 week. 

IMG_4138

You can change up the ingredients to your tastes. I use these two ingredients all the time so this is my favorite. This makes a nice gift for Grandparents, Parents, Bosses, Mother’s Day, Father’s Day, Christmas, Hostess Gift, & Housewarming. Use for making salad dressings, pan frying chicken, fish, shrimp, beef, pork, & lamb.

IMG_4120

OTHER HERBS TO USE:

  • Thyme
  • Oregano
  • Whole Dried Chili Peppers
  • Dried Chili Pepper Flakes
  • Fresh Sage Leaves (another fav!!)
  • Lemon Peelings + zest
  • Lime Peelings + zest
  • Whole Peppercorns

When choosing herbs and combinations of them, (especially the spicy ones) make sure to start off with small quantities and add to it from there. As you can see in the original recipe I only use small quantities. Fresh herbs are very powerful and infuse the oil very well. 

This recipe is beign shared over at Foodie Friends Friday

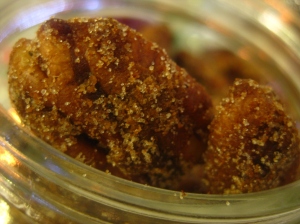
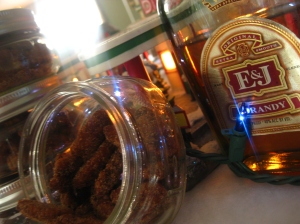
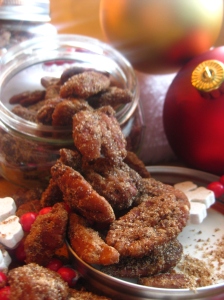
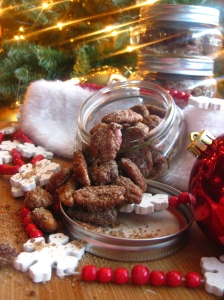
Candy Brandy Pecans

IMG_4146

INGREDIENTS:

6 tbsp butter, melted
1 cup brown sugar
5 tbs brandy
2 tbsp Gingerbread Spice Mix
10 oz-bag whole shelled pecans

IMG_4141

DIRECTIONS:

Preheat oven to 325 degrees F. 

Line a baking sheet with tin foil and spray with non stick spray.

Melt butter in sauce pot on medium heat.

Add brown sugar, brandy and Gingerbread Spice Mix, cook for 1 minute until bubbly stirring constantly.

Add pecans and stir until all coated.

Spread out in an even layer on cookie sheet with rubber spatula and bake for 20-25 minutes stirring several times throughout.

Remove from oven to cool and in medium bowl combine:

1/2 cup sugar

2 tsp Gingerbread Spice Mix

Pour pecans in bowl and stir until all coated with sugar mixture. 

IMG_4107

Let cool completely and store in airtight container. I put mine in decorative mason jars for Christmas gifts. This would also be good for birthday gifts, hostess gifts, parties, baby showers, Thanksgiving snacks, mother’s day gifts, and father’s day gifts

IMG_4103


This recipe is being shared at Foodie Friends Friday


Gingerbread Spice Mix

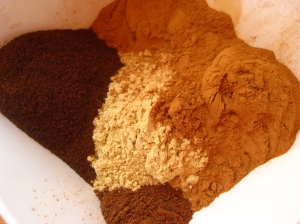
IMG_4057

This is the beginning of so many things you can create. This Gingerbread Spice Mix is versatile for gift giving and for making different recipes out of it, some of which I have in this post for you. 

INGREDIENTS:

1/2 cup ground ginger
6 tbsp ground cinnamon
4 tbsp ground cloves
2 tsp ground nutmeg

DIRECTIONS:

Mix all ingredients together and store in an airtight container  until ready to use.

IMG_4128

Bag up and give as gifts for Christmas or any event that calls for one! This does not have to be a holiday only gift!  

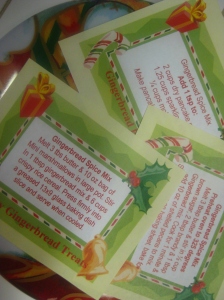
I gave mine as Christmas gifts, added tags with the recipes below and tied on to the bag with a decorative ribbon. This gives the recipient an idea of what to use it with and get creative in the kitchen!

IMG_4136

IMG_4184

You can add this mix to the following recipes: (more coming soon)

Crispy Gingerbread Treats

3 tbsp butter, melted
1 bag (10 oz) mini marshmallows
1 tbsp Gingerbread Spice Mix
6 cups crispy rice cereal

Melt and mini marshmallows in a large sauce pot over medium heat stirring occasionally. Stir in Gingerbread Spice Mix and crispy rice cereal. Press into a greased 13 x 9″ baking dish. let cool and cut into squares.

Do you have a recipe to make with this? I’d love to share it and see what you come up with. Leave me a comment below with the deets and you could be featured on SHC in the near future!

Browned Butter Strawberry Eggnog Pancakes

IMG_4037

That ah-ha moment when you serve this at the breakfast table will be all the redemption you need. Once they taste the fluffy, sweet & tartness of these pancakes they will not know there is a hidden secret ingredient PACKED full of nutrients, Chia Seeds. 

  1. Chia seeds carry the omega-3 fats our bodies need.
  2. Chia seeds have more omega-3’s than salmon and they also contain a fat called omega-6. Both of these “good” fats help regenerate cells in our bodies and regulate processes of our bodies. Our bodies themselves do not make these fats and that is why it is essential to eat them daily.
  3. They have 11 grams of fiber per ounce! That is 42% of your recommended daily allotment in just 1 ounce. 
  4. Chia seeds are full of calcium too, 3 times MORE than skim milk!

I could go on about all the benefits, but I think you get the idea. Eggnog is one of my favorite drinks this time of year, I have yet to make my own, but I try to put it into everything during the season it is around. My husband absolutely HATES the stuff, so I am limited somewhat. BUT since he is at work, I am playing in the kitchen, shakin’ my groove thang to Dominic the Donkey (no I’m not Italian) and drinking my coffee! There is nothing better today…

IMG_4038

These pancakes and nutritious, sweet, tart and beautiful to look at. They are easy to make ahead and refrigerate for Christmas morning. All you have to do is get up and cook them while listening to some relaxing Christmas Music or some soothing jazz!

This recipe yields approximately 16-18 pancakes give or take. 

INGREDIENTS:

3 cups all-purpose flour
7 teaspoons baking powder
1.5 teaspoon salt
1 tablespoon white sugar
1.5 cups eggnog
1 cup milk
2 eggs, beaten & room temperature
1/2 teaspoon pure vanilla extract
pinch of cinnamon
2 tablespoons strawberry jam (I use my homemade jam, use a good quality one for this recipe)
3 teaspoons Chia Seeds
Butter for cooking with

DIRECTIONS:

  1. In a large bowl, sift together the flour, baking powder, salt and sugar; then sift again into another bowl. The second sifting creates a fluffier pancake.
  2. In a small bowl or measuring cup, beat the eggs and add vanilla and pinch of cinnamon to it.
  3. Make a well in the center of the flour mixture and pour in the eggnog, milk, egg mixture; mix until combined (no need to over do it)
  4. Add strawberry jam and Chia seeds and stir until just combined.
  5. Heat 1-2 teaspoons of butter in skillet and brown it, if you want the method for browned butter click here.
  6. Once browned and ready to go add 1/4 cup of batter to skillet and cook until golden brown on both sides. Wipe out pan after each batch with a paper towel adding fresh butter to the pan for the new batch. Repeat until desired number of pancakes are reached.
  7. Drench or drizzle your strawberry jam over the top. I heat mine up for about 30 seconds in the microwave prior to the pancakes being completed.
  8. Garnish with some cranberries or blueberries or strawberries.

IMG_4036 (2)

Nutritional information cited from Dr. Oz

This recipe was shared at Wicked Good Wednesday & Manic Monday.

Don’t ever buy it again, make your own…Homemade Sugar Cookies

IMG_3989

The reality is we all have busy lives and when we want to please our kids or ourselves with a little Christmas Cheer and make the infamous Sugar Cookies during the holiday season, it is EASY to get wrapped up in the convenient pre-made store bought dough. If you do one thing this year, PLEASE make your own. You will see how easy it is AND you can easily double or triple the recipe and freeze it for your convenience later so you are not tempted to buy the pre-made dough.

IMG_3987

A friend of mine Katrin over at Running with The Devil(ed) Eggs and I agree, MAKING cookies involves the process from buying ingredients to actually making the cookies. BAKING cookies involves pre-made slice and bake. Your kids and grandkids will have much fonder memories of the entire MAKING cookie process than the slice and bake version. The hope is they will continue the tradition and do the same with their kids and future generations to come. Honestly, the fondest memories I have are with my grandma MAKING cookies, pies, bread, noodles, bread everything was homemade.

As a society we have strayed so far away from that reality, I wonder if our kids or their kids will even know what homemade truly is and to me that is very sad.  I just think it is important to show our kids fresh food, non processed food, the art of being together (isn’t that what holiday’s are for anyway?) quality time together, the fun of checking the oven to see if the food is done, the aroma your house has while it is cooking, the laughter between you while you listen to Christmas Music and mess up on the words! Pre-made dough has you in and out of the kitchen before  you know it, much like the society we have turned in to; quick, easy, and impersonal. 

IMG_3984

Not only does homemade food taste incredibly better, but you know exactly what you are putting into it, there are no preservatives, you can make it organic and feel good about feeding your own belly, Santa’s and your kids’ 😀 *Stepping off soap box**

With all that being said, (and thank you for staying tuned this long) I just want to offer this recipe that is easy enough for the beginner baker and just as fun for the novice baker. With few ingredients and LOTS of decorations for the finished product afterward you are sure to build lasting memories, new traditions and fun for years to come.

INGREDIENTS:

3 cups all-purpose flour
3/4 teaspoon baking powder
1/4 teaspoon salt
1 cup unsalted butter, softened (salted butter works too if you don’t have the other)
1 cup sugar
1 egg, beaten
1 teaspoon real vanilla extract
1 tablespoon milk
Powdered sugar, for rolling out dough ( learned this from my grandma, this is key to a soft non over-worked cookie)

DIRECTIONS:

Sift together flour, baking powder, and salt. Set aside.

Place butter and sugar in large bowl of electric stand mixer and beat until combined.

Add egg and milk and beat to combined. Add vanilla extract.

Set mixer on low speed, gradually add dry ingredients, and beat until mixture pulls away from the side of the bowl. Don’t over mix here.

Create a disk, or divide dough up if you will be making different colors or adding candies to it. Wrap in waxed paper, and refrigerate for 2 hours. *NOTE* If you are adding colors or candies to the dough, now is the step to do it BEFORE you refrigerate for 2 hours. The dough will be hard once it is refrigerated. Ideas for add ins:

  • crushed candy canes + red food coloring color
  • roasted pecans
  • diced cranberries + green food coloring
  • macadamia nuts
  • white chocolate chips + blue food coloring
  • dark chocolate chips

IMG_3980

When ready to start baking, preheat your oven to 375 degrees F.

Sprinkle your rolling out surface with a light dusting of powdered sugar. Remove 1 wrapped pack of dough (or the entire ball if you did not divide) from refrigerator at a time, sprinkle rolling pin with powdered sugar, and roll out dough to 1/4-inch thick.

Move the dough around as you roll and check frequently to make sure it is not sticking.

Using cookie cutters, cut into desired shapes.

Place at least 1-inch apart on greased baking sheet, parchment, or silicone baking mat, and bake for 7 to 9 minutes or until cookies are just beginning to turn brown around the edges.

Cool on wire rack.

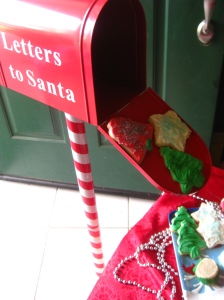
Serve as is or ice as desired. Store in airtight container for up to 1 week or freeze for 1 month in an airtight ziplock.

IMG_3990

IMG_3993

This recipe is being shown over at: 

Manic Monday Party

Wicked Good Wednesday
No Santa Cookies This Year…Eggnog Rum Bread

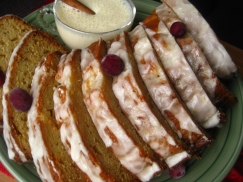
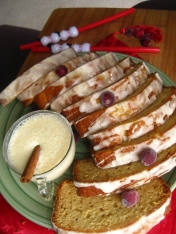
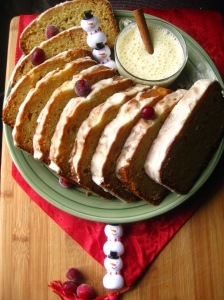
Eggnog Rum Bread


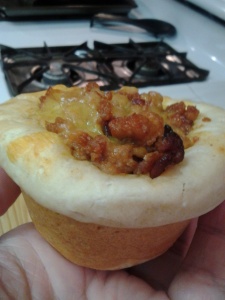
So this year we will not be making Santa cookies, nope this is not a joke nor is it us protesting against Christmas. THIS year we will be making dear old Santa some  delicious, decadent, sweet, moist Eggnog Rum Bread. Crazy you say? Read this recipe I found from an awesome blogger named Robin over at Knead To Cook and you will know the only one crazy is YOU for still reading this and not checking to see if you have all the ingredients in your pantry 😀 by the way make sure to visit Robin’s page, she has a TON of great recipes to share.

I URGE you to try this recipe and leave Santa a new treat this year, he will be happy you did! 

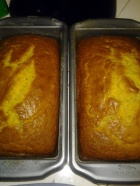
I doubled this recipe and both loaves were gone within 3 days…just sayin, if you have a large family you might want to invest in 2 loaves! Breakfast, snack, dessert, anytime is a great time for this bread. It shows well, it maintains it’s structure and glaze really well for traveling. As Robin did, she made mini loaves for gifts, be careful with this…the people you give this to will never leave you alone again!!

2012-11-27 18.12.25


INGREDIENTS:

2 eggs
1 and 1/2 cups of regular eggnog (not low fat)
2 tsp Spiced Rum
1 cup white sugar
1 teaspoon vanilla extract
1/2 cup butter @ room temperature
2 1/4 cup all purpose flour
1 (3.4 ounces of powdered) package of instant French vanilla pudding mix
2 tsp baking powder
1/2 tsp salt
1/2 tsp ground nutmeg

IMG_3963
DIRECTIONS:

Preheat oven to 350. Spray your loaf, muffin etc. pan with non stick spray with flour. 

In your stand mixer use your paddle attachment and mix together the eggs, eggnog, rum, sugar, vanilla and butter. The butter will remain clumpy but that is just fine.

In a separate bowl, sift the flour, pudding mix, baking powder, salt and nutmeg.

Add the dry mixture to the wet and blend until incorporated. Avoid over mixing. The butter will remain clumpy and this is how the batter should look, the butter will melt when cooking.

Pour into your prepared choice of pan(s). Bake mini loaves for approximately 30 minutes or until a toothpick comes out clean. A regular loaf pan will take about 45-55 minutes. A double batch using 2 loaf pans take about 80 minutes. Just be sure to check, check and check you don’t want this over done. All your hard work put into this decadent bread you won’t want it ruined, especially after you smell the batter alone, you can imagine how scrumptious the actual cooked bread will turn out.

Lemon Rum Glaze:

1 cup sifted confectioners sugar
2 teaspoon eggnog
2 tablespoon Spiced Rum
1/8 tsp of ground nutmeg
Lemon zest, about 1/4 of a lemon ( I added this to the original recipe, you can omit)

2012-11-27 19.30.57
Whisk together and pour over your cooled eggnog bread. (If you can wait until it’s cooled)

The glaze recipe yields enough for both loaves with a lot left over, don’t be worried about really drizzling until your heart’s content! I wish I had used more…NEXT TIME, NEXT TIME!

IMG_3967

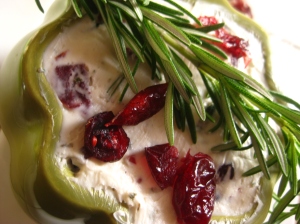
Cranberry Rosemary Dip – EASY & QUICK


INGREDIENTS

  • 10 ounces cream cheese, softened
  • 3/4 teaspoon garlic powder
  • 6 tablespoons dried sweetened cranberries ( I course chop them, but you could leave them whole)
  • 4 teaspoons chopped fresh rosemary ( I used the spice grinder)
  • fresh cracked pepper and kosher salt (to taste)

Place all ingredients in bowl and using a spoon smooth, smash and stir together all ingredients until well combined. Taste it with a cracker and see if you want to add more of any of the ingredients! Place back in refrigerator covered for about 1 hour before serving with crackers. Garnish with a few whole cranberries and a sprig of Rosemary. Super easy, beautiful in color and a HUGE hit! Enjoy 😀


Cranberry Swirl Cheesecake – Perfect for the holidays!

Have a holly jolly Christmas, it’s the best time of the year….Oh sorry I have these Christmas jingles in my head  this time of year and yes I know it isn’t even Thanksgiving yet. 😀  I’m hopeless when this time of year comes around! Just imagine your friends and families face when you break out this beauty for desert! I think this is truly one of the best cheesecakes I have ever had.

As you know I am not the best baker around, so when I make a cheesecake that comes out looking at gorgeous as this one..I am a happy camper! You know what it means? It means YOU can do this too!! LOL

My mom gave me a ton of fresh cranberries and I was trying to figure out what the heck to do with them, when of course cheesecake comes to mind. The cinnamony chocolatey graham cracker crust paired with the creamy cheesecake and tartness of cranberries is like a bite of heaven in each mouthful. The cranberry compote is a MUST to save even after the cheesecake is gone. It is great on crackers with a sharp cheddar cheese or to add into your mixed cocktails! YUM

Cranberry Compote:

  • 2 cups of fresh or frozen cranberries
  • 2/3 cup granulated white sugar
  • 2/3 cup orange juice
  • 1/4 tsp nutmeg, ground
  • 1/2 tsp cinnamon, ground
  • zest of one lemon or orange
  • 4 tsp vanilla

Graham Cracker Crust:

  • 2 3/4 cups of graham crackers
  • 1 tsp cinnamon
  • 1 tablespoon unsweetened Cocoa powder
  • 2 tablespoons granulated white sugar
  • 1/2 cup unsalted butter, melted

Cheesecake Filling:

  • 4 – 8 ounces packages cream cheese, room temperature (I used 2 full fat and 2 reduced fat cream cheese and this is crazy rich)
  • 1 cup granulated white sugar
  • 1 cup sour cream
  • 1/2 cup whipping cream or half and half
  • 1 tablespoon vanilla
  • 4 large eggs, room temperature
  • 1 tsp pure vanilla extract
  • cranberry compote

Make cranberry compote:
Combine all ingredients except vanilla in large saucepan. Cook over medium high heat until mixture thickens, stirring occasionally, about 5-10 minutes. Cool slightly. Transfer to food processor and add vanilla. Puree until smooth. Strain into a bowl and cover  Refrigerate at least 6 hours or freeze for 3.

Make crust:
Spray 10-inch-diameter Springform pan (I used 2 pie dishes) with nonstick spray. If using a Springform pan, wrap outside of pan with 2 layers of heavy-duty foil. Blend all ingredients except butter in food processor. Add butter; blend until moist clumps form. Press crumb mixture onto bottom and up sides of pan. Chill crust while preparing filling.

Make filling:
Position rack in center of oven and preheat to 350°F. Using electric mixer, beat cream cheese in large bowl until fluffy. Beat in sugar. Beat in eggs 1 at a time. Mix in sour cream, half and half and vanilla.

Transfer 1/3 of filling to prepared crust. Dollop 1/3 of cranberry puree atop filling. Repeat layering of filling and puree 2 more times. Using knife, skewer or toothpick, swirl puree through filling, creating marbled design.

Place springform pan or pie dish in large baking dish or roasting pan. Pour enough hot water into roasting pan or baking dish to come halfway up sides of springform pan or pie dish. Bake until cheesecake puffs around edges, about 1 hour 15 minutes. Turn off oven. Let cake stand in oven 1 hour, leaving oven door ajar.

If using  springform pan: Transfer cake to rack. Run knife around pan sides to loosen cake. Cool completely. Remove foil from pan sides. Cover cake and chill overnight. (Can be made 2 days ahead. Keep refrigerated.) Remove pan sides.

If using a pie dish: Cover with plastic wrap and place in refrigerator for 6 hours or 3 hours in freezer.

Serve cake with Cranberry Compote either on top or on the side for dipping each tart bite into!

This recipe is was shared over at:

Thursday’s Treasures

Wicked Good Wednesdays