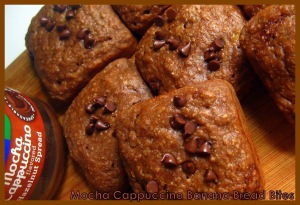
Mocha Cappuccino Banana Bread Bites

mocha cappuccino banana bread bites - sweetheatchefs.com

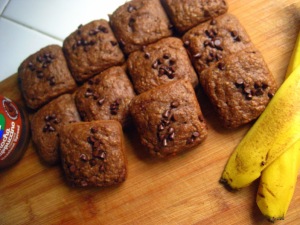
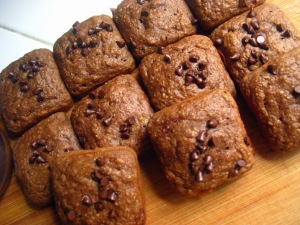
In keeping up with my low-fat and low-calorie diet, I still need 2 things: (1) SUGAR and (2) CHOCOLATE! There are a few things I won’t give up because, well, I LOVE FOOD and that won’t change! But the reality is you don’t have to give up foods you enjoy to lose weight. Moderation is key. When I say moderation, I mean moderation sometimes in small amounts. You are giving yourself the satisfaction to please your tummy, mind and soul without having to feel like you blew your day’s workout or the progress you’ve made in losing weight thus far. With all that in mind I came up with these banana bites with chocolate, fruit, & even sugar in combination with fiber and protein  seriously this is a WIN-WIN if I ever saw it!

mocha cappuccino banana bread bites - sweetheatchefs.com

INGREDIENTS
3 medium-sized ripe bananas, mashed
1/3 cup sweetened apple sauce (I use Tree Top pre-packaged for convenience in measuring each cup is 1/2 cup)
1.25 cups white whole wheat flour
3/4 tsp baking soda
1/4 tsp salt
2 tbsp butter, softened
1/3 cup brown sugar, packed
2 large egg whites
1/2 tsp real vanilla extract
3 tbsp Jif Mocha Cappuccino Hazelnut Spread (YUM!)
Mini Chocolate Chips (optional to sprinkle on top and is not included int he nutritional value of this recipe)

DIRECTIONS
1. Preheat oven to 325°. Spray a non-stick loaf pan, or muffin tin, or brownie pan ( I used brownie pan) with a non stick spray. IF your pans are non stick no need to do this.
2. Mash bananas and set aside. In a medium bowl, combine flour, baking soda and salt with a wire whisk. Set aside.
3. In a large bowl cream butter and sugar with an electric mixer. Add egg whites, bananas, apple sauce, Jif Mocha Cappuccino Hazelnut Spread, and vanilla. Beat with mixer until well combined.
4. Add flour mixture, then blend at low-speed until combined. Do not over mix.
5. Pour batter into prepared pan; bake for about 30 minutes, or until a toothpick inserted in the center comes out clean.

Serving Size: Makes 18 Mocha Cappuccino Banana Bread Bites at 1.75 oz each


mocha cappuccino banana bread bites - sweetheatchefs.com

~~~~~~~~~~~~~~~~~~~~~~~~~~~~

Nutritional Info

Servings Per Recipe: 18
Calories: 92.1
Total Fat: 2.1 g
Cholesterol: 1.9 mg
Sodium: 197.6 mg
Total Carbs: 18.8 g
Dietary Fiber: 1.6 g
Protein: 2.0 g

Home Made Plain Greek Yogurt

Home Made Plain Greek Yogurt - sweetheatchefs.com

You know how we LOVE Greek Yogurt, but it takes a toll on our pocket books? Well here is an easy, NO FAIL way to make it yourself at a fraction of the cost in 2 easy steps, AND you can make it savory or sweet! It is thick and creamy just like the store stuff, you will love this, I promise!

INGREDIENTS

1 – 32 oz. container plain yogurt, I used Mountain High Original Style All Natural Yoghurt.

Home Made Plain Greek Yogurt - sweetheatchefs.com

DIRECTIONS

  1. Find a strainer that will fit over a bowl and add yogurt into strainer.
  2. Cover with plastic wrap and place in refrigerator for 24 hours.
  3. Remove from refrigerator and discard the whey in bowl.
  4. Place into an airtight container, I used the same one it came in after I cleaned it that way you will know the expiration date. Keep refrigerated.

Home Made Plain Greek Yogurt - sweetheatchefs.com

Add to your favorite savory dishes or dips, like my Spicy St. Patty’s Day Deviled Eggs, or my Tzatiziki; Or try your endless options with sweet toppings like fresh strawberries, granola, honey, or any fresh in season berries!

Gingerbread Pancakes with Molasses Butter

gingerbread pancakes

gingerbread pancakes (Photo credit: emdot)

INGREDIENTS:

2 cups pancake mix
1.25 cups (10-oz bottle) sparkling apple cider
1/4 cup dark molasses
2 tsp Gingerbread Spice Mix

DIRECTIONS:

  1. In a large bowl Pour 1/4 cup batter per pancake into a lightly buttered skillet.
  2. Cook over medium heat for about 2 minutes, flip and cook for 1-2 more minutes.
  3. Serve warm with Molasses Butter.

Molasses Butter

Stir all ingredients together in a bowl until well combined and dollop on top of pancakes.


Candy Brandy Pecans

IMG_4146

INGREDIENTS:

6 tbsp butter, melted
1 cup brown sugar
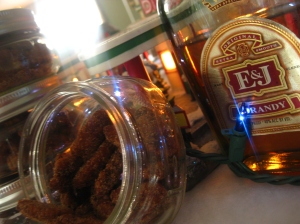
5 tbs brandy
2 tbsp Gingerbread Spice Mix
10 oz-bag whole shelled pecans

IMG_4141

DIRECTIONS:

Preheat oven to 325 degrees F. 

Line a baking sheet with tin foil and spray with non stick spray.

Melt butter in sauce pot on medium heat.

Add brown sugar, brandy and Gingerbread Spice Mix, cook for 1 minute until bubbly stirring constantly.

Add pecans and stir until all coated.

Spread out in an even layer on cookie sheet with rubber spatula and bake for 20-25 minutes stirring several times throughout.

Remove from oven to cool and in medium bowl combine:

1/2 cup sugar

2 tsp Gingerbread Spice Mix

Pour pecans in bowl and stir until all coated with sugar mixture. 

IMG_4107

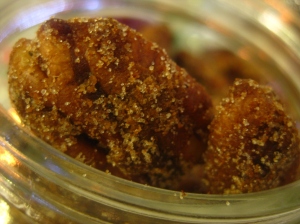
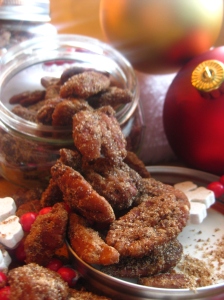
Let cool completely and store in airtight container. I put mine in decorative mason jars for Christmas gifts. This would also be good for birthday gifts, hostess gifts, parties, baby showers, Thanksgiving snacks, mother’s day gifts, and father’s day gifts

IMG_4103


This recipe is being shared at Foodie Friends Friday


Gingerbread Spice Mix

IMG_4057

This is the beginning of so many things you can create. This Gingerbread Spice Mix is versatile for gift giving and for making different recipes out of it, some of which I have in this post for you. 

INGREDIENTS:

1/2 cup ground ginger
6 tbsp ground cinnamon
4 tbsp ground cloves
2 tsp ground nutmeg

DIRECTIONS:

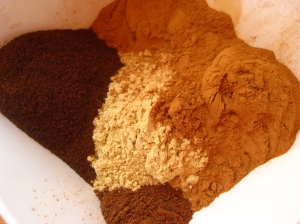
Mix all ingredients together and store in an airtight container  until ready to use.

IMG_4128

Bag up and give as gifts for Christmas or any event that calls for one! This does not have to be a holiday only gift!  

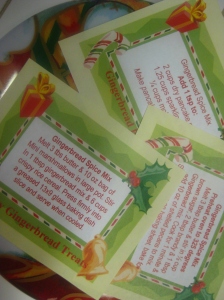
I gave mine as Christmas gifts, added tags with the recipes below and tied on to the bag with a decorative ribbon. This gives the recipient an idea of what to use it with and get creative in the kitchen!

IMG_4136

IMG_4184

You can add this mix to the following recipes: (more coming soon)

Crispy Gingerbread Treats

3 tbsp butter, melted
1 bag (10 oz) mini marshmallows
1 tbsp Gingerbread Spice Mix
6 cups crispy rice cereal

Melt and mini marshmallows in a large sauce pot over medium heat stirring occasionally. Stir in Gingerbread Spice Mix and crispy rice cereal. Press into a greased 13 x 9″ baking dish. let cool and cut into squares.

Do you have a recipe to make with this? I’d love to share it and see what you come up with. Leave me a comment below with the deets and you could be featured on SHC in the near future!

Don’t ever buy it again, make your own…Homemade Sugar Cookies

IMG_3989

The reality is we all have busy lives and when we want to please our kids or ourselves with a little Christmas Cheer and make the infamous Sugar Cookies during the holiday season, it is EASY to get wrapped up in the convenient pre-made store bought dough. If you do one thing this year, PLEASE make your own. You will see how easy it is AND you can easily double or triple the recipe and freeze it for your convenience later so you are not tempted to buy the pre-made dough.

IMG_3987

A friend of mine Katrin over at Running with The Devil(ed) Eggs and I agree, MAKING cookies involves the process from buying ingredients to actually making the cookies. BAKING cookies involves pre-made slice and bake. Your kids and grandkids will have much fonder memories of the entire MAKING cookie process than the slice and bake version. The hope is they will continue the tradition and do the same with their kids and future generations to come. Honestly, the fondest memories I have are with my grandma MAKING cookies, pies, bread, noodles, bread everything was homemade.

As a society we have strayed so far away from that reality, I wonder if our kids or their kids will even know what homemade truly is and to me that is very sad.  I just think it is important to show our kids fresh food, non processed food, the art of being together (isn’t that what holiday’s are for anyway?) quality time together, the fun of checking the oven to see if the food is done, the aroma your house has while it is cooking, the laughter between you while you listen to Christmas Music and mess up on the words! Pre-made dough has you in and out of the kitchen before  you know it, much like the society we have turned in to; quick, easy, and impersonal. 

IMG_3984

Not only does homemade food taste incredibly better, but you know exactly what you are putting into it, there are no preservatives, you can make it organic and feel good about feeding your own belly, Santa’s and your kids’ 😀 *Stepping off soap box**

With all that being said, (and thank you for staying tuned this long) I just want to offer this recipe that is easy enough for the beginner baker and just as fun for the novice baker. With few ingredients and LOTS of decorations for the finished product afterward you are sure to build lasting memories, new traditions and fun for years to come.

INGREDIENTS:

3 cups all-purpose flour
3/4 teaspoon baking powder
1/4 teaspoon salt
1 cup unsalted butter, softened (salted butter works too if you don’t have the other)
1 cup sugar
1 egg, beaten
1 teaspoon real vanilla extract
1 tablespoon milk
Powdered sugar, for rolling out dough ( learned this from my grandma, this is key to a soft non over-worked cookie)

DIRECTIONS:

Sift together flour, baking powder, and salt. Set aside.

Place butter and sugar in large bowl of electric stand mixer and beat until combined.

Add egg and milk and beat to combined. Add vanilla extract.

Set mixer on low speed, gradually add dry ingredients, and beat until mixture pulls away from the side of the bowl. Don’t over mix here.

Create a disk, or divide dough up if you will be making different colors or adding candies to it. Wrap in waxed paper, and refrigerate for 2 hours. *NOTE* If you are adding colors or candies to the dough, now is the step to do it BEFORE you refrigerate for 2 hours. The dough will be hard once it is refrigerated. Ideas for add ins:

  • crushed candy canes + red food coloring color
  • roasted pecans
  • diced cranberries + green food coloring
  • macadamia nuts
  • white chocolate chips + blue food coloring
  • dark chocolate chips

IMG_3980

When ready to start baking, preheat your oven to 375 degrees F.

Sprinkle your rolling out surface with a light dusting of powdered sugar. Remove 1 wrapped pack of dough (or the entire ball if you did not divide) from refrigerator at a time, sprinkle rolling pin with powdered sugar, and roll out dough to 1/4-inch thick.

Move the dough around as you roll and check frequently to make sure it is not sticking.

Using cookie cutters, cut into desired shapes.

Place at least 1-inch apart on greased baking sheet, parchment, or silicone baking mat, and bake for 7 to 9 minutes or until cookies are just beginning to turn brown around the edges.

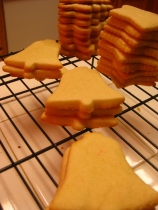
Cool on wire rack.

Serve as is or ice as desired. Store in airtight container for up to 1 week or freeze for 1 month in an airtight ziplock.

IMG_3990

IMG_3993

This recipe is being shown over at: 

Manic Monday Party

Wicked Good Wednesday
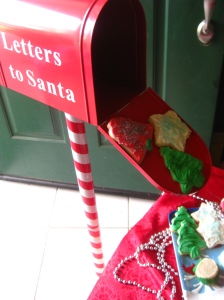
No Santa Cookies This Year…Eggnog Rum Bread

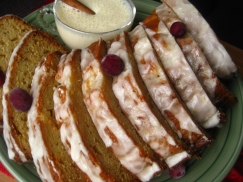
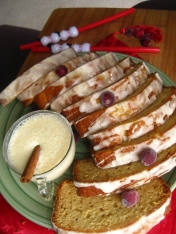
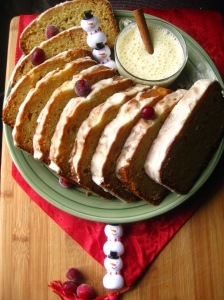
Eggnog Rum Bread


So this year we will not be making Santa cookies, nope this is not a joke nor is it us protesting against Christmas. THIS year we will be making dear old Santa some  delicious, decadent, sweet, moist Eggnog Rum Bread. Crazy you say? Read this recipe I found from an awesome blogger named Robin over at Knead To Cook and you will know the only one crazy is YOU for still reading this and not checking to see if you have all the ingredients in your pantry 😀 by the way make sure to visit Robin’s page, she has a TON of great recipes to share.

I URGE you to try this recipe and leave Santa a new treat this year, he will be happy you did! 

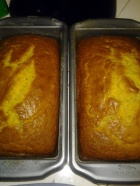
I doubled this recipe and both loaves were gone within 3 days…just sayin, if you have a large family you might want to invest in 2 loaves! Breakfast, snack, dessert, anytime is a great time for this bread. It shows well, it maintains it’s structure and glaze really well for traveling. As Robin did, she made mini loaves for gifts, be careful with this…the people you give this to will never leave you alone again!!

2012-11-27 18.12.25


INGREDIENTS:

2 eggs
1 and 1/2 cups of regular eggnog (not low fat)
2 tsp Spiced Rum
1 cup white sugar
1 teaspoon vanilla extract
1/2 cup butter @ room temperature
2 1/4 cup all purpose flour
1 (3.4 ounces of powdered) package of instant French vanilla pudding mix
2 tsp baking powder
1/2 tsp salt
1/2 tsp ground nutmeg

IMG_3963
DIRECTIONS:

Preheat oven to 350. Spray your loaf, muffin etc. pan with non stick spray with flour. 

In your stand mixer use your paddle attachment and mix together the eggs, eggnog, rum, sugar, vanilla and butter. The butter will remain clumpy but that is just fine.

In a separate bowl, sift the flour, pudding mix, baking powder, salt and nutmeg.

Add the dry mixture to the wet and blend until incorporated. Avoid over mixing. The butter will remain clumpy and this is how the batter should look, the butter will melt when cooking.

Pour into your prepared choice of pan(s). Bake mini loaves for approximately 30 minutes or until a toothpick comes out clean. A regular loaf pan will take about 45-55 minutes. A double batch using 2 loaf pans take about 80 minutes. Just be sure to check, check and check you don’t want this over done. All your hard work put into this decadent bread you won’t want it ruined, especially after you smell the batter alone, you can imagine how scrumptious the actual cooked bread will turn out.

Lemon Rum Glaze:

1 cup sifted confectioners sugar
2 teaspoon eggnog
2 tablespoon Spiced Rum
1/8 tsp of ground nutmeg
Lemon zest, about 1/4 of a lemon ( I added this to the original recipe, you can omit)

2012-11-27 19.30.57
Whisk together and pour over your cooled eggnog bread. (If you can wait until it’s cooled)

The glaze recipe yields enough for both loaves with a lot left over, don’t be worried about really drizzling until your heart’s content! I wish I had used more…NEXT TIME, NEXT TIME!

IMG_3967

Cranberry Swirl Cheesecake – Perfect for the holidays!

Have a holly jolly Christmas, it’s the best time of the year….Oh sorry I have these Christmas jingles in my head  this time of year and yes I know it isn’t even Thanksgiving yet. 😀  I’m hopeless when this time of year comes around! Just imagine your friends and families face when you break out this beauty for desert! I think this is truly one of the best cheesecakes I have ever had.

As you know I am not the best baker around, so when I make a cheesecake that comes out looking at gorgeous as this one..I am a happy camper! You know what it means? It means YOU can do this too!! LOL

My mom gave me a ton of fresh cranberries and I was trying to figure out what the heck to do with them, when of course cheesecake comes to mind. The cinnamony chocolatey graham cracker crust paired with the creamy cheesecake and tartness of cranberries is like a bite of heaven in each mouthful. The cranberry compote is a MUST to save even after the cheesecake is gone. It is great on crackers with a sharp cheddar cheese or to add into your mixed cocktails! YUM

Cranberry Compote:

  • 2 cups of fresh or frozen cranberries
  • 2/3 cup granulated white sugar
  • 2/3 cup orange juice
  • 1/4 tsp nutmeg, ground
  • 1/2 tsp cinnamon, ground
  • zest of one lemon or orange
  • 4 tsp vanilla

Graham Cracker Crust:

  • 2 3/4 cups of graham crackers
  • 1 tsp cinnamon
  • 1 tablespoon unsweetened Cocoa powder
  • 2 tablespoons granulated white sugar
  • 1/2 cup unsalted butter, melted

Cheesecake Filling:

  • 4 – 8 ounces packages cream cheese, room temperature (I used 2 full fat and 2 reduced fat cream cheese and this is crazy rich)
  • 1 cup granulated white sugar
  • 1 cup sour cream
  • 1/2 cup whipping cream or half and half
  • 1 tablespoon vanilla
  • 4 large eggs, room temperature
  • 1 tsp pure vanilla extract
  • cranberry compote

Make cranberry compote:
Combine all ingredients except vanilla in large saucepan. Cook over medium high heat until mixture thickens, stirring occasionally, about 5-10 minutes. Cool slightly. Transfer to food processor and add vanilla. Puree until smooth. Strain into a bowl and cover  Refrigerate at least 6 hours or freeze for 3.

Make crust:
Spray 10-inch-diameter Springform pan (I used 2 pie dishes) with nonstick spray. If using a Springform pan, wrap outside of pan with 2 layers of heavy-duty foil. Blend all ingredients except butter in food processor. Add butter; blend until moist clumps form. Press crumb mixture onto bottom and up sides of pan. Chill crust while preparing filling.

Make filling:
Position rack in center of oven and preheat to 350°F. Using electric mixer, beat cream cheese in large bowl until fluffy. Beat in sugar. Beat in eggs 1 at a time. Mix in sour cream, half and half and vanilla.

Transfer 1/3 of filling to prepared crust. Dollop 1/3 of cranberry puree atop filling. Repeat layering of filling and puree 2 more times. Using knife, skewer or toothpick, swirl puree through filling, creating marbled design.

Place springform pan or pie dish in large baking dish or roasting pan. Pour enough hot water into roasting pan or baking dish to come halfway up sides of springform pan or pie dish. Bake until cheesecake puffs around edges, about 1 hour 15 minutes. Turn off oven. Let cake stand in oven 1 hour, leaving oven door ajar.

If using  springform pan: Transfer cake to rack. Run knife around pan sides to loosen cake. Cool completely. Remove foil from pan sides. Cover cake and chill overnight. (Can be made 2 days ahead. Keep refrigerated.) Remove pan sides.

If using a pie dish: Cover with plastic wrap and place in refrigerator for 6 hours or 3 hours in freezer.

Serve cake with Cranberry Compote either on top or on the side for dipping each tart bite into!

This recipe is was shared over at:

Thursday’s Treasures

Wicked Good Wednesdays

Homemade Breadcrumbs – Because it’s too easy not to!

You know those pesky ends to the bread no one eats? Or when you have a toddler who is on a kick of I won’t eat the crust on my sammich!? What a better way to make use of those left overs is to make them into bread crumbs. Throughout the month I toss ends and left over bread scraps into a bag in the freezer and once a month I get out the food processor and the frozen bread and go to town for the morning making bread crumbs. I freeze them so they don’t get moldy before I am ready to use them. You can make plain ones or seasoned ones just like you can buy in the store. But the best part is you make them with natural ingredients and they types of herbs and seasonings YOU like. You are not limited to what is supplied in the supermarket. This could not be a simpler project to take on, in fact my 2 year old loves to whirl the food processor in what he thinks is his all acclaimed part of helping in the kitchen 😀

INGREDIENTS:

  • Left over bread ends, scraps, hot dog buns, hamburger buns, whatever bread product you have that you won’t use.

DIRECTIONS:

  1. Pre-heat oven to  375 degrees F.
  2. In a food processor tear up bread and pulverize until consistency you like for bread crumbs. I generally use a medium to smaller consistency. 
  3. Line a sheet pan with foil and toss about 2 cups worth of the mixture (which for me is 1 container full from the food processor) onto the sheet pan.
  4. Bake for   12 – 15 minutes.
  5. Watch it your first time to make sure they don’t over cook. I have made extra crispy ones and the flavor was not all that great. 
  6. Halfway through the baking process I toss and break up the bread crumbs to ensure a nice even browning.


ITALIAN SEASONED INGREDIENTS:

  • 2 teaspoons dried ground thyme
  • 2 teaspoons garlic powder
  • 1 teaspoon dried ground oregano
  • 1 teaspoon dried ground basil
  • 1 teaspoon crushed red pepper flakes (or to taste)

ITALIAN SEASONED DIRECTIONS:

Follow the steps above for the plain crumbs, except before placing in the oven toss with the ingredients above.

You can create whatever seasoning suits you. I make a lot of Italian food, so this is my go to mix.

Store in an airtight container or zip lock bag in freezer for several months.

Creamy Chicken Veggie and Rice Soup – Warm the Heart, Warm the Soul!

Don’t let the sunny picture fool you…well ok I’m not even going to go there. Living in California sure its fun in the sun. But when my favorite time of year comes, FALL, I am saddened that the weather is not cool enough to reflect that. I love making soup and bread and warm you up goodies, but when the temperature reaches 80 in November, well sometimes it just isn’t that easy to get my family to eat hot soup! Luckily in between these warm days are a few hit or miss cool and even rainy ones. Leaving me to explore the world of Fall cooking.

Today I made a creamy, warm, stick to your ribs with a hearty healthy kick soup. This soup is almost too hearty to have a second bowl…I did say ALMOST! Filled with vegetables for great nutrition and a little creaminess to round it out, you will surely want to accompany it with a carb filled side! For me I have been making this Focaccia Bread that is just delicious and pairs perfectly with any soup or is fabulous on its own. Take a weekend, get your ingredients together you will want to make both of these delights this weekend!

INGREDIENTS

  • 8 c. Low-Sodium Chicken Broth
  • 2 Stalks Celery, thinly sliced
  • 1 Red  Onion, diced
  • 1/2 c. Carrots, I used the shredded ones
  • 1 head of broccoli, washed and cut up in small pieces (reserve 1/2 of the florets)
  • 1 bunch of Asparagus, washed and trimmed; reserve the stems
  • 2 cloves Garlic, minced
  • 1 tsp. Dried Oregano
  • Extra Virgin Olive Oil
  • 2 tbsp. All Purpose Flour
  • 3/4 c. Cream of Chicken Soup (could substitute in heavy cream, I just had this left over so I wanted to use it)
  • 1/4 c. 2% Milk
  • 1/2 cup sharp cheddar cheese (optional)
  • Kosher Salt, to taste
  • 1/4 tsp. Fresh Ground Pepper
  • 3 cooked Chicken Breasts, diced

DIRECTIONS:

In a large stockpot, drizzle olive oil on the bottom and add your diced chicken. Season with salt/pepper and cook until browned and cooked through.

Remove from pot and add 1 tbs of olive oil, add; carrots, celery, onion, broccoli, stems of your asparagus and saute for 5 minutes.

*NOTE* Using the stems to the asparagus:

  1. Cut the very bottoms off, discard and do not use
  2. Bend the bottom of one the asparagus spears until it snaps, this will be your guide for cutting the rest of the bunch
  3. Cut the remaining spears and cut the stems into 1/2″ dices, add these to your stockpot.

Add flour and saute for 2 minutes to get the flour taste out of it.

Add chicken broth slowly stirring as you add to avoid clumps. Once all broth is incorporated, bring to a boil and then reduce heat to just at a boil for about 20 minutes, or until all veggies are super soft.

Remove from heat and using an immersion blender (these things ROCK!) start blending until you get the desired consistency you like.

Return pot to stove and reduce heat to low. Add rice stir to combine.

Take a microwave safe bowl and add your milk and cream of chicken soup and combine. Add cheese if using.

Add this to your stockpot along with your reserved chicken and simmer for about 30 minutes or until the rice is cooked through.

While simmering place your asparagus spears & broccoli florets in a microwave safe bowl and add about 2 tbs water. Cover with Saran wrap and cook for 1 minute. Immediately add to an ice bath to stop the cooking process.

When soup is finished garnish with a few of your steamed broccoli florets and asparagus spears.